The MGA With An Attitude
| MGAguru.com |
|
MGAguru.com |
MGA Guru Is GOING MOBILE - (August 1 - August 15, 2024)
Thursday August 1, 2024:
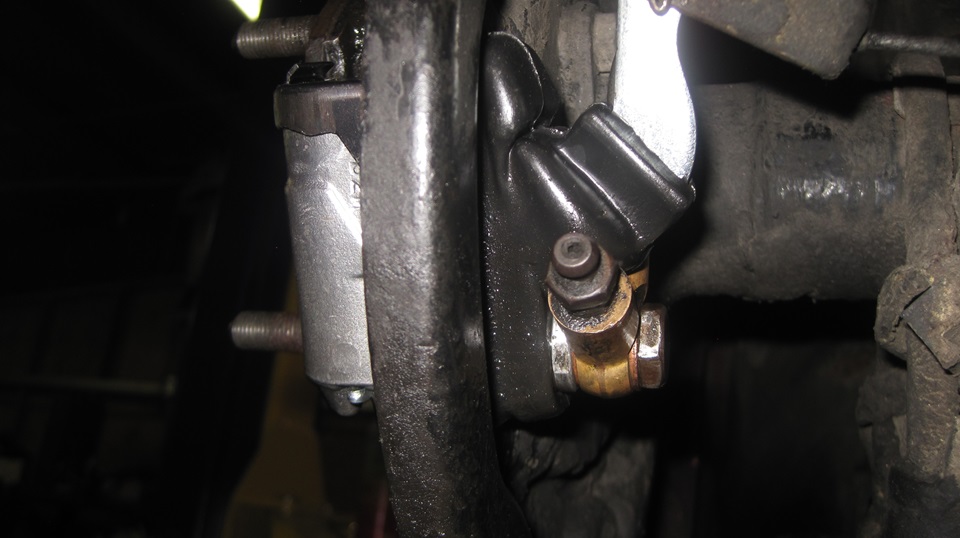
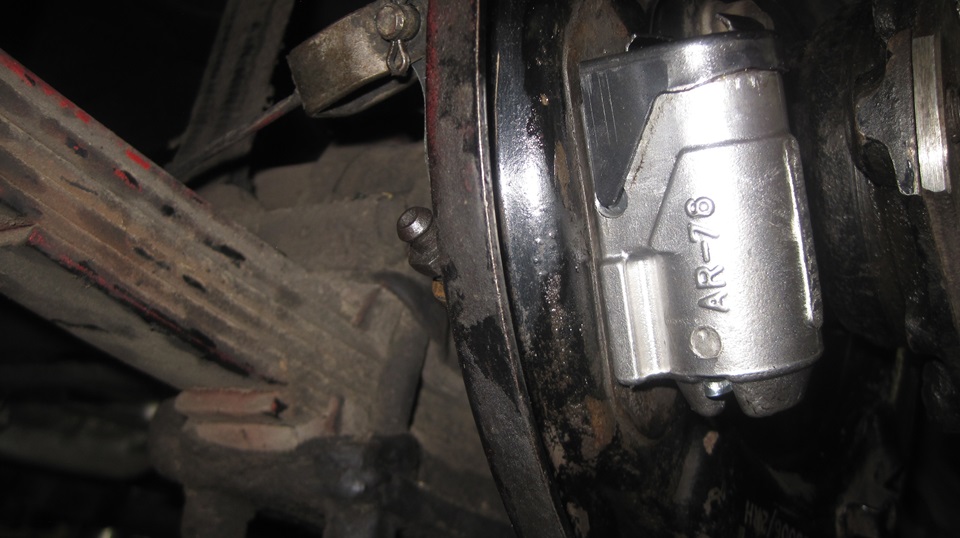
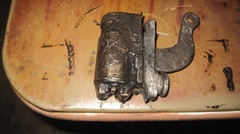
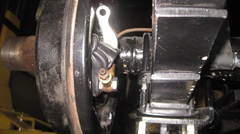
Too many delays yesterday, but finally we get to attack the failed rear slave cylinders, clean everything, and get the rear brakes reassembled. The rear slave cylinders from Moss fit well, and slide properly in the slots (a prior problem long since fixed). I missed a good picture here. Between 38 and 40 I had a minor screw up where I had installed the rubber dust excluder boot but didn't get it fully seated into the retaining groove around the fluid port. The rubber was pinched in the joint between the copper sealing washer and alloy body of the cylinder. It looked good, but didn't feel right when tightening the banjo bolt, and it was leaking fluid badly at base of the banjo. Less then a minute to figure that one out, a couple minutes to loosen the banjo bolt, relocate the rubber farther down into the groove, and get it tightened up again. Where Moss rubber parts are nearly all garbage these days, the new rubber boots from Scarborough Fare are top quality parts, so we may finally keep dirt out of the rear slave cylinders.
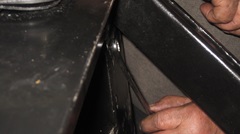
With that bit of experience the right side slave went together much quicker, no leaks on the first pass. Back off the hand brake cable to full loose before assembling the brake shoes and springs and keepers. Be sure the slave cylinders are fully compressed, adjusters backed off, drums fit over the shoes, and then adjust the rear brakes to minimum clearance before adjusting the hand brake cable. Then you can bleed the hydraulics. The last picture is Elliot doing the messy grunt work of cleaning all of the old brake parts with gasoline, then with lacquer thinner to get the dirt gas off. He did the brake drums first so I could take them outside to paint them, allowing some drying time as he was finishing cleaning the smaller parts.

Rear brakes finally back together, we thought we didn't have enough DOT-5 fluid, but we did (just enough to finish). All reassembled and bled, and leak free. Now we have a slightly soft pedal, most likely a bit of air left in the new rear wheel cylinders. Enough for one day, leave it over night and check it again in the morning.
Friday August 2, 2024:
Up earlier today, I thought it might be noble to pack away parts and tools, clear the floor, get the car and trailer out of the shop, and do a test run to McD before breakfast cut-off time. Alas, a bit too late, so we did a little shopping first. Three miles down the hill to The Red Store in Murphys, they didn't have DOT-5 fluid. But they did refer us to parts store called "Car Doctor" a mile away. That turned out to be a three bay service garage with a small parts store at the end of the building. There was a Fiat 124 Spider backing out of a service bay to park outside, so that was a good sign. We'll have to check this place out better later. They did have one small bottle of DOT-5, so I bought that and tossed it in the boot. Now not needing to hit O'Reilly, we headed to McD in Angles Camp for brunch, and relax for a few hours of WiFI time (as long as the computer batteries last with no A/C outlet to recharge). -- Late afternoon, let's check out Angels Food store next door to McD in Angels Camp. Similar to the small store in Murphys, a little better supply on the shelves, maybe just because not so late in the evening this time. Pick up a week's food supply, trailer that 12
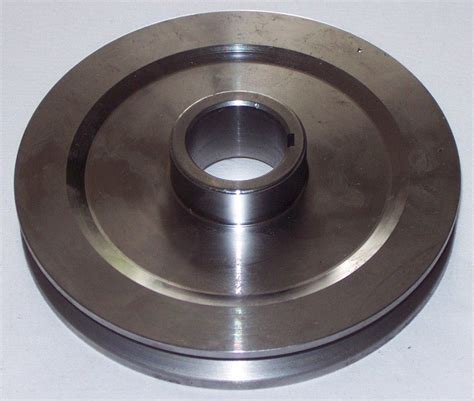
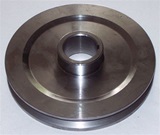 miles up the hill up to Stu's place to restock the Fridge. Then park the car and trailer in the near end of the shop away from the now vacant car lift, and call Stu to provide a status report. Ask when he would like to get his restoration MGA rolling chassis back on the lift for installing brake pipes (which is where we came in six weeks go before the deer incident). Thursday, Friday, Saturday, Shakespeare on stage in the park for three weeks, so no car work tonight. -- Do some research looking to buy a new crankshaft pulley. Found some pictures of a one-piece steel pulley, no sheet metal and no rivets. My antenna suddenly jumped to full mast. A few possible sources, so far all out of stock, and it is officially the week end all around the world, so maybe resume this search on Monday.
Saturday August 3, 2024:
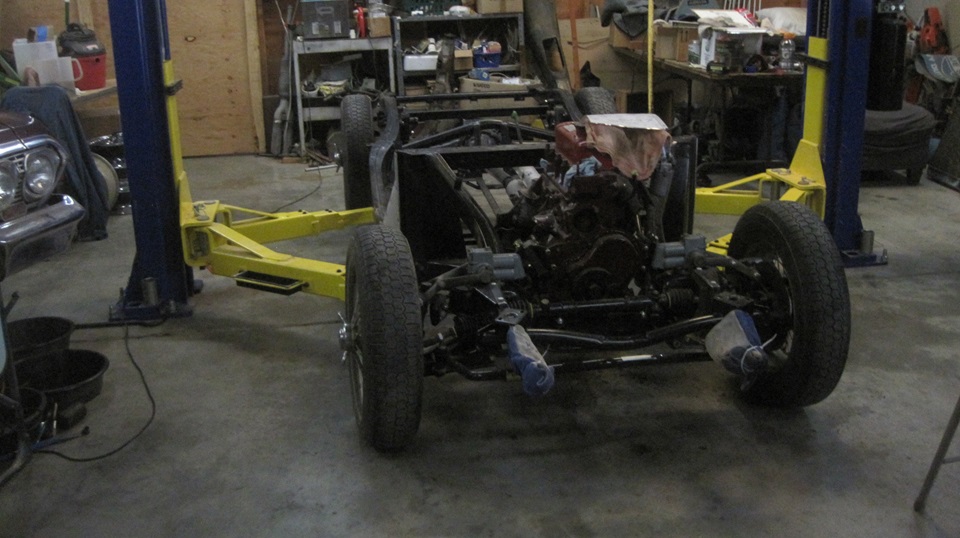
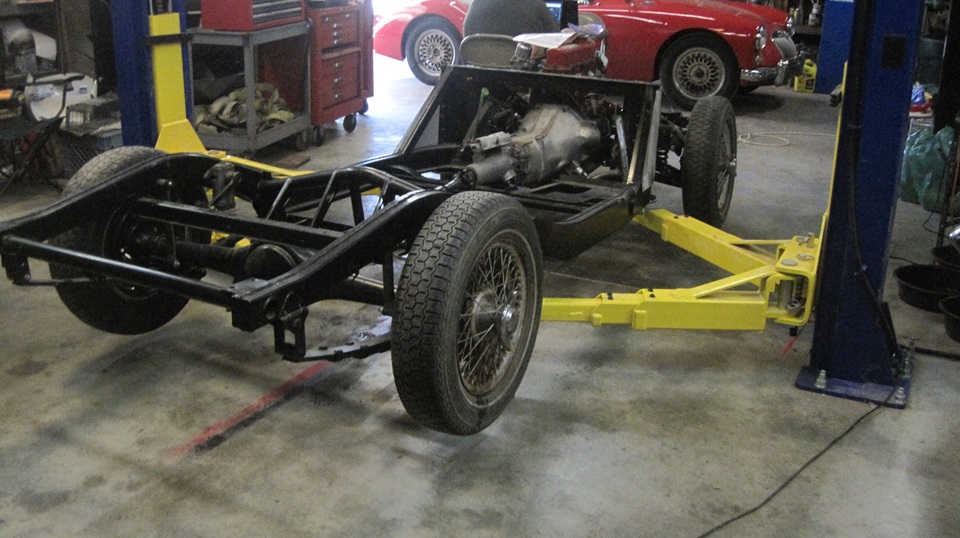
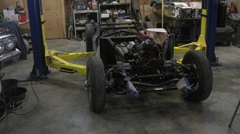
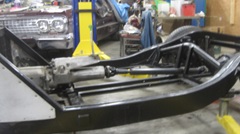
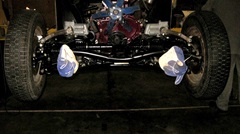
Just getting into breakfast and email when Stu showed up with a couple more guys to help move the restomod rolling chassis. So get my MGA and trailer out of the shop temporarily, shuffle a few things around, push the rolling chassis into the shop and get it aligned with the lift. Ten minutes fiddling with jacking points, and up it went. Then Stu had to rush off for business, so we pulled the car and trailer back into the least obtrusive spot in the shop and got back to soggy cereal. The restomod chassis will keep us busy for a while. MGA chassis, MGB 1800 5-main engine with HS4 carburetors, 4-synchro 4-speed gearbox, think 1968-1971 vintage.


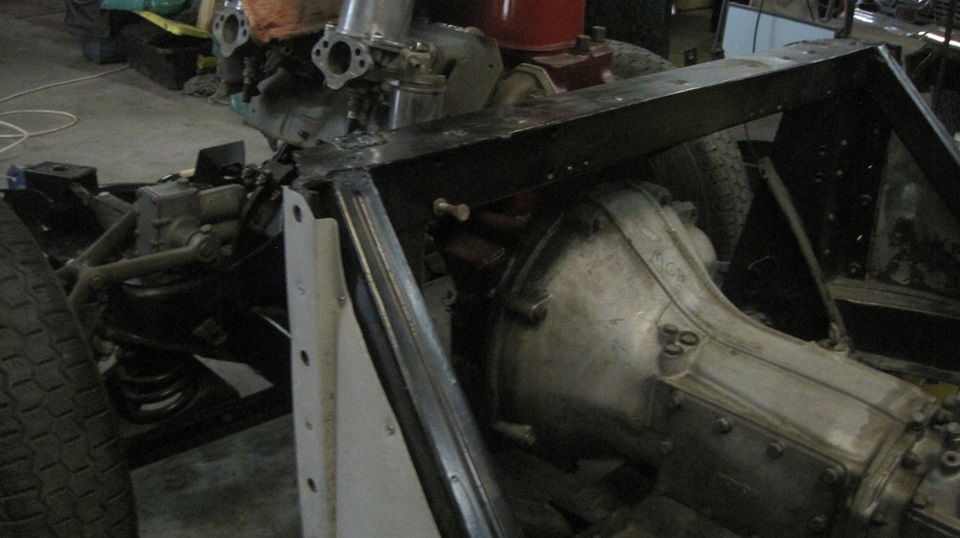
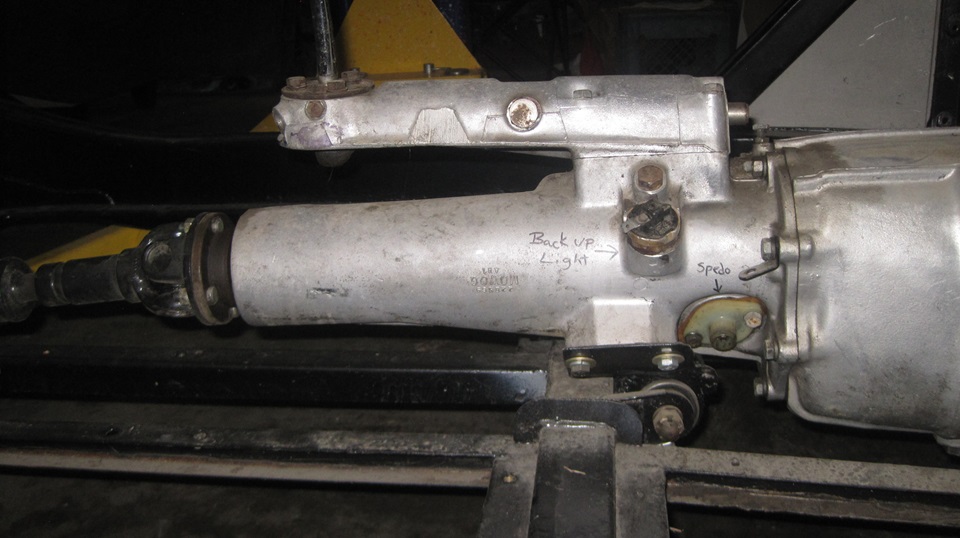
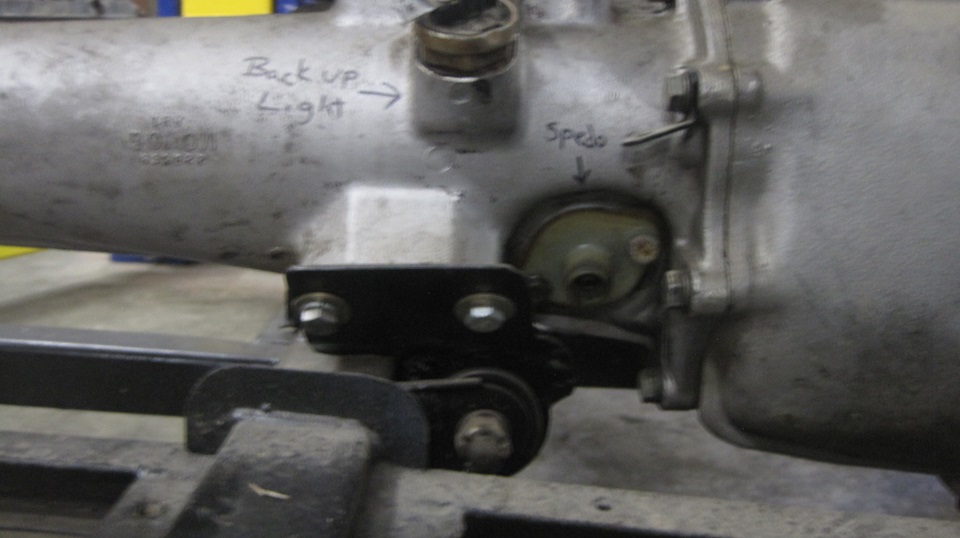
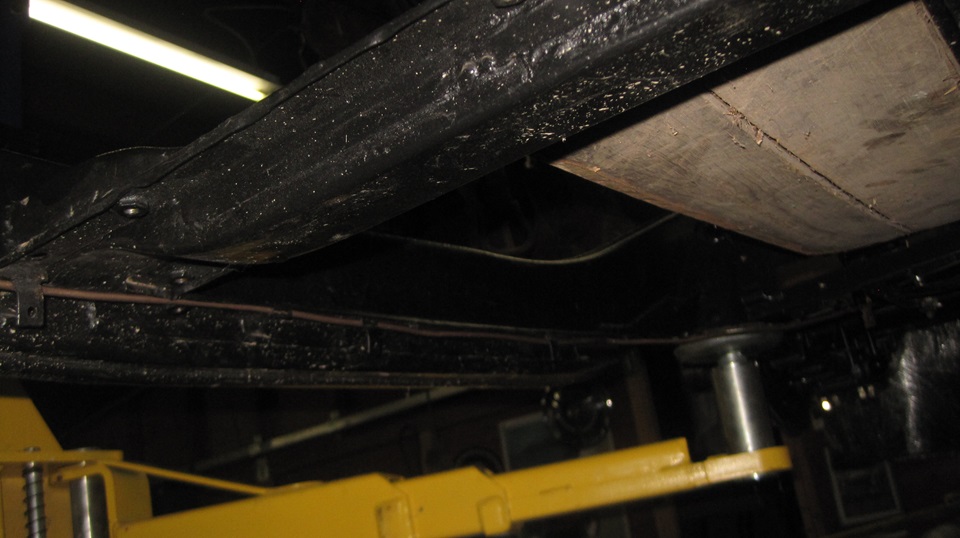
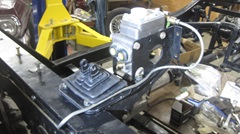
The larger MGB gearbox is tight in the MGA frame.Interesting rear mount has a top cradle plate for the MGB rubber blocks, and a lower clevis bracket with MGA Silentbloc rubber bushing and cross bolt.


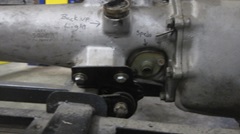
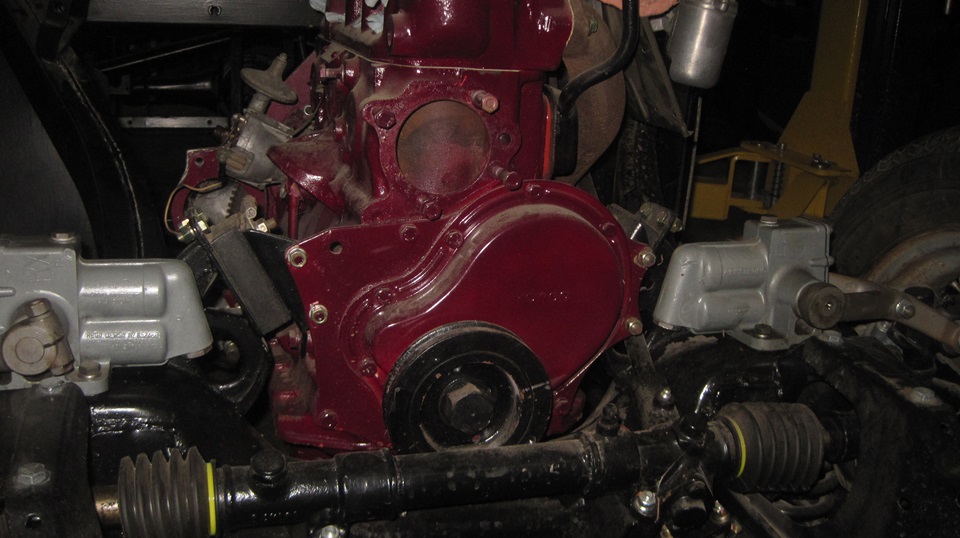
The gearbox may sit a smidge high at the rear with propshaft angling down. But bear in mind that the frame is on stands, and the rear axle is at full drop, so this angle is not as low as it may appear. Clutch slave cylinder and hose already installed, kind of close to the frame but not going to touch with rocking. All of the brake parts are in place, except no pipes or hoses, which will be the next immediate project. Start looking for the pedal and master cylinder brackets.
Sunday August 4, 2024:
Replying to an email question from a shop in Oregon, wanting to know where the MGA Twin Cam generator bottom adjusting link attaches to front of the engine. That was easy enough, but this is a new shop not yet on my North American Shops list. So now check out the new links update for "Sports Car Solutions in Ashland Oregon, USA. at
www.mgaguru.com/links/shops_na3.htm#oregon. Scroll down to "Sports Car Solutions". --
Collecting parts for reassembly of Stu's MGA 1600 restomod rolling chassis. Make the brakes work first. Some parts to mount the master cylinder and pedals. Disassemble, clean, grease, reassemble the pedal pivot bushings
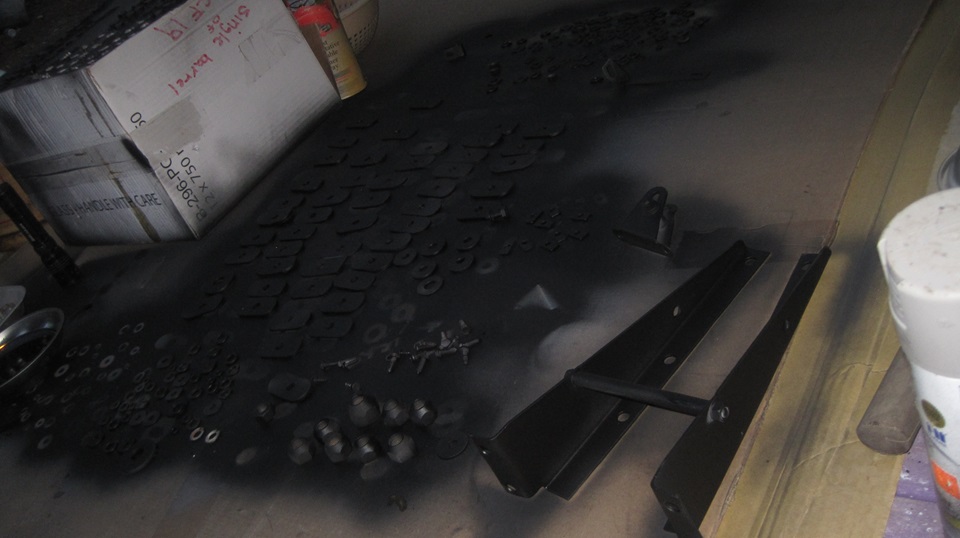
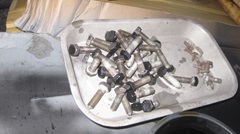
 The next collection was a basket full of nuts and bolts, mostly pointed body bolts and oval fender washers,which Stu ran through the sandblaster for clean up. Not building a show car, just a good driver car, so the fasteners will not be zinc plated. Poke holes in cardboard, stick the bolts in, and paint the bolt heads. Lay all the washers on cardboard, paint one side, let dry, turn over, and paint the other side, spray at an angle to paint ID and OD of the washers at the same time. For small brackets, lay down, paint, turn over, paint again.
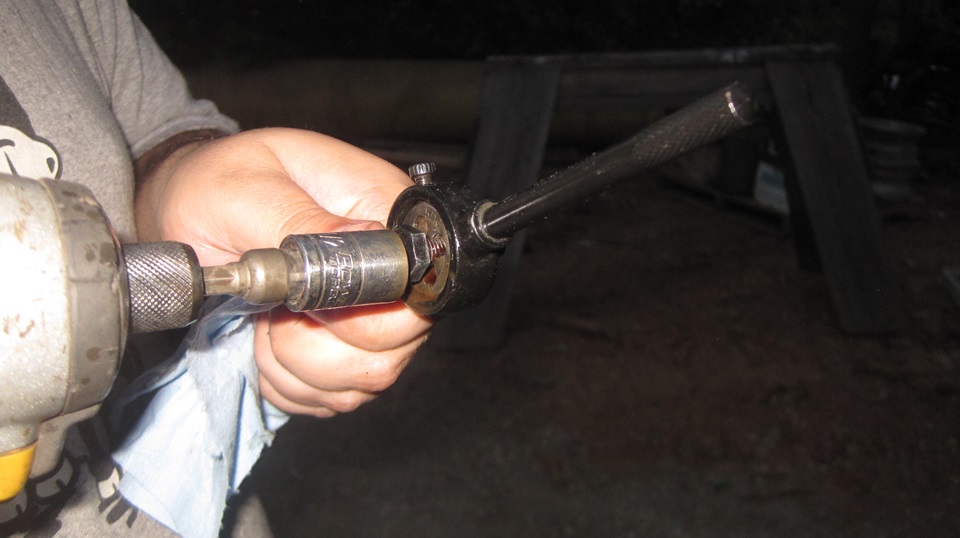
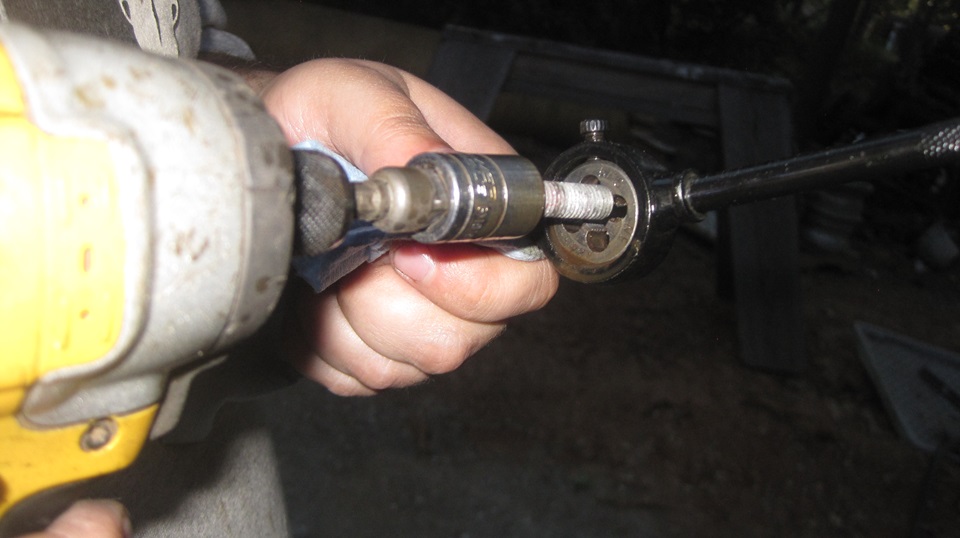
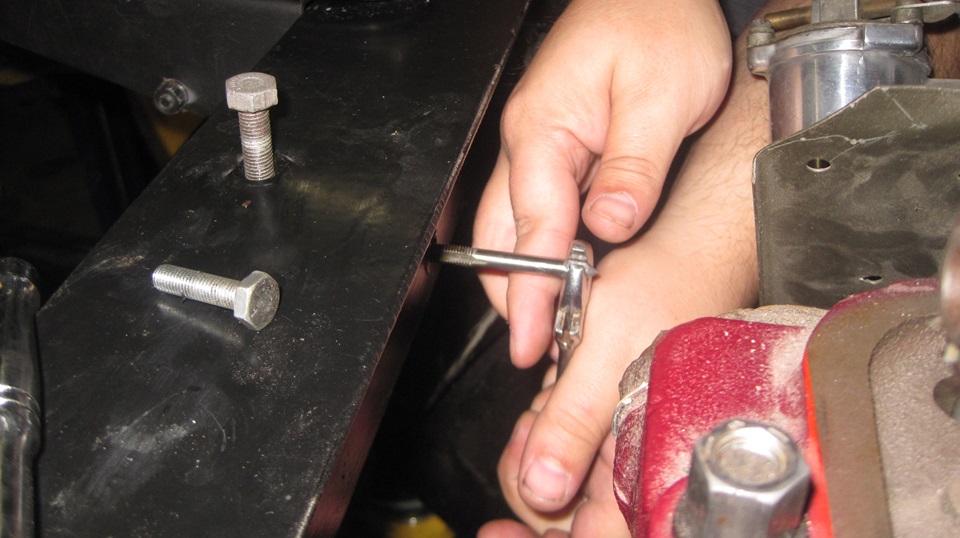
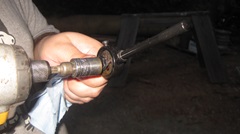
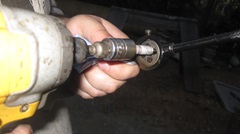
The bolt threads had not been cleaned after sand blasting, so do that next. Grab a 5/16-24-UNF threading die mounted in in
 a handle, a reversible variable speed impact screw driver with a socket drive spindle, a 1/2-in socket, and a small dish of cutting oil. Dip a screw tip into cutting oil, thread it two turns into the thread cutting die, run it full in and back out again with the reversible driver, and drop the screw into the finished parts bucket. For the occasional screw with extra dirty or damaged thread, it may require a couple seconds of impact driving to push the screw through the threading die, then run it in/out a couple more times to get the thread clean and free running. Seemed to be a couple of slightly stretched bolts, but I think we saved them all.
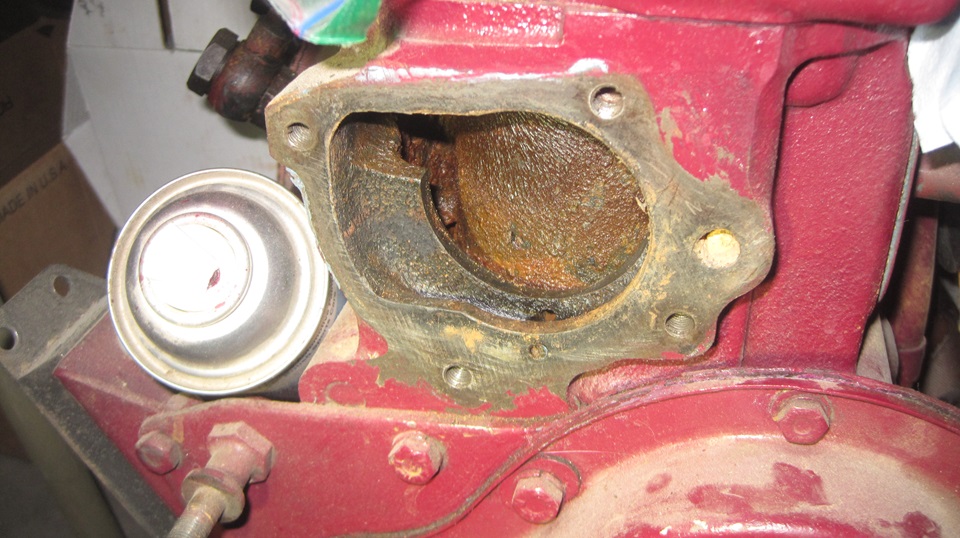
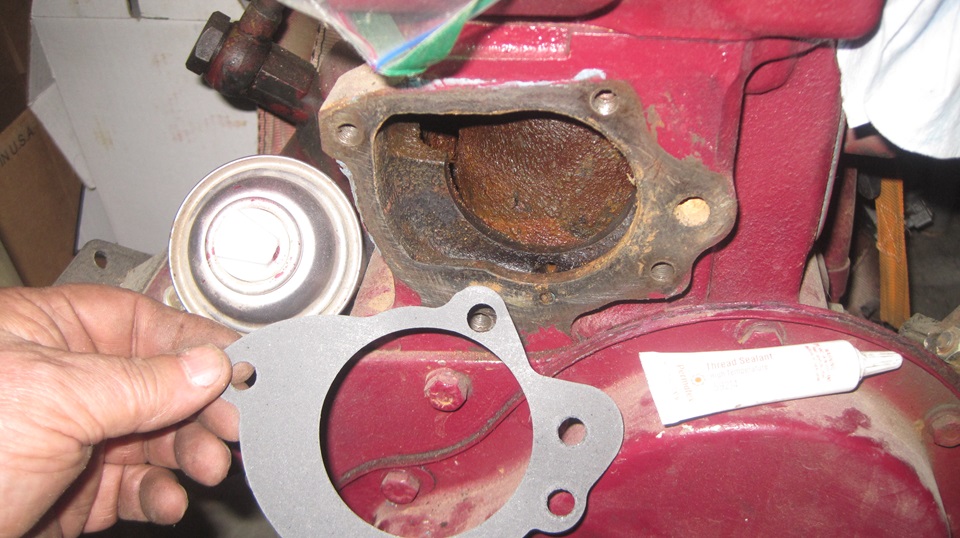
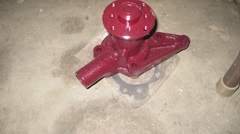
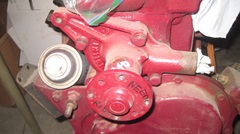
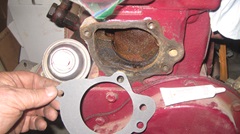
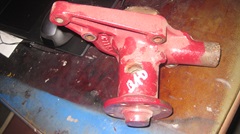
Meanwhile, I was getting tired of stepping over a new water pump I had painted on June 28 (when we were half way through repairing the deer strike damage). So I took a few minutes to install it on the spare 1600 engine (the one we reassembled and borrowed and drove for several weeks two years ago). New gasket and thread sealant on the bolts, good to know that's done, and the bad water pump can be retired. As that engine is getting back toward being serviceable again, we just freed up a bit of valuable floor space. And yes I know it still needs a crankshaft pulley.


By then we were out of daylight, good time to quit for the night. By the time we had dinner , fielded a couple of friendly phone calls, and I got the photos and notes posted it was past midnight again. -- By the way, a bunch of spare parts arrived, including another gearbox rear seal, couple of good material radiator hoses, a bunch of small size widgets to replace stuff we had use in the past several weeks. Need to update the inventory list in the morning. and file the new spares in the Magic Trailer.
Monday August 5, 2024:
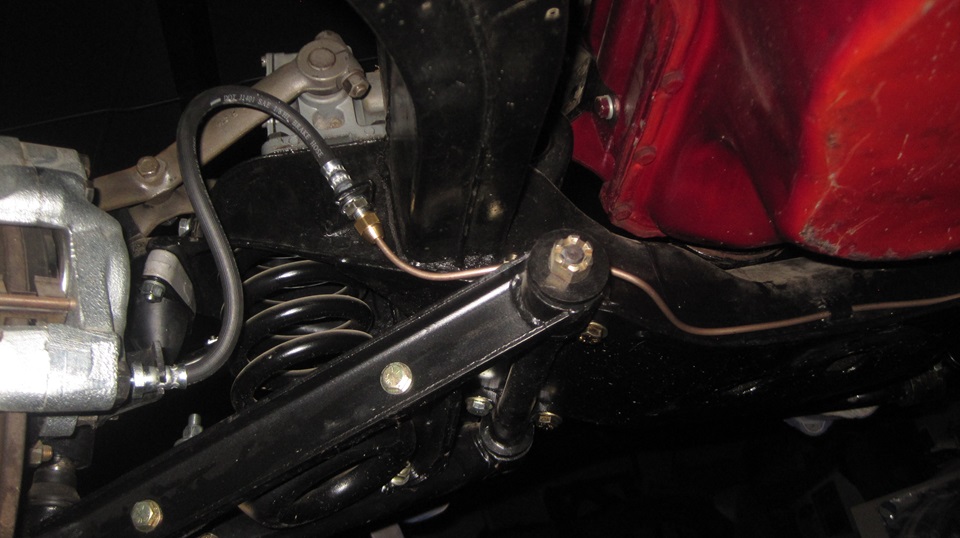
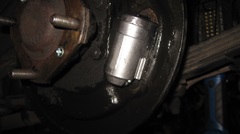
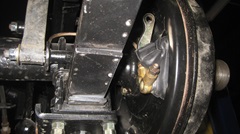
Pushing toward installing brake control parts on the rolling chassis, we spent much of the day pulling some parts out of the Magic Trailer, checking and updating inventory, and making a list of parts still missing that may need to be ordered. We recently took delivery of a pair of rubber boots for the rear brake slave cylinder lever dust excluders. Those came right back out of inventory to be installed. We also found one front disc brake hose, one font banjo bolt, one rear banjo bolt, and some copper sealing washers, so on with the show. Left front hose installed, right front still waiting for its hose and banjo bolt.

In the rear, those nice rubber boots are installed, left side pipe connected, right side still waiting for a banjo bolt.

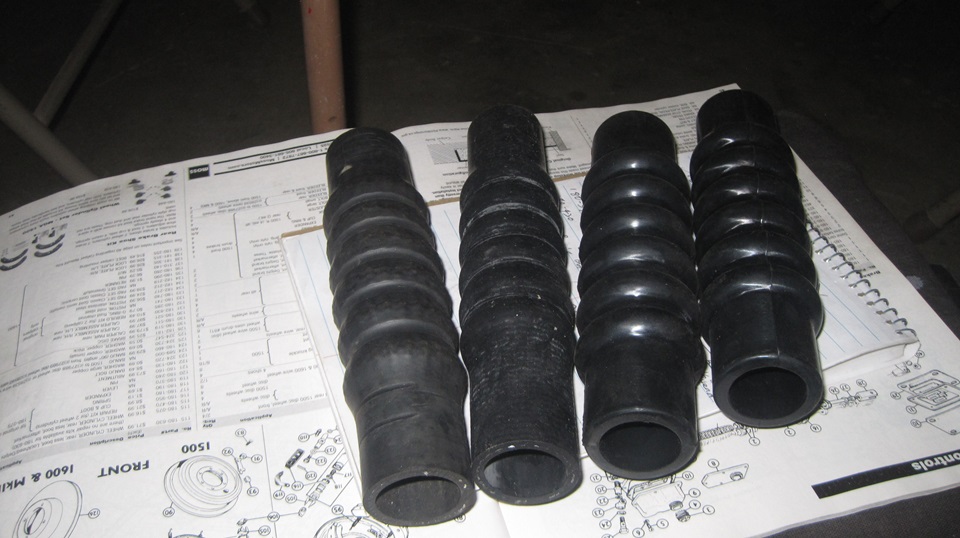
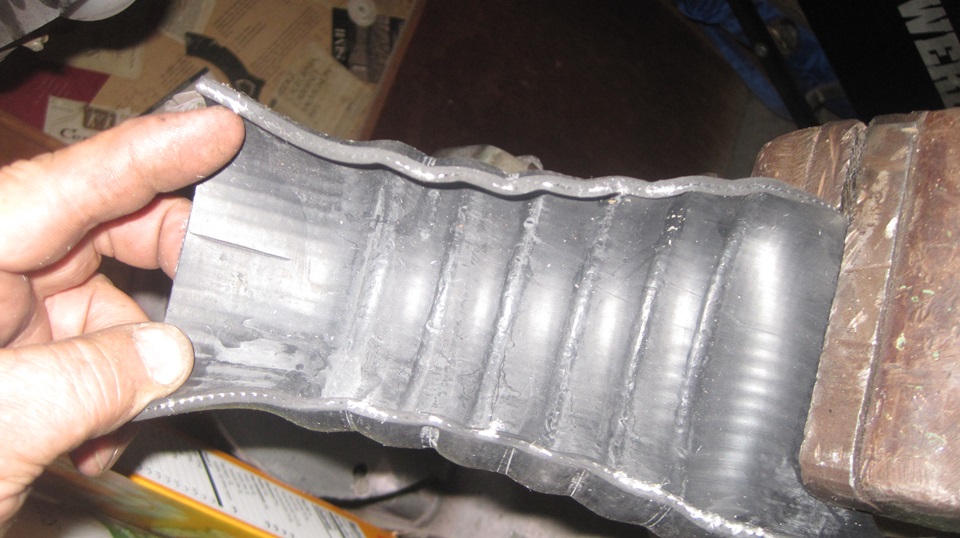
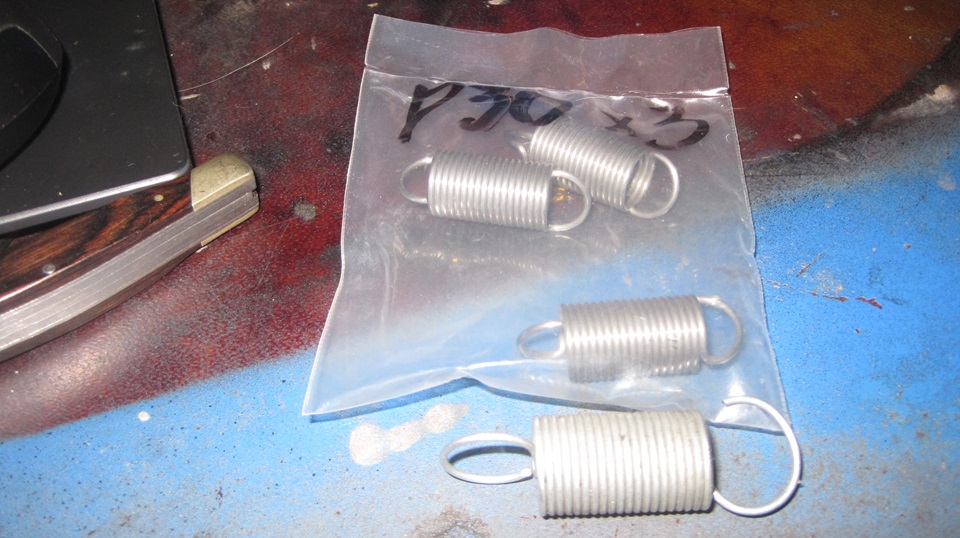
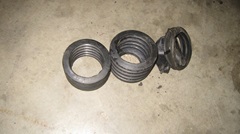
In the evening we spent time with a dozen parts that arrived with a recent order, updating inventory and stashing new parts in the trailer. First picture below showing radiator hoses, two on the left from Moss Motors, two on the right from Scarborough Faire. The new S/F hoses are correct configuration, thick, strong, made with silicone rubber, may last a lifetime in service. The Moss hoses are absolute garbage, causing more problems than I can tolerate. they are thin, made from crap rubber that will fail in a year or two, turning into lawn sprinklers, guaranteed to leave you on the side of the road. The cut open hose shows the thin wall and dire shortage of reinforcement fiber. After the pictures, the Moss parts were dropped into the nearest dust bin. -- The last picture shows carburetor choke arm return springs. Three from S/F are correct and good parts. One from Moss is another faulty part, too wide, too long and, too weak. The only way to use that spring would be to cut off at least two coils to shorten it and bend up a new hook end. That makes the cost of labor to fix it more than the price of the part, so that piece also went directly to the dust bin.


Tuesday August 6, 2024:
Sent an inquiry to a parts sales company in Australia who is offering a solid steel crankshaft pulley that might be sourced from the UK, but not at all sure the part is even available, but at lest I need to ask. -- Chatting with Stu about front sway bars for MGA, and Stu is suddenly threatening to buy two, one for his daily driver car, and one for the rolling chassis.
 Next step should be to install the master cylinder and all of its brackets on the rolling
chassis. But most of the bolt holes Next step should be to install the master cylinder and all of its brackets on the rolling
chassis. But most of the bolt holes

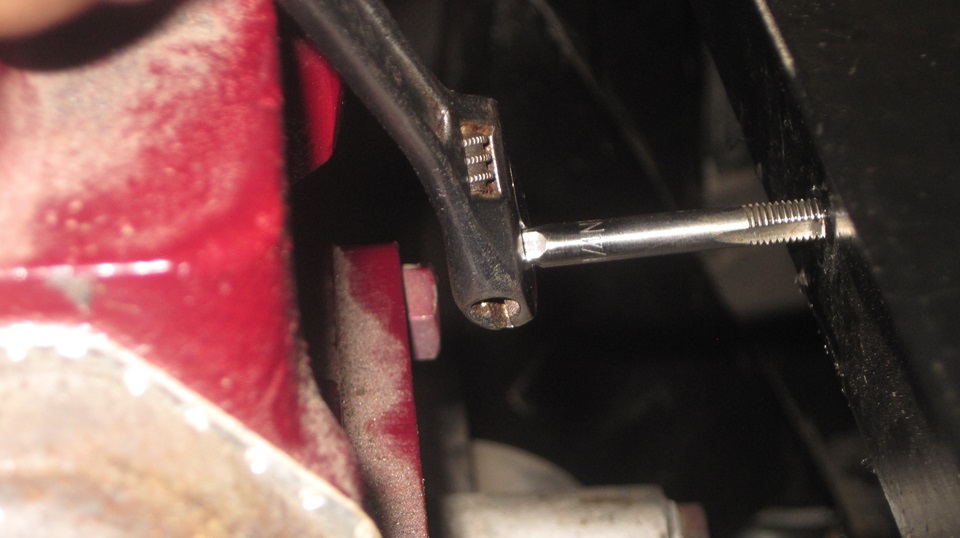
 have paint in the threads. Seems like this may have been painted with POR-15, or something similarly tough, because this tapping process was slow going. Of course his should have been done with the bare frame, before the suspension and drive train were installed. Now some components like the gearbox are in the way of tool access, so we were attacking it from all conceivable directions. No more assembly until we get all the holes tapped out.
Wednesday August 7, 2024:
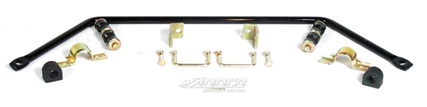
A big step for Stu, ordering up two font sway bars for MGA from Addco Industries in Florida, USA. Guessing one week for slow rate free delivery. We intend to install one on his daily driver MGA,which should be good for cruising around the local mountain roads. the second one is for the restomod rolling chassis that currently has an entirely incorrect front sway bar, a result of a wrong part in a prior delivery.
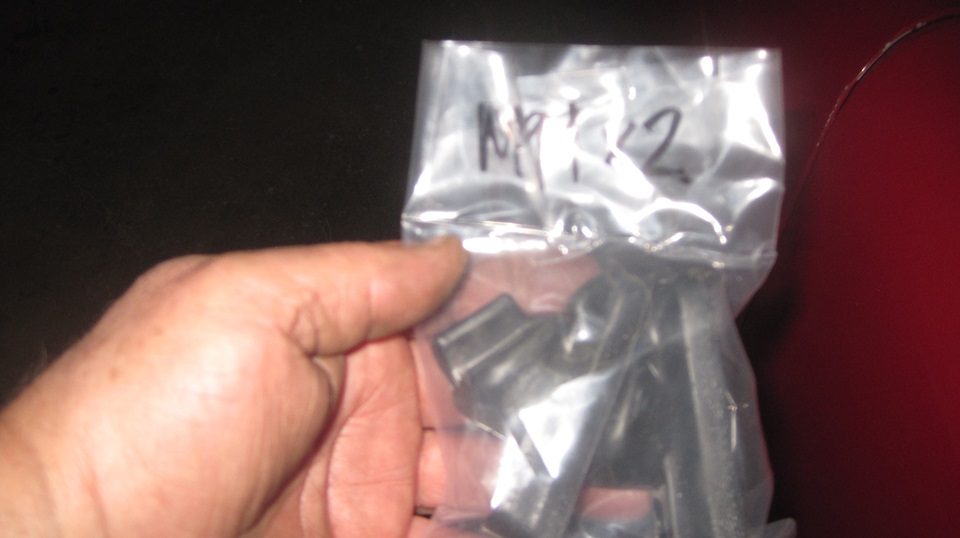
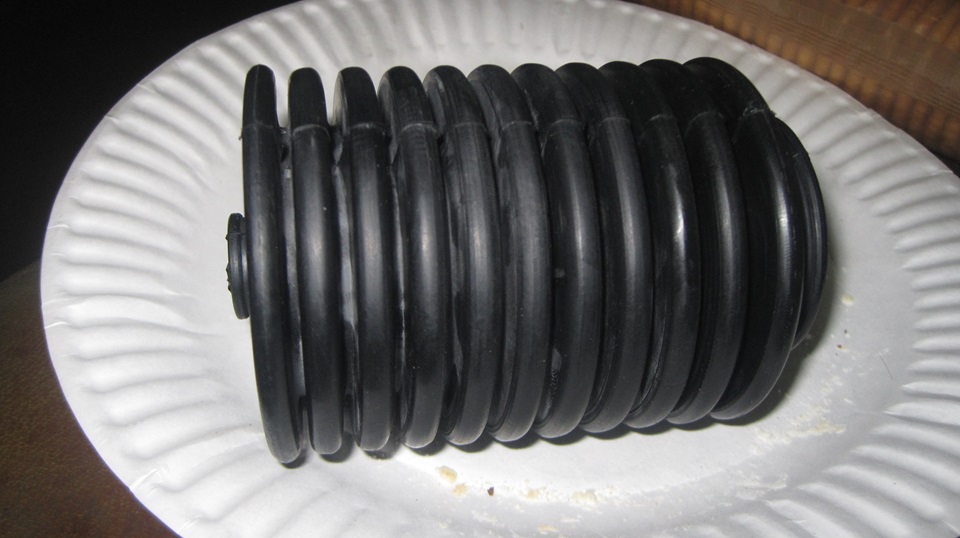
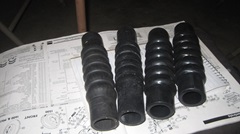
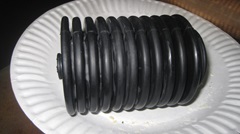
Next thing we can install on the rolling chassis is new steering rack gaiters (rubber boots) to replace the perished garbage rubber parts from Moss that never made it out of the shop before falling apart, even when never exposed to oil.

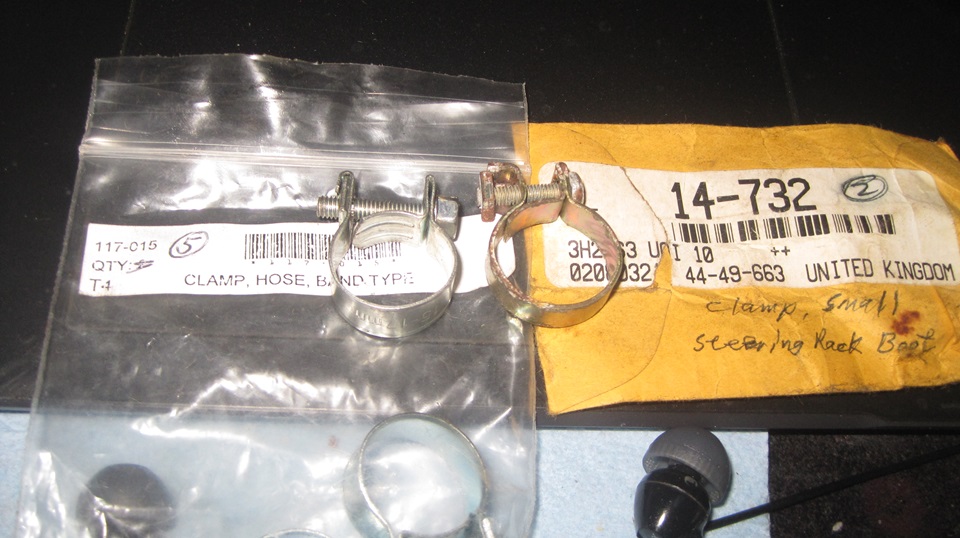
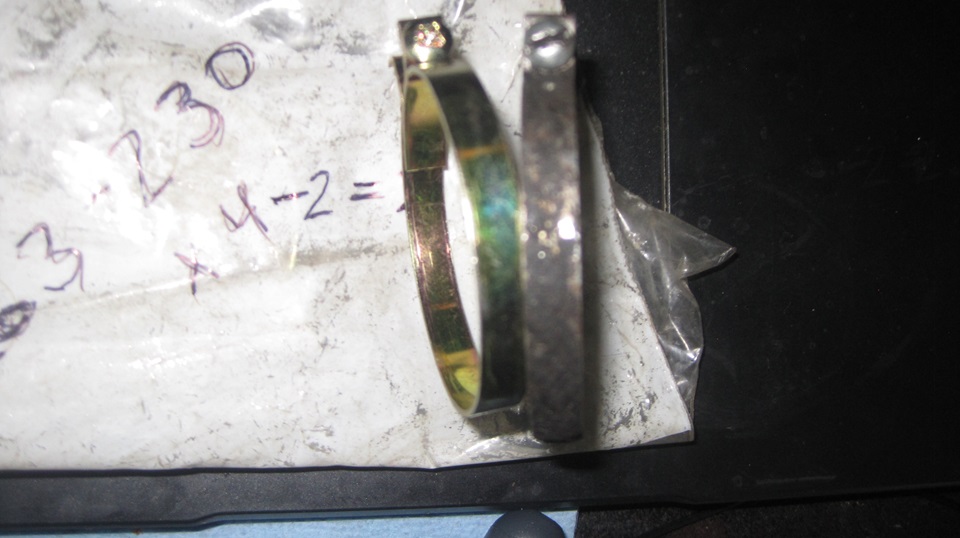
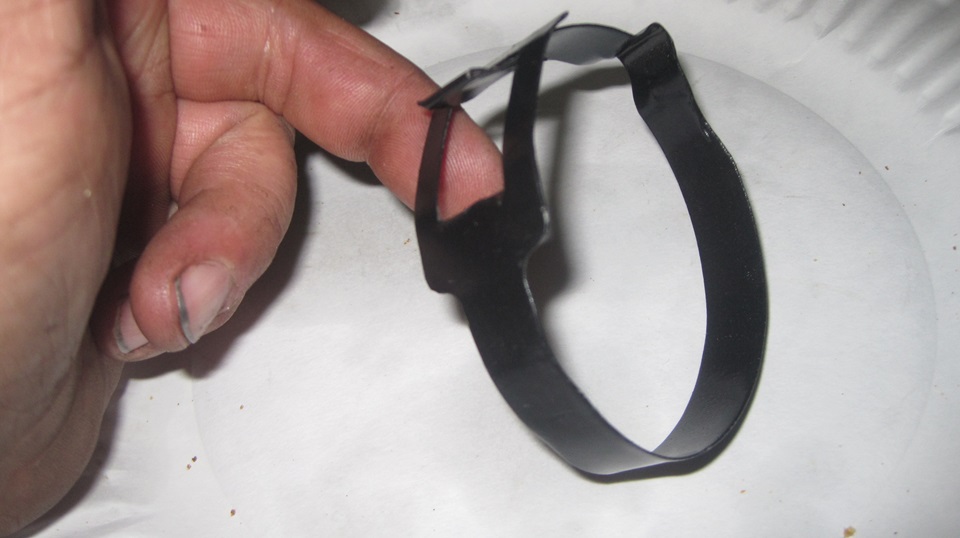
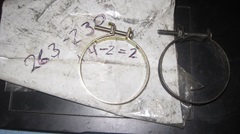
We had choice of two clips for the small end. The narrow clip on right, sitting on the colored envelope, is an original type part

 procured from Victoria British (back when they were still in business). This is the best part, but also the last original style part I have, so I will keep it for future reference. The slightly wider clip on the left, sitting on the Moss Motors source envelope, will have to suffice today, as I have plenty of those in hand.
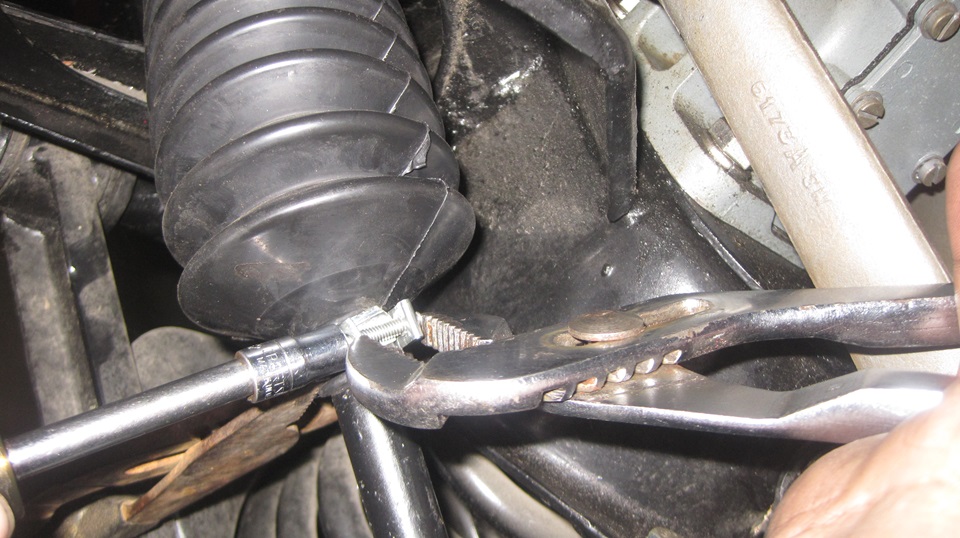
The Moss clip is too wide, and will sit on top of the rubber end flange (bummer). It is also marginally too small ID. and the inside underlap finger end is marginally too short making it very difficult to install. With two men, four hands, two channel-lock pliers, one nut driver, and a lot of finesse, we finally managed to get it installed. But if anyone ever loosens that clip to adjust toe-in, they may never get it back on again. Pity we can't have correct original style parts.

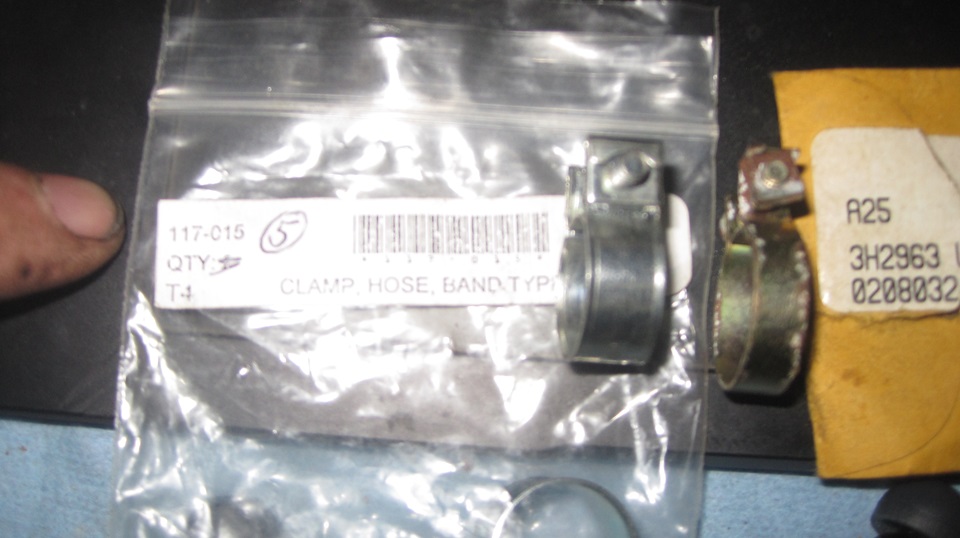
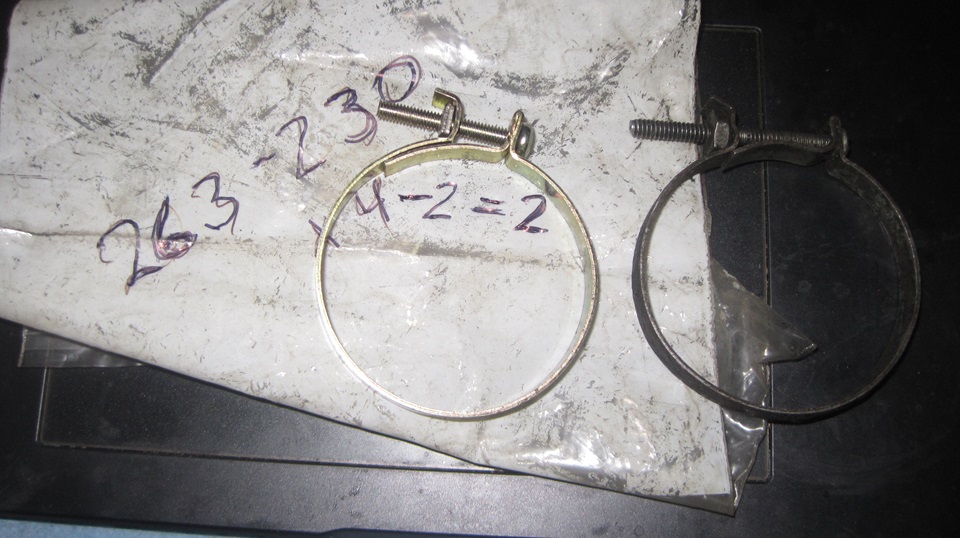
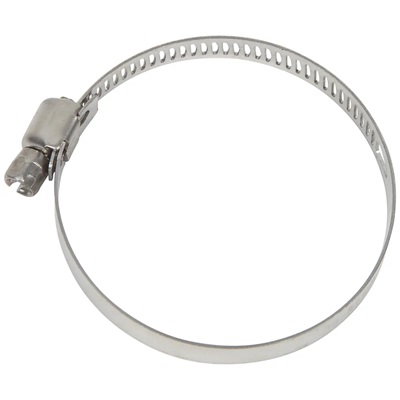
We had four clips for the big end, two original style used but in good condition, and two original style new, but likely no longer available, and the screws are a bit different. We will install the good used ones here, keeping the slightly variant new ones for spares. The current issue replacement part from Moss is a non-original screw clamp,like a narrow radiator hose clamp. I suspect it is perfectly serviceable, just looks funny, and I don't have any of those in hand.


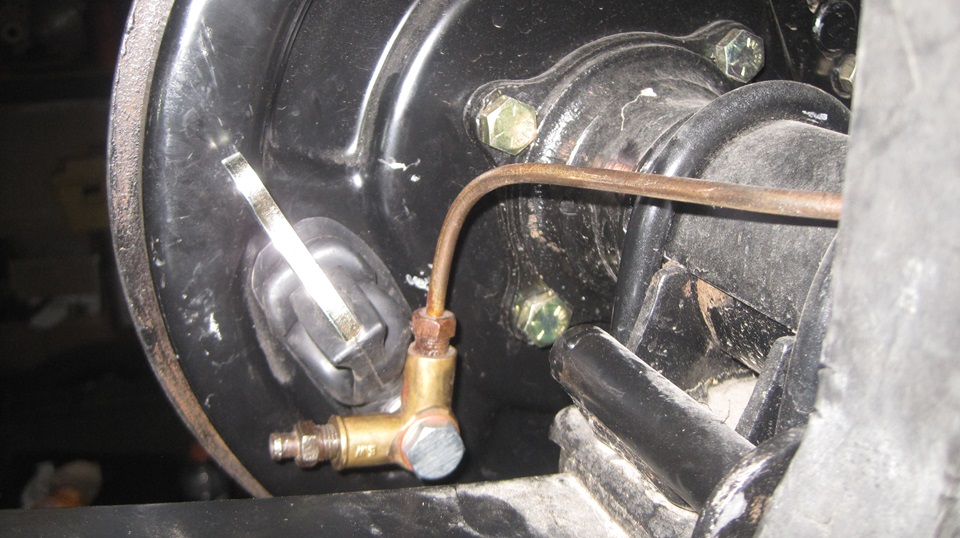
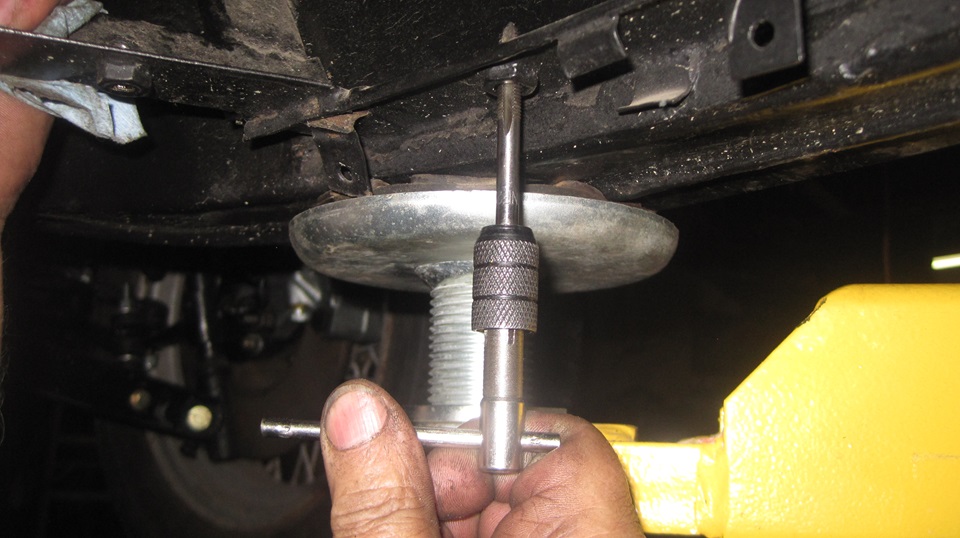
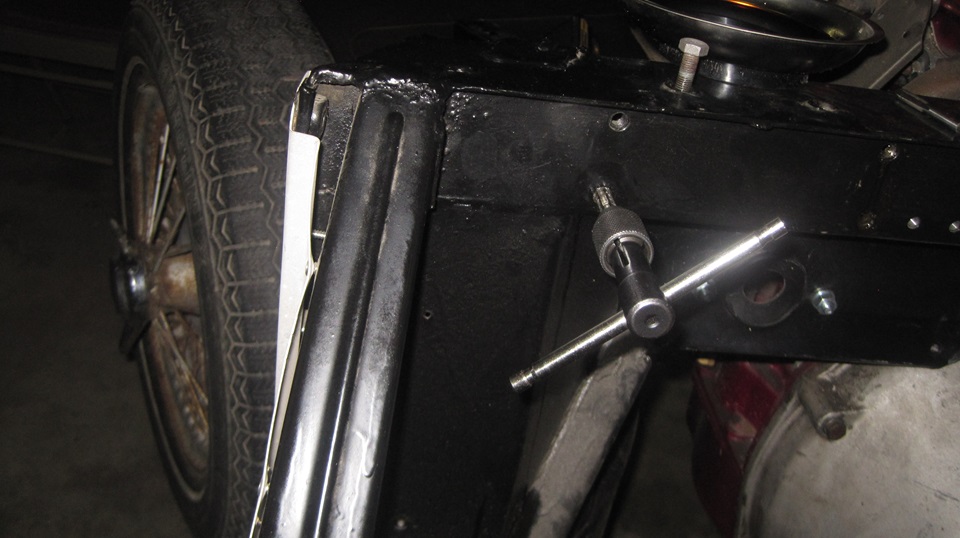
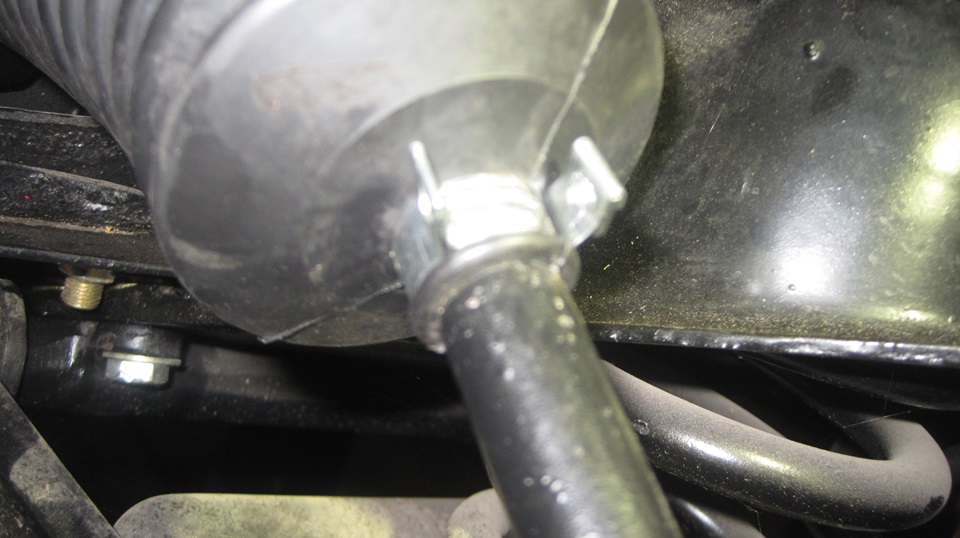
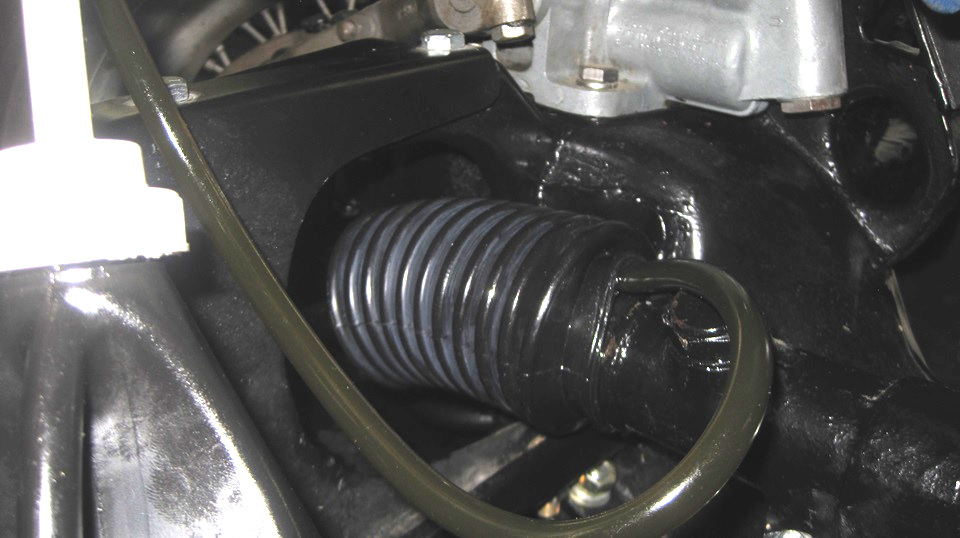
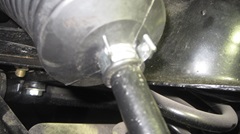
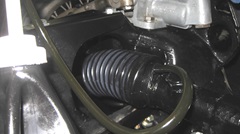
With the rubber boots installed, we need to fill the steering rack with 6 to 8 ounces of EP80W90 gear oil. The proper and easiest way is to inject it through the angled Zerk fitting on top of the rack housing using a "palm gun", just a small grease gun with oil in it instead of grease. Sorry, I don't carry the palm gun in the trailer. But I am used to injecting the oil into the rubber boot using a manual pump on top of an oil bottle, same tool I use to put oil in the differential (or a side fill gearbox). I commonly inject oil into the small end of the boot using a trigger pump oil can, but I don't want to remove that miserable clamp to do it. The rolling chassis has clear access to top of the big end of the boot, so we will do it there (see first picture below).
Remove the larger clamp, pry the boot big end open and insert the injection hose a couple inches right up top. Move the rack to center of motion to allow some volume inside the boot, but not to stretch or pull the boot off of the rack housing. Pump in oil until it begins to run out around the hose.then pull the hose out and close the big end of the boot. We get about 4-fluid-ounces of oil into the boot on the first pass. -- Holding the big end of the boot in place, we move he rack slowly left and right through full travel to move most of the oil from the boot into the rack housing. Then "rinse and repeat" putting another 4 ounces of oil into the boot. Install the big end clamp to seal the rack with oil inside (6 to 8 ounces as specified). When you have the correct amount of oil inside, it will gurgle as the rack is moved from lock to lock.

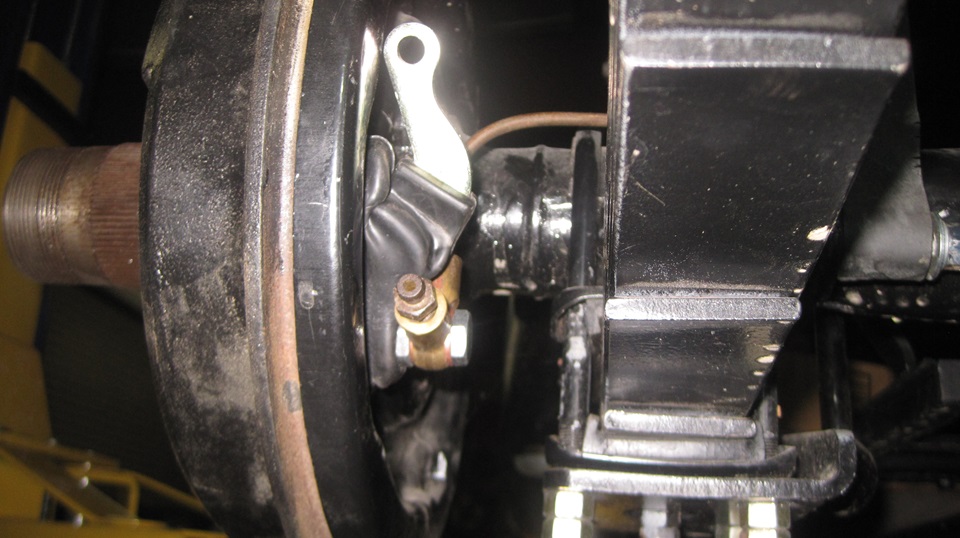
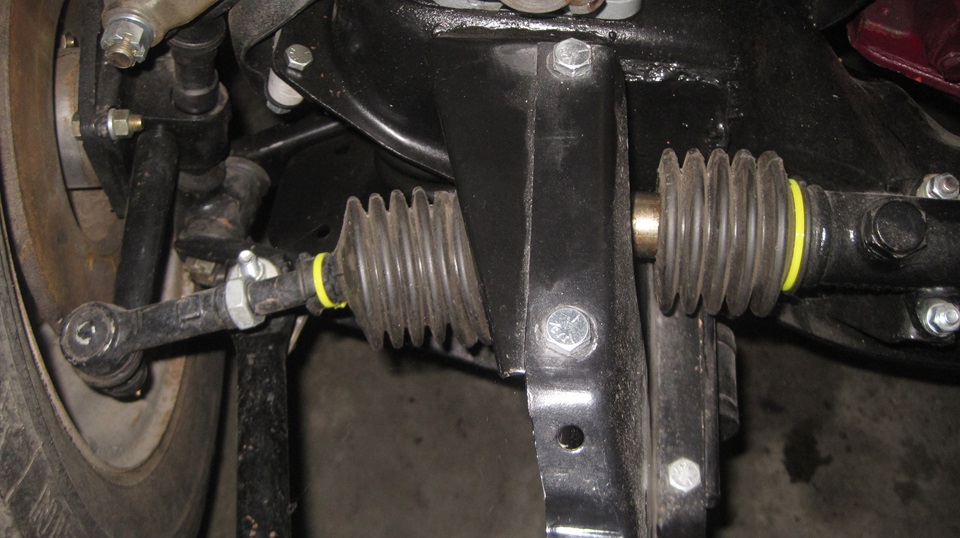
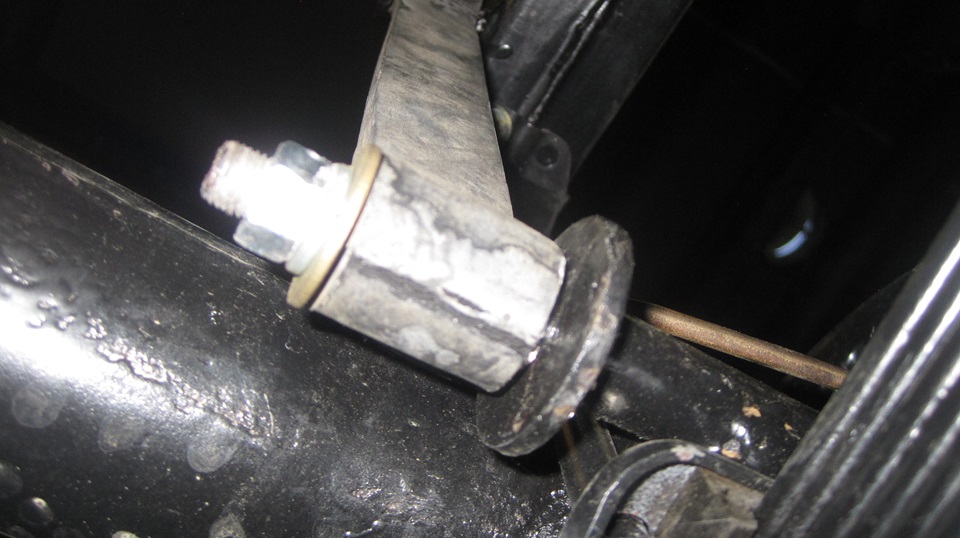
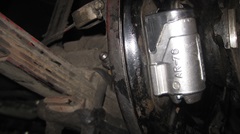
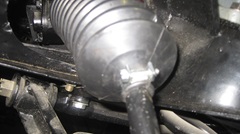
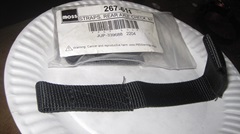
There it is all buttoned up with new boots and fresh oil inside, ready for front end alignment (whenever). Sweep up the remains of the old rotten rubber boots for the dust bin. And there is this neat metal clip for the rear axle, just to remind us that we have not finished the rear brake pipe installation yet, maybe tomorrow.

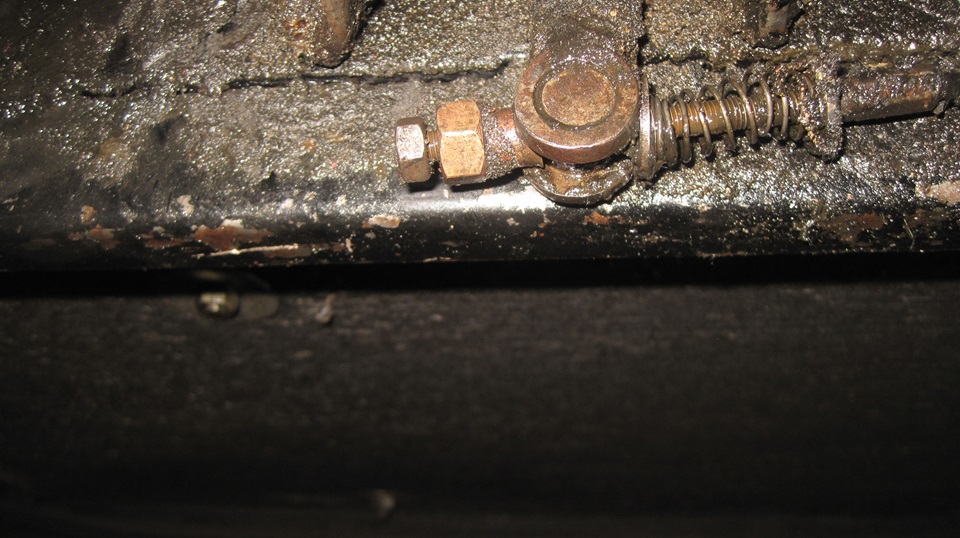
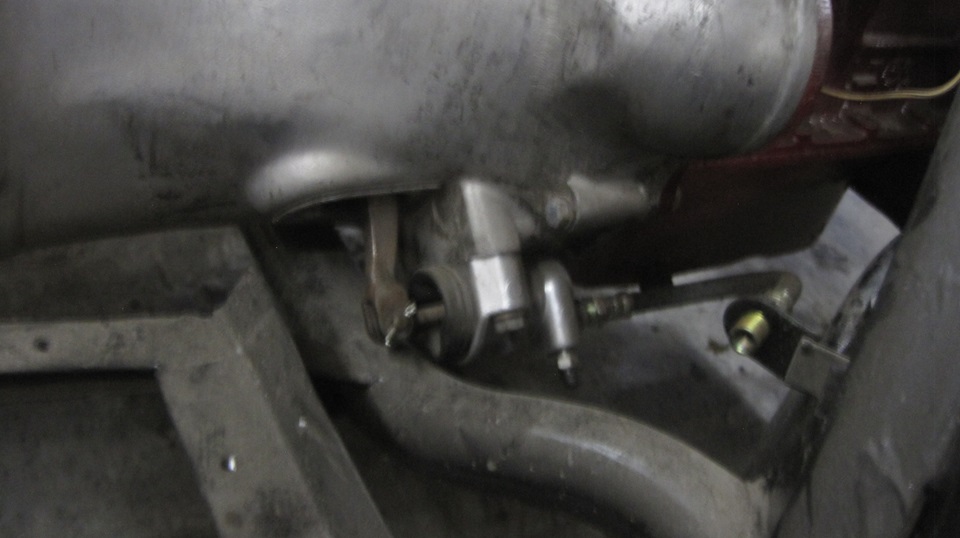
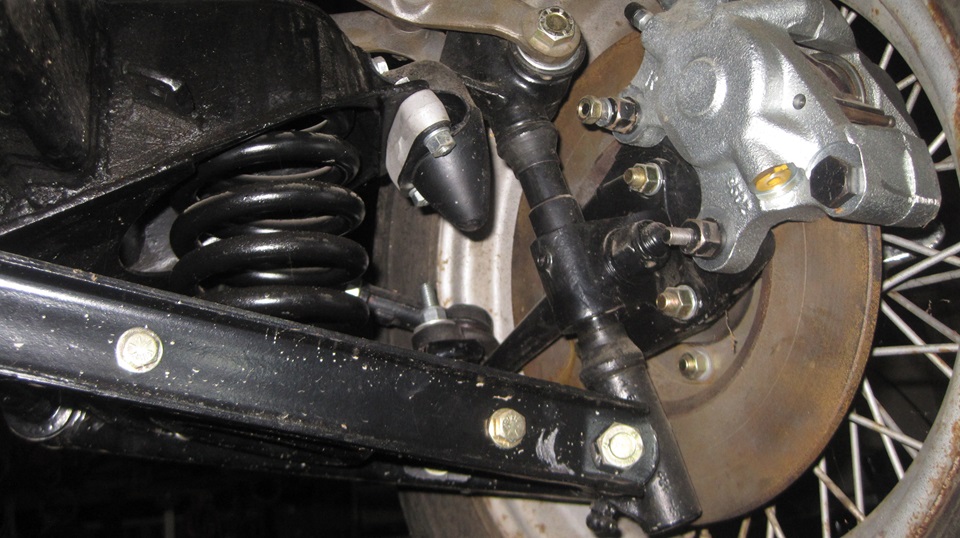
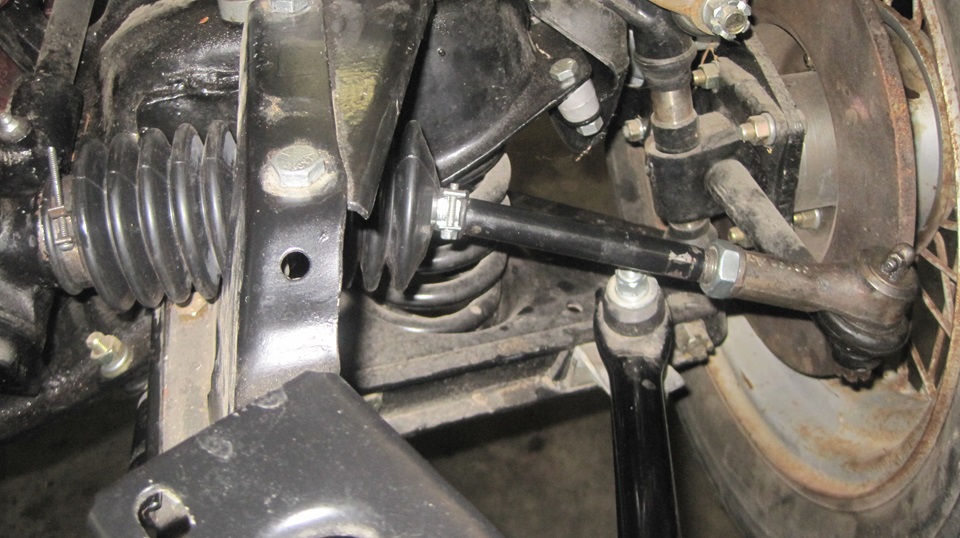
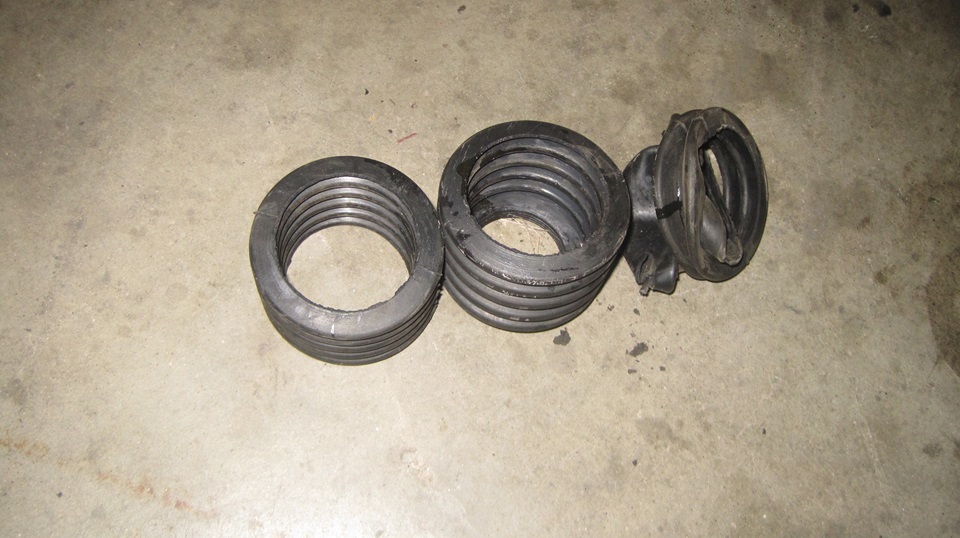
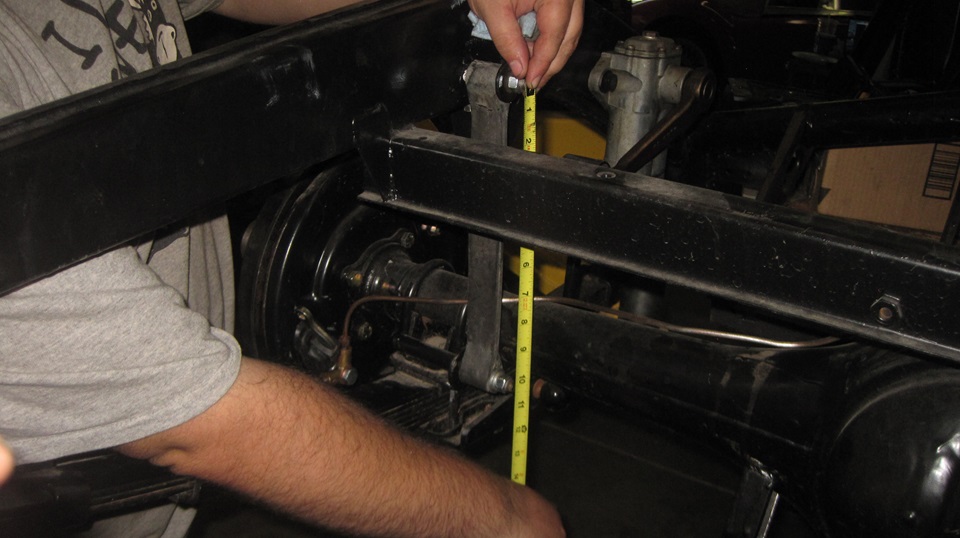
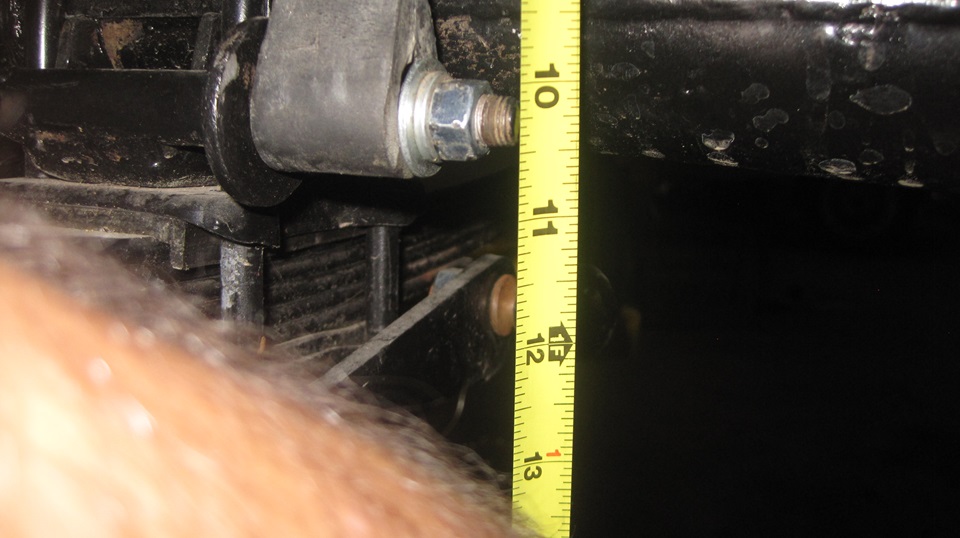
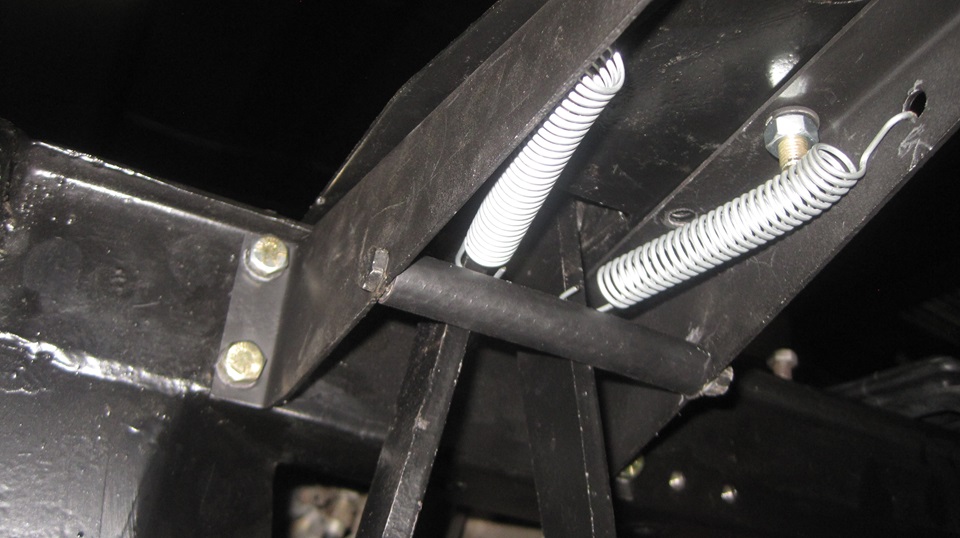
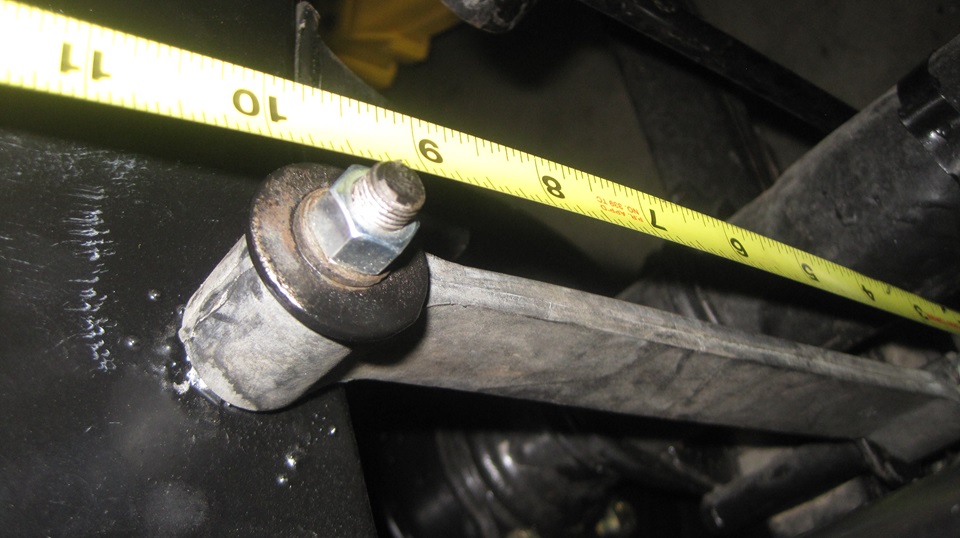
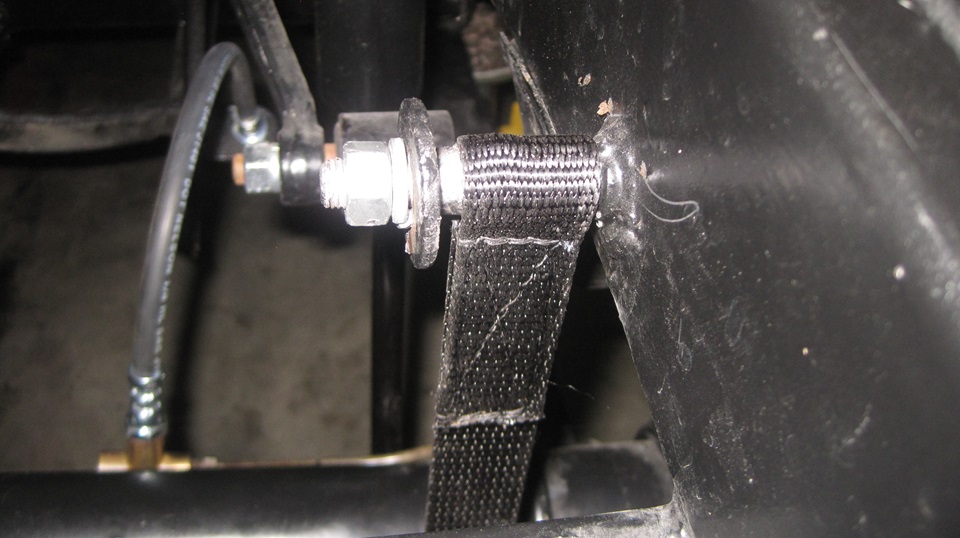
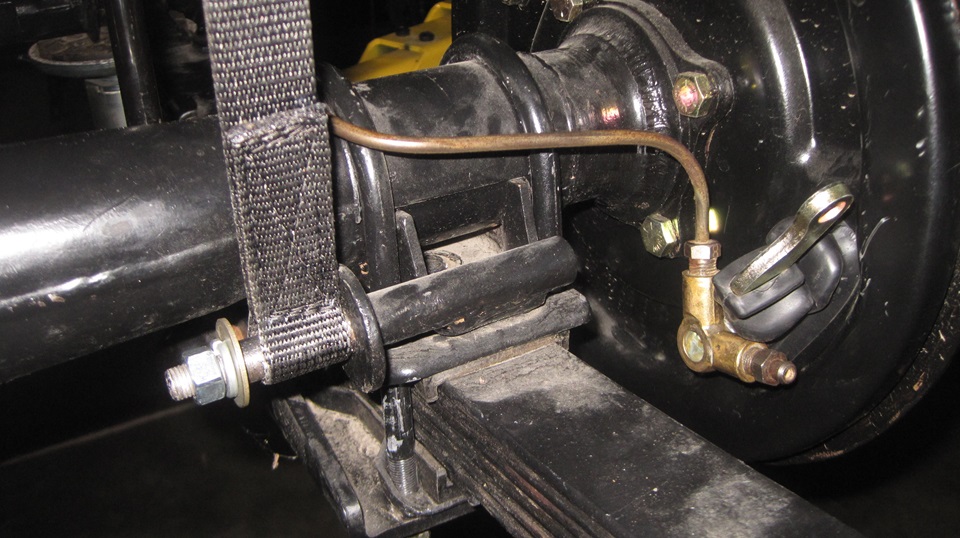
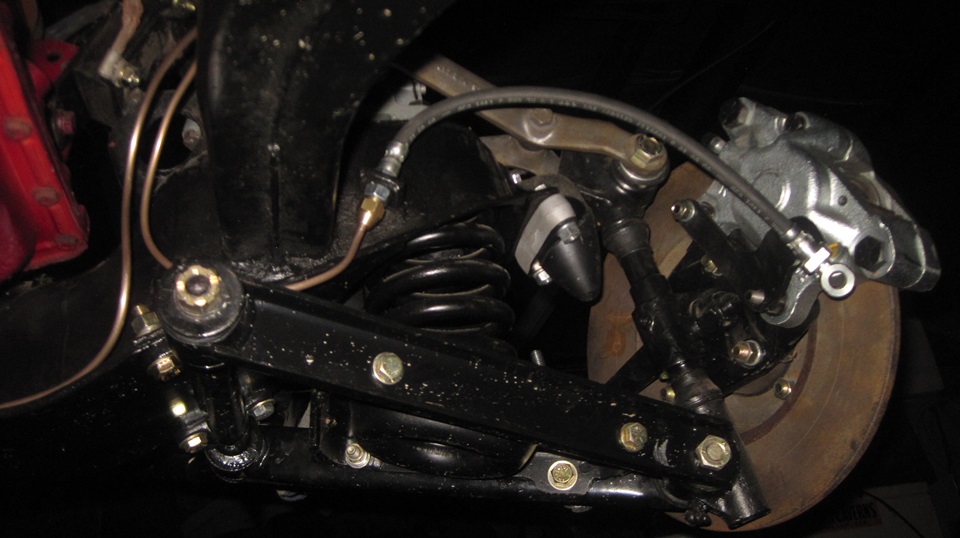
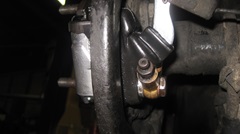
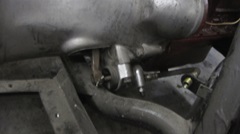
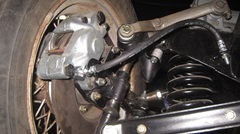
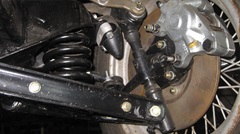
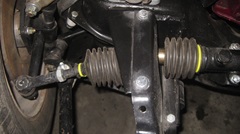
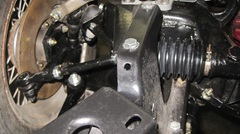
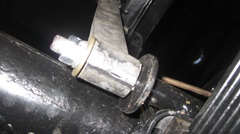
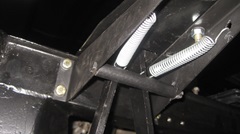
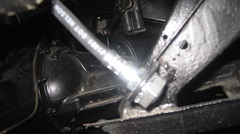
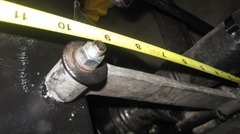
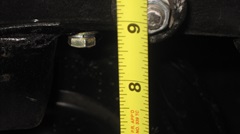
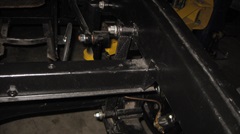
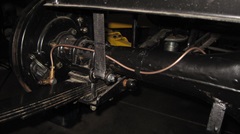
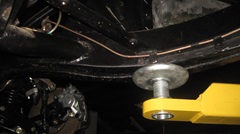
W had look at the rear axle rebound straps, another faulty part from Moss that has been known for several years. After three failed attempts to reproduce this part, the straps never have enough tension fiber inside, so they either stretch or break(or both). These straps have never left the garage, but they have stretched from original 8-5/8-in to 10-1/4-in long. Here the shock absorbers hit end of mechanical travel (susceptible to serious internal damage), the parking brake cable is stretched over the exhaust pipe, and the axle housing is close to hitting the exhaust pipe. These straps definitely have to be changed.


Thursday August 8, 2024:
Iventory updates, listing stuff for the next parts order, photos and notes, and planning on going to McD for breakfast (really).
Friday August 9, 2024:
I told you, 12 miles down the hill to Angels Camp to McD for breakfast. Well, we did have ulterior motives. Short side trip to parts store for a foot of 3/8-inch rubber fuel hose (ask later). Trip to the grocery store to restock the larder, then quick trip 12 miles back up the hill to get the stuff in the Fridge asap.
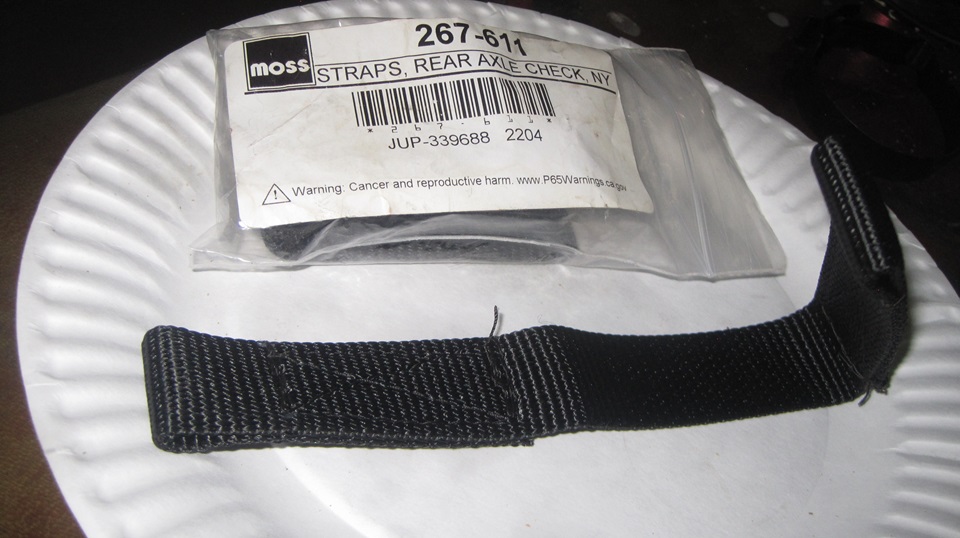
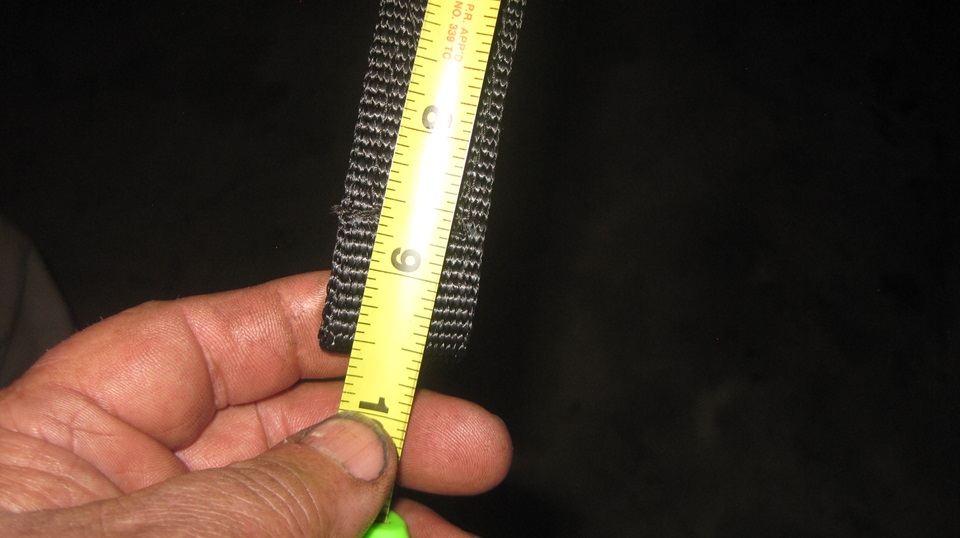
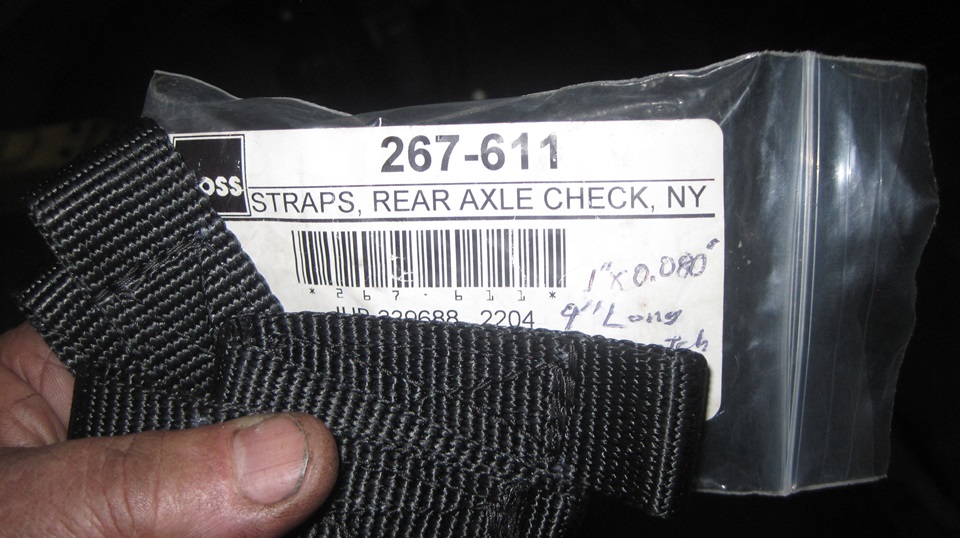
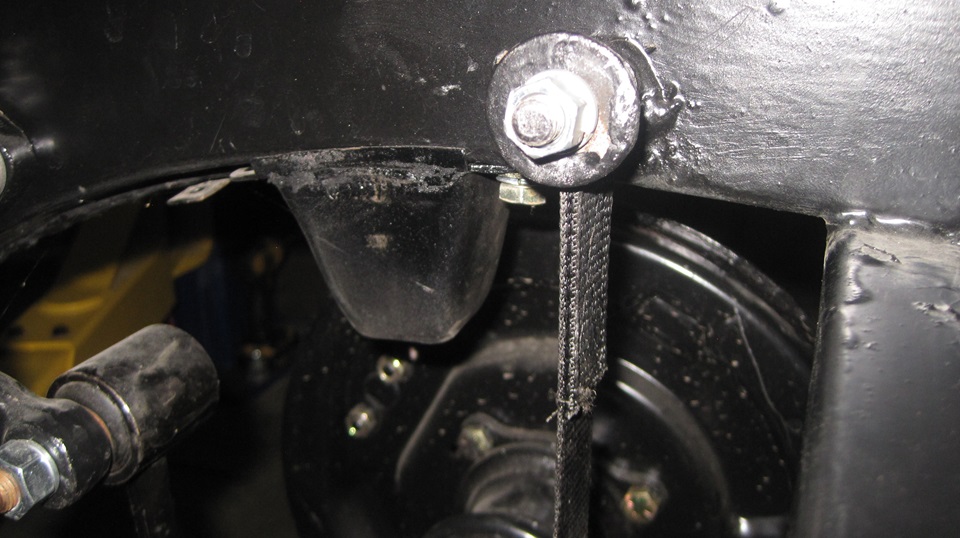
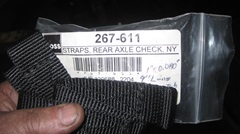
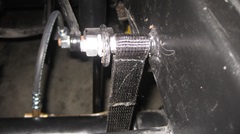
Remember those stretchy rebouind straps from Moss? Unfortunately their current next best option is a pair of nylon web straps that are also likely to be nonfunctional. There used to be an aftermarket nylon strap supplied by "Strapping Lad" on eBay that was correct dimensions , a few wraps, and sufficiently strong to do the job. The current Moss part is one layer of nylon web, only 3/4-in wide and 0.086-in thick (1/16-sq-in cross section). it is also nearly an inch too long in free state. We will attempt to install these straps, just to see what might happen when they are loaded. stay tuned.

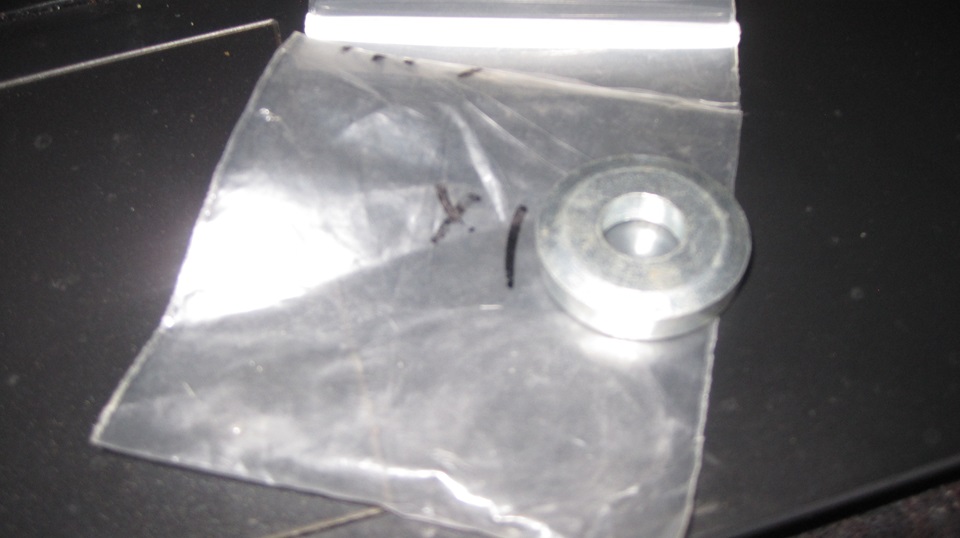
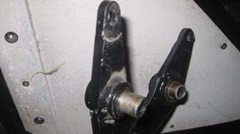
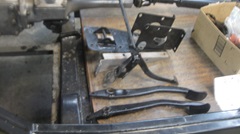
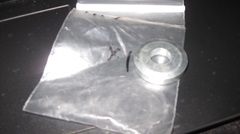
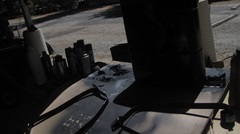
Working on mounting the master cylinder with brackets and pedals. we have a rubbeer pedal excluder from the trailer. The 4-inches of 3/8-in hose is to fit over the 3/8-in tube serving as upper travel stop for the clutch snd brake [pedals (think thump, not clank). A spacer to fit on the shaft between the pedals, sourced from S/F, is too thin, not flat, and not steel. This spacer should ne 3/8' bore, 1" OD, and 1/4" thick. The expedient substitute turned out to be three flat wasners. And we have two pedal return springs in hand.

 Got that stuff put together with some new bolts, and the master cylinder pewrched up top with a couple temporary bolts, Still identifying missing parts as we go.
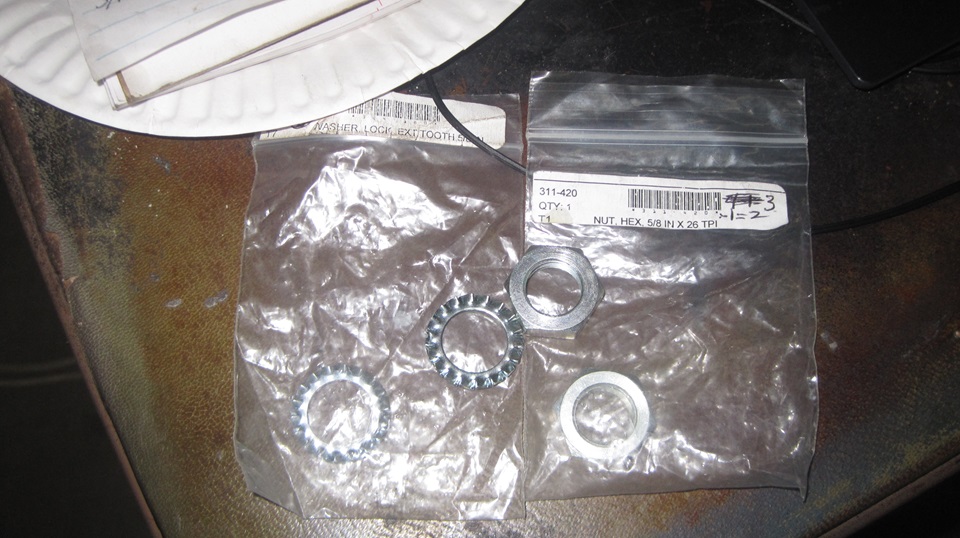
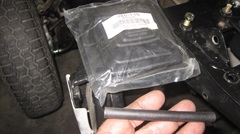
Large hex nuts and locking washers for mounting the clutch hose and rear brake hose to the frame brackets. Will be looking to install brake pipes on the rearaxle soon.
Got that stuff put together with some new bolts, and the master cylinder pewrched up top with a couple temporary bolts, Still identifying missing parts as we go.
Large hex nuts and locking washers for mounting the clutch hose and rear brake hose to the frame brackets. Will be looking to install brake pipes on the rearaxle soon.


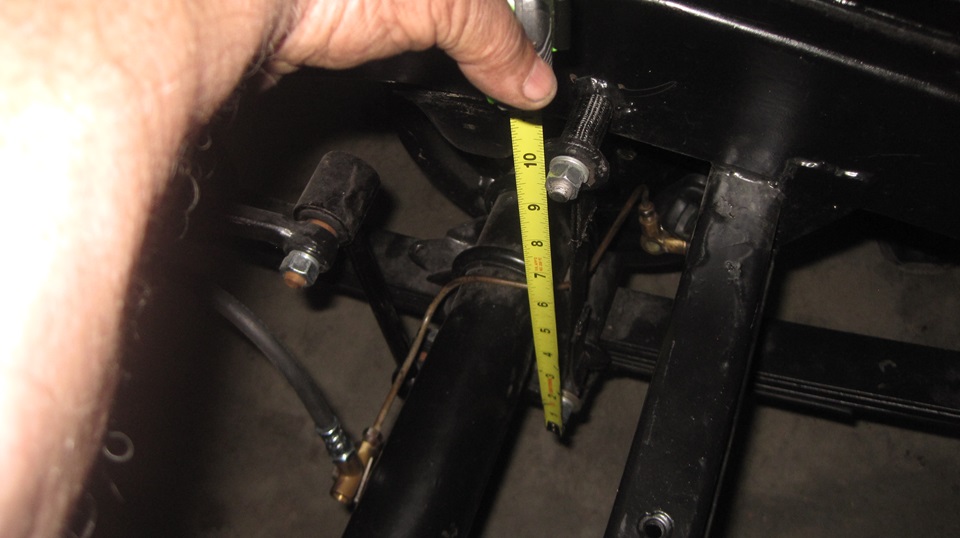
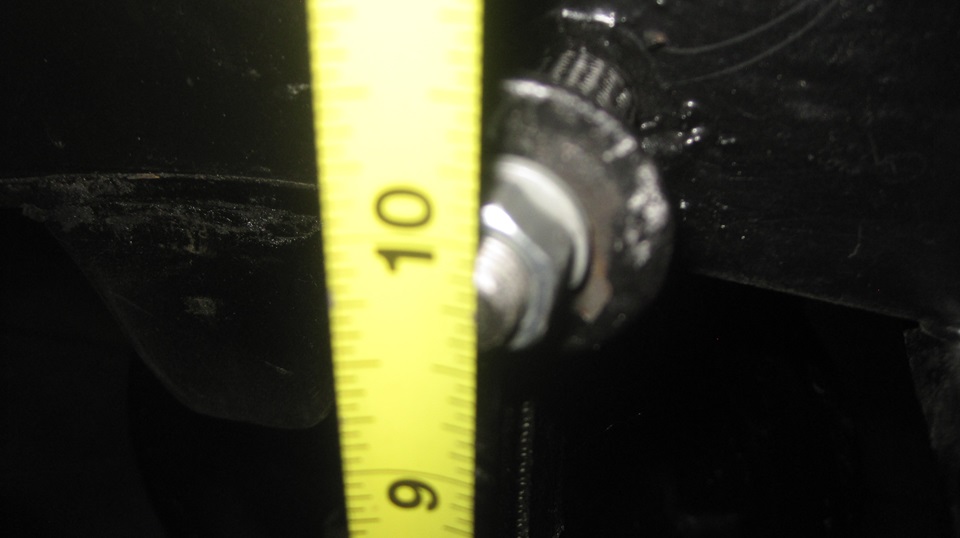
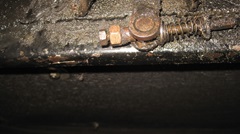
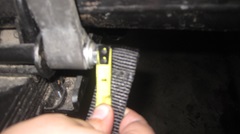
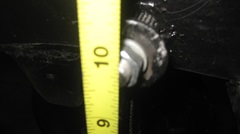
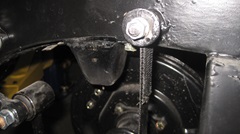
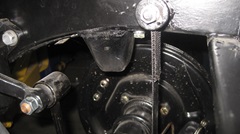
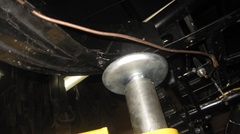
 Looking again at the stretchy rubber check straps on the rear axle, stretched to 10-1/4". Put floor jack under the axle and lift until the frame lifts off the hoist. Sit two guys on rear of the frame to relieve tension on the check straps, and they retract to 9" with no load. Worthless rubber bands. Then we installed the thin nylon check straps. They settled at 9" long with the initial axle load. We will leave those loaded for 24 hours to see if they astretch more.

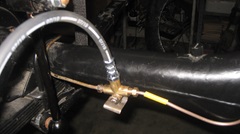
Time to install a new brake pipe on left side of the rear axle to replace the original one that was clogged at both ends. Not too long for that little chore. Time to call it a night and let the nylon rebound straps settle.

Saturday August 10, 2024:
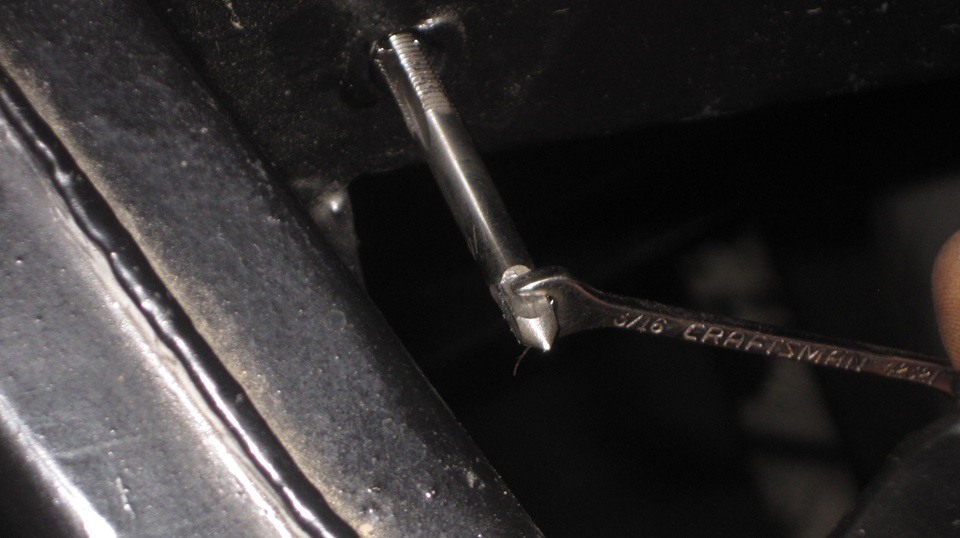
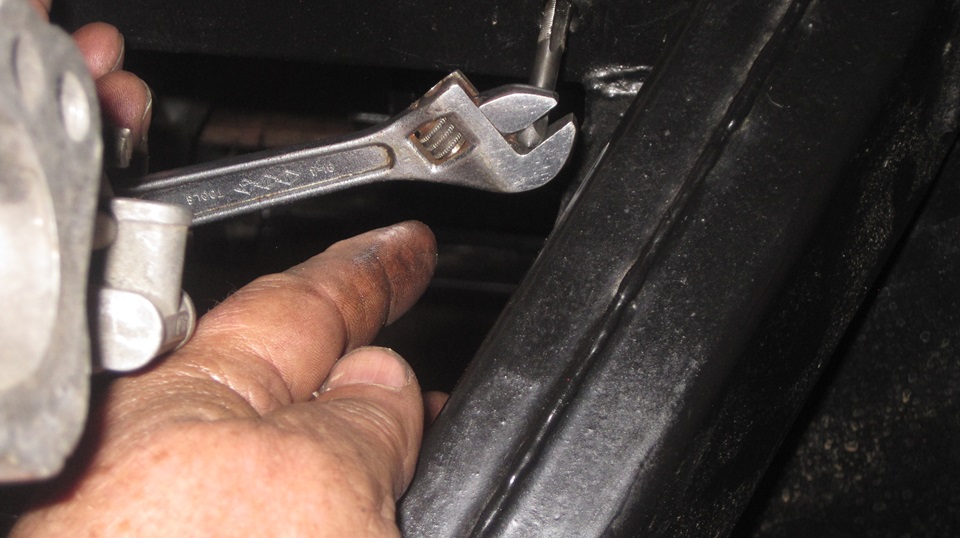
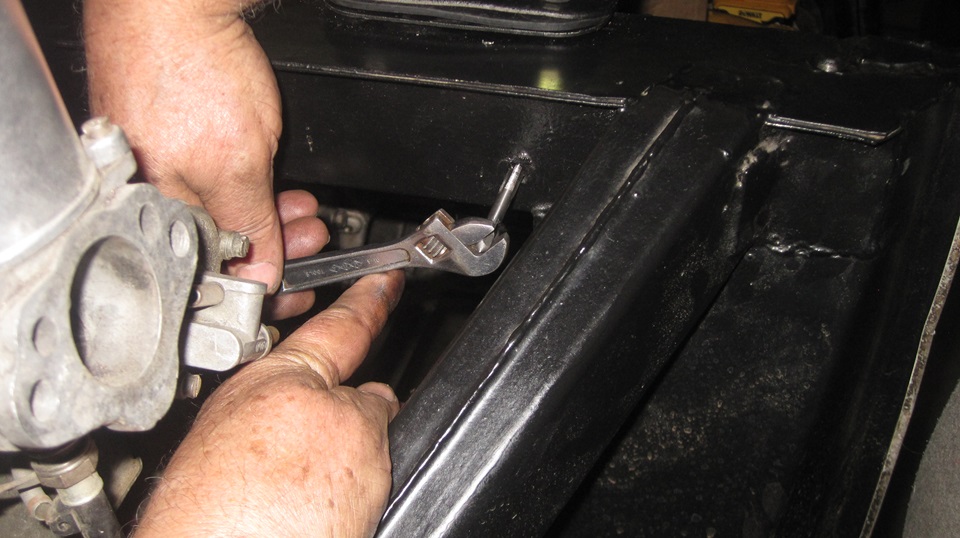
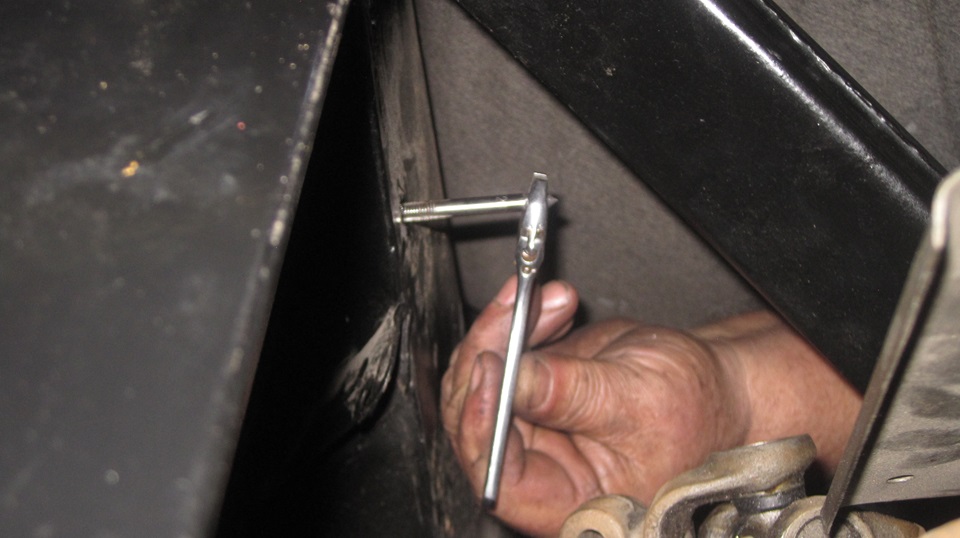
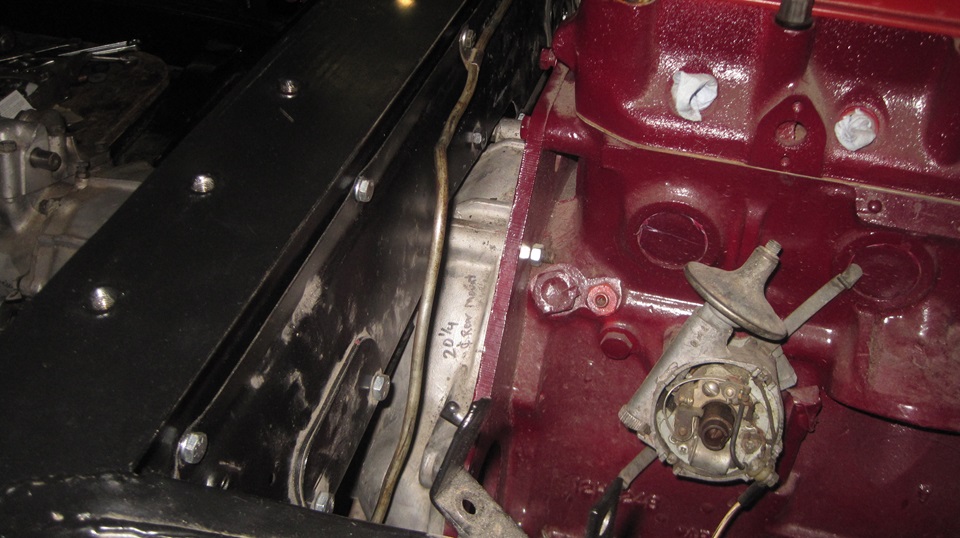
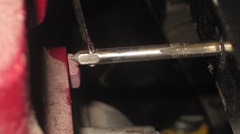
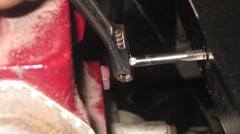
Today we want to install the frame closure plate below the frame goal post behind the engine. Nine 1/4-28 bolts required, and again, unfortunately, the threads had not been tapped out after frame painting. Three holes each side severely obstructed by the frame angle tubes, and one hole directly behind th engine. So kill half the day turning a small thread tap with a small wrench.


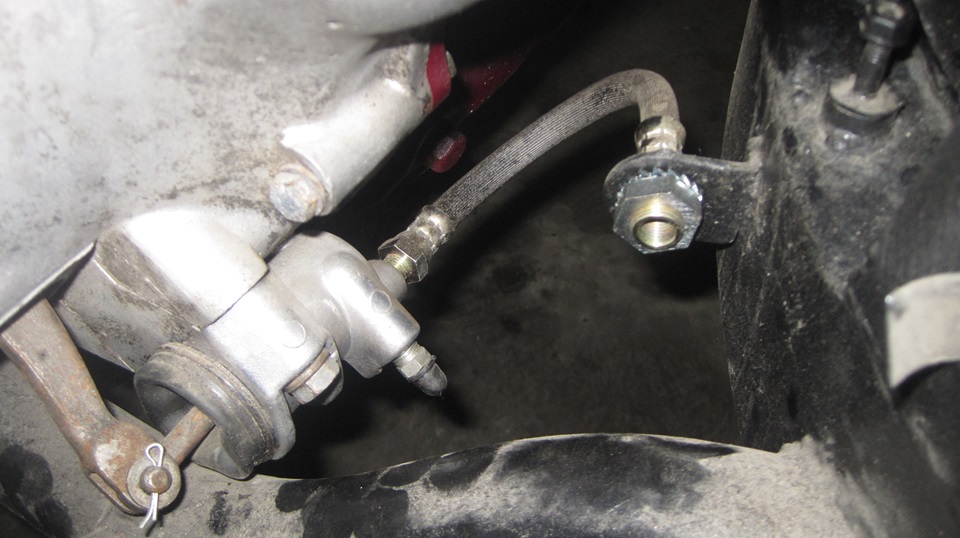
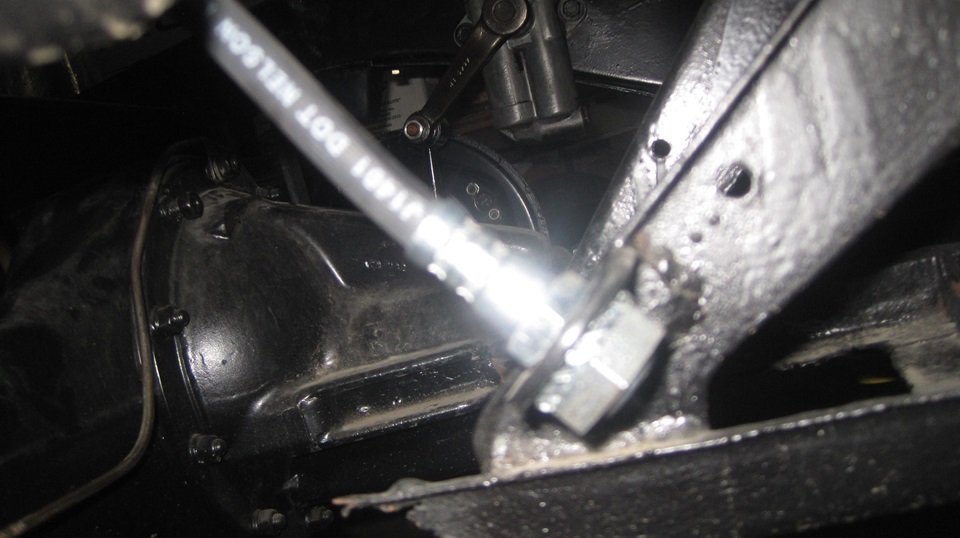
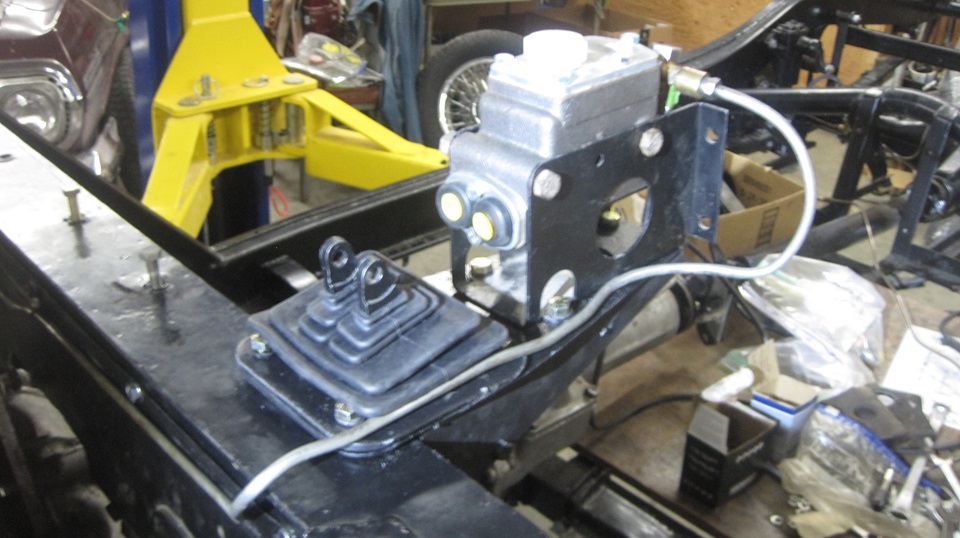
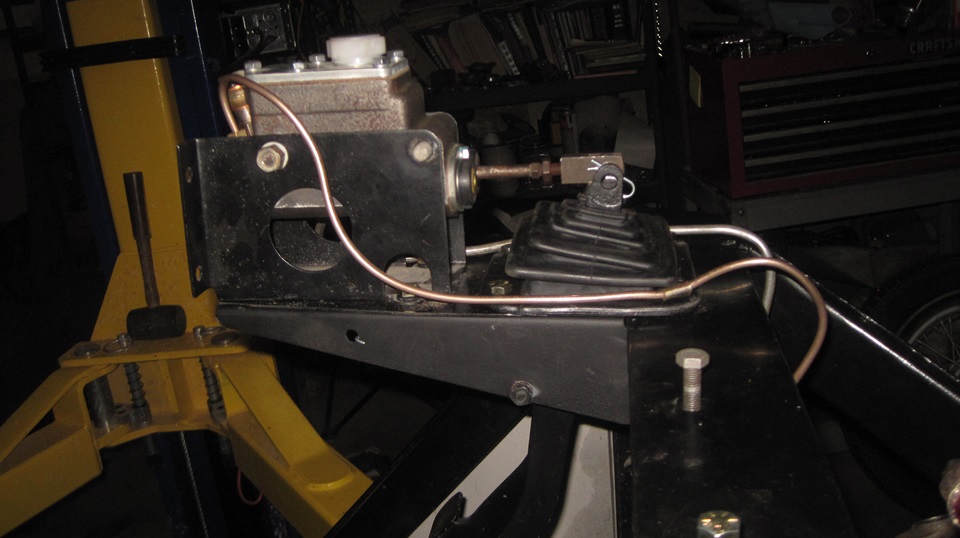
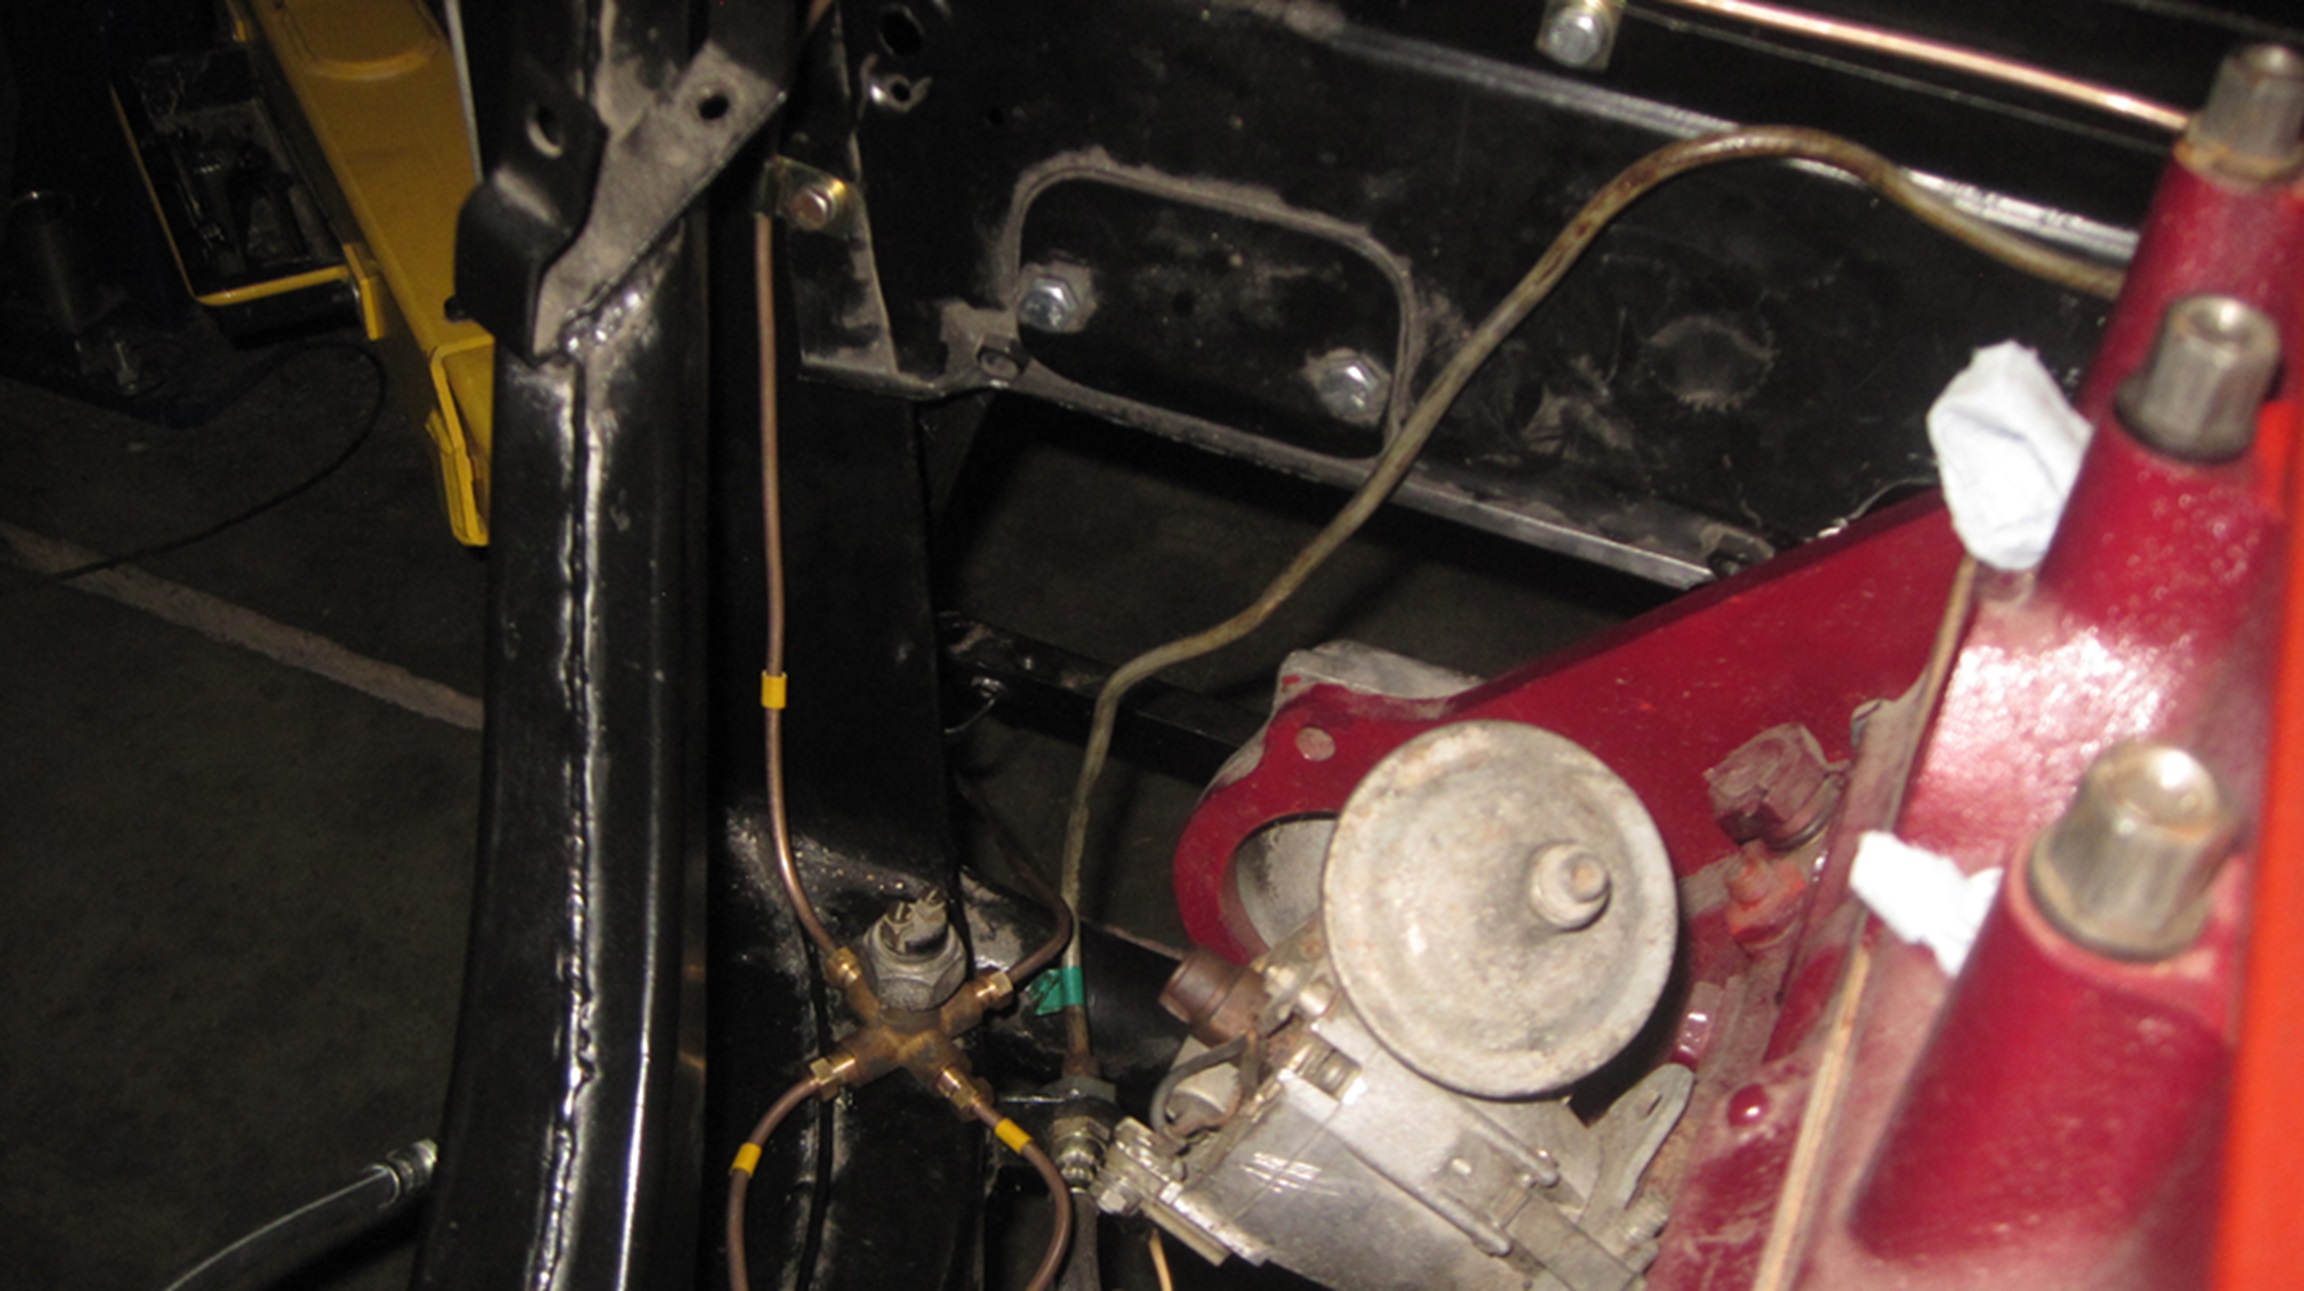
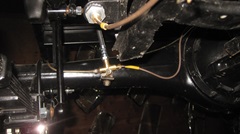
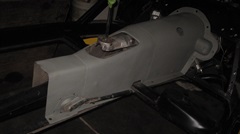
Did I mention it was a miserable chore? We finally got it done, and trimmed the bottom edge of the panel a little to clear the top two bolts on the bellhousing of the 4-synchro gearbox. Another half hour in the evening to get the clutch hydraulic pipe formed to fit snd connected with the banjo fitting up top. The clutch master cylinder pushrod was also installed and adjusted (not shown in the picture yet).


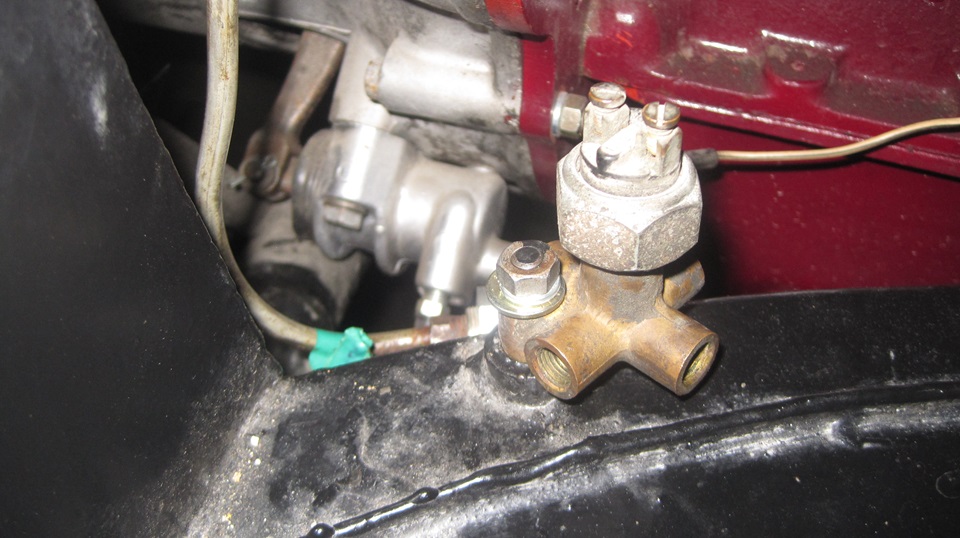
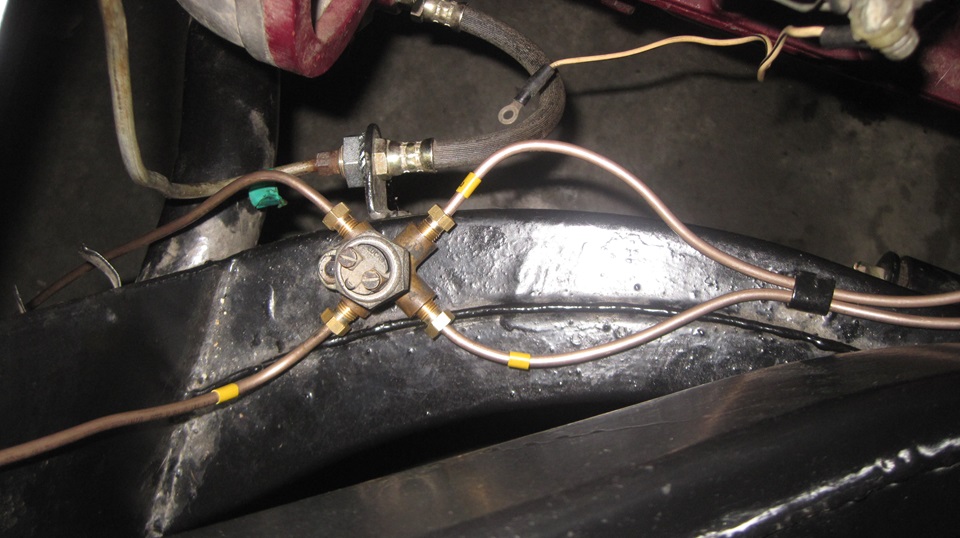
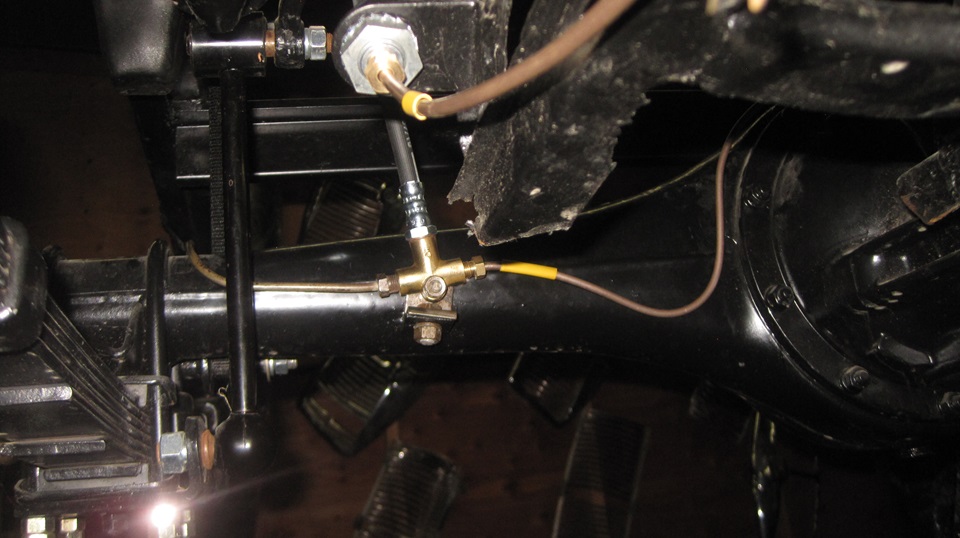
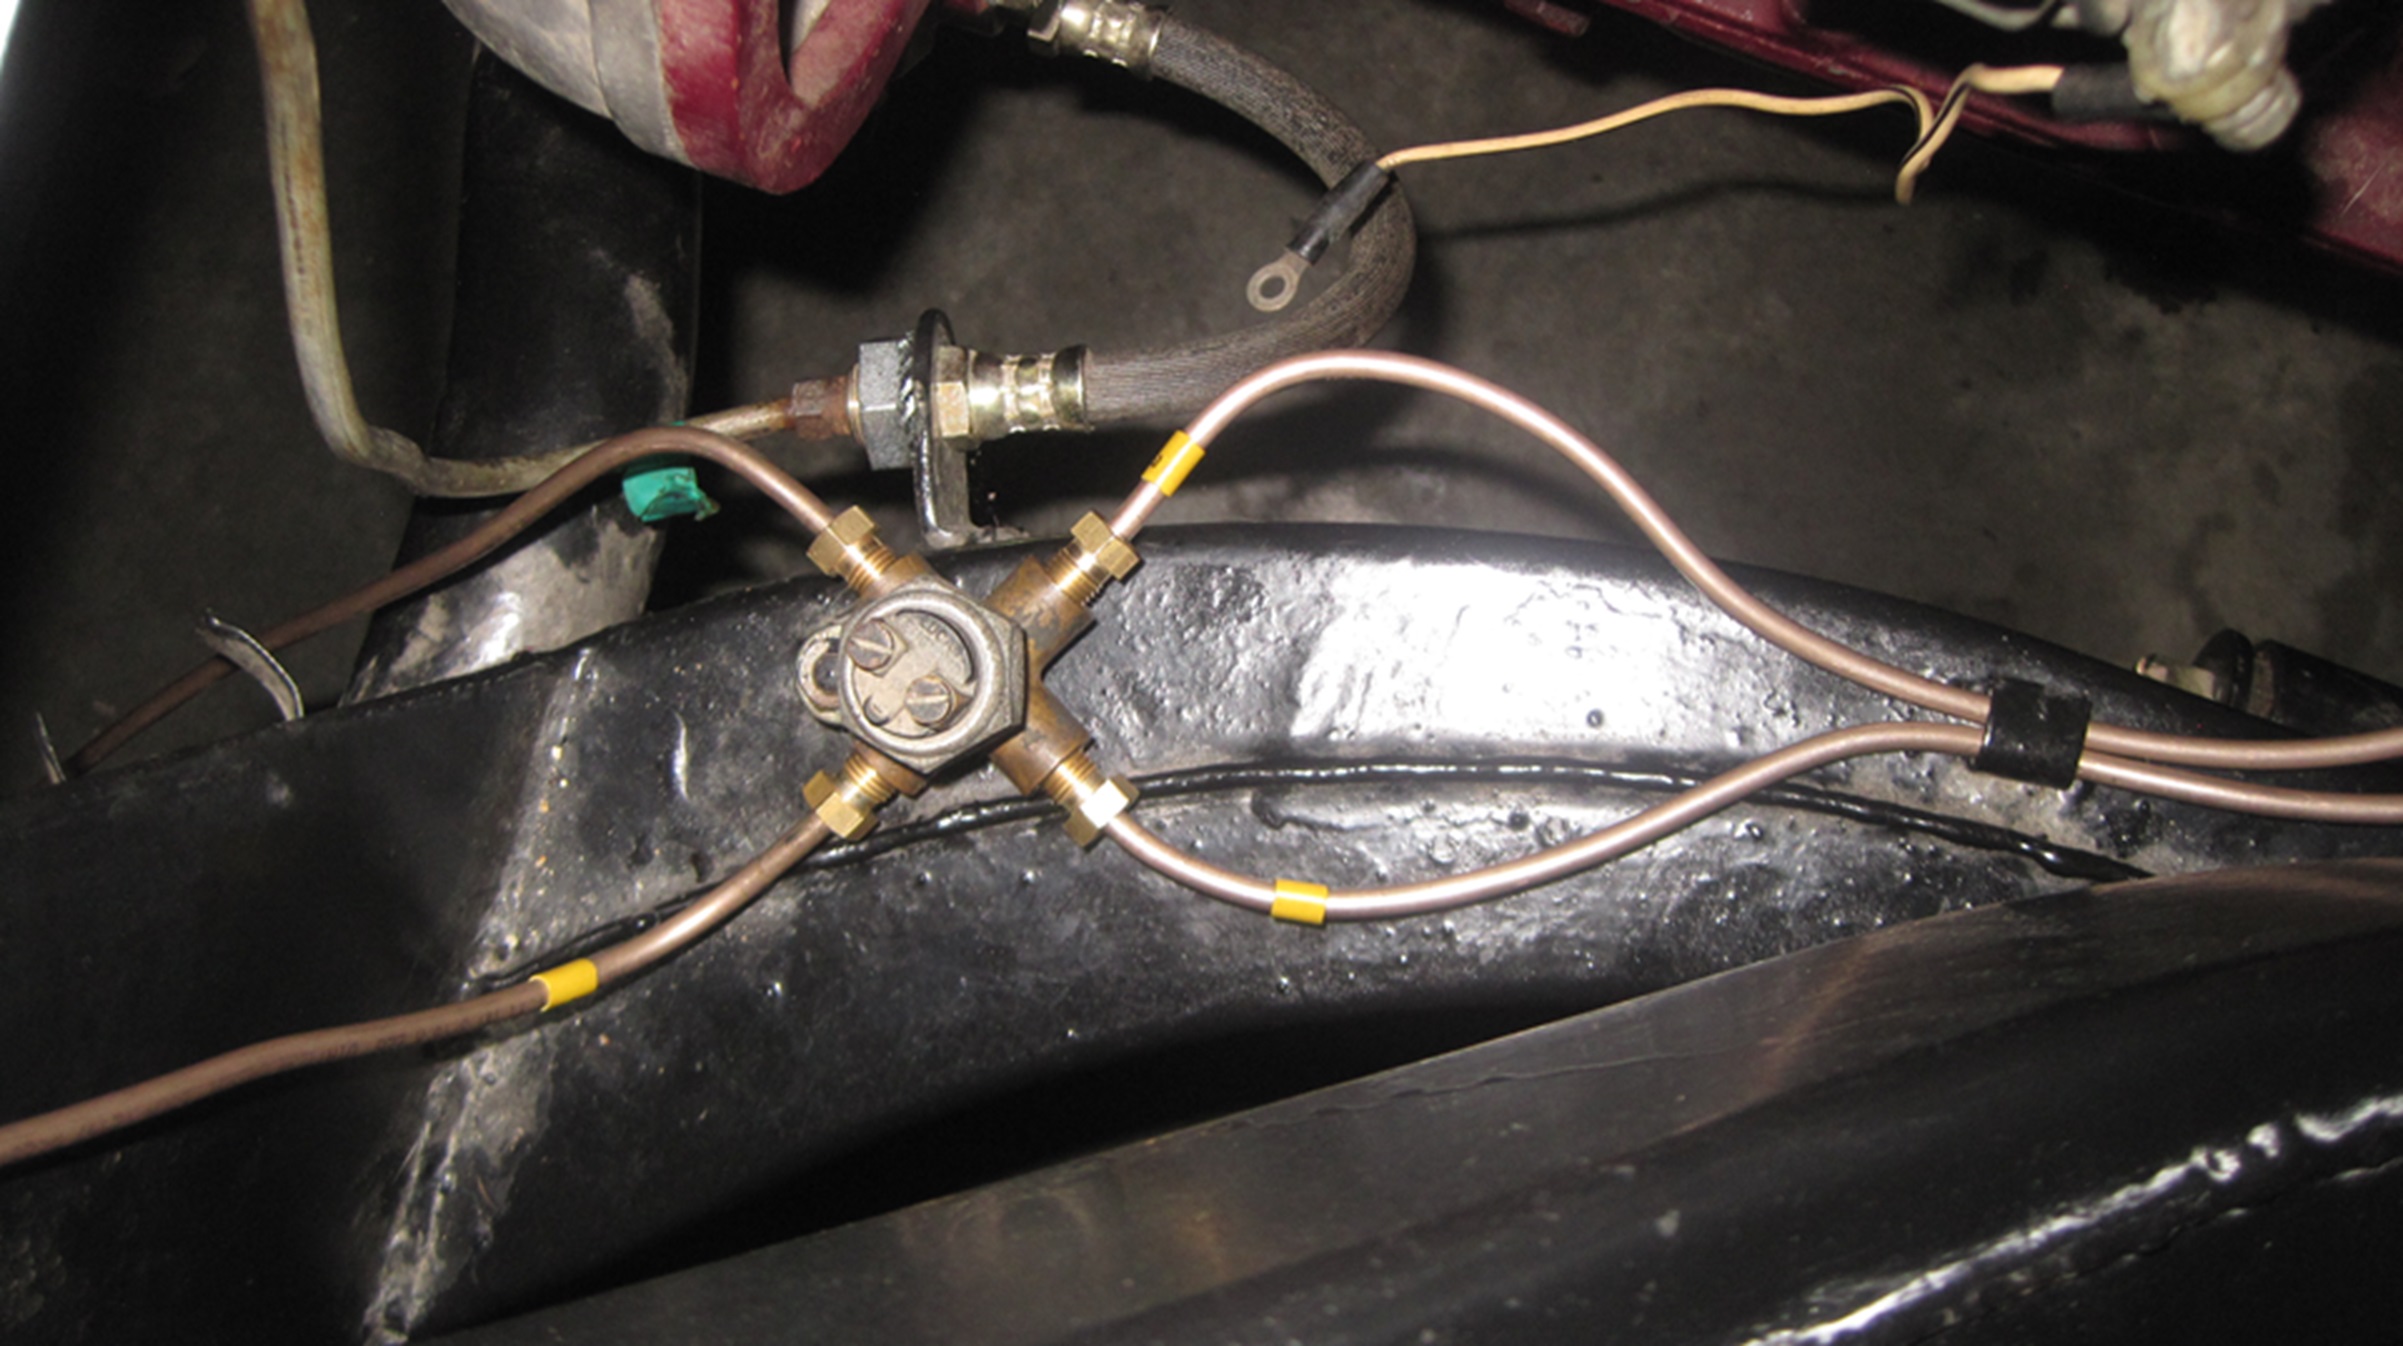
A few more minutes getting the brakes 5-way hydraulic fitting with pressure switch installed. Intending to get the rest of the brake pipes installed tomorrow.
Sunday August 11, 2024:
If nothing else, we were determined to install the rest of the brake pipes, all four ways from the 5-way fitting on the front frame. So we did. All nicely formed, under the capture clips, and all the proper P-clips installed (except a couple near the pedal excluder). And we still need a couple of banjo bolts to seal up the circuits. Intending to place a parts order in the morning.


Monday August 12, 2024:
Up early, skip breakfast, get to work on the parts order list., Not easy, adding up all the parts we just put into the rolling chassis, needing to be re-stocked, and all of the parts we stil need. spent too much time with the rolling chassis. By mid aftrnoon navigator was saying "nake the call". Didn't happen. About 5-pm it was past cloing time for placing the order. Still thinking about fuel pipes and tank hangers, Have breakfast at 5:30, and take the rest of the day off.
Tuesday August 13, 2024:
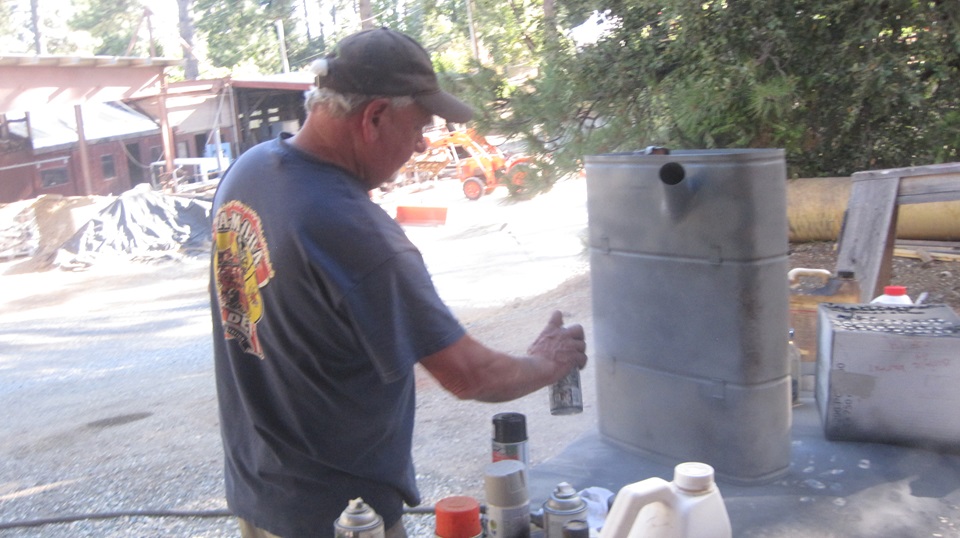
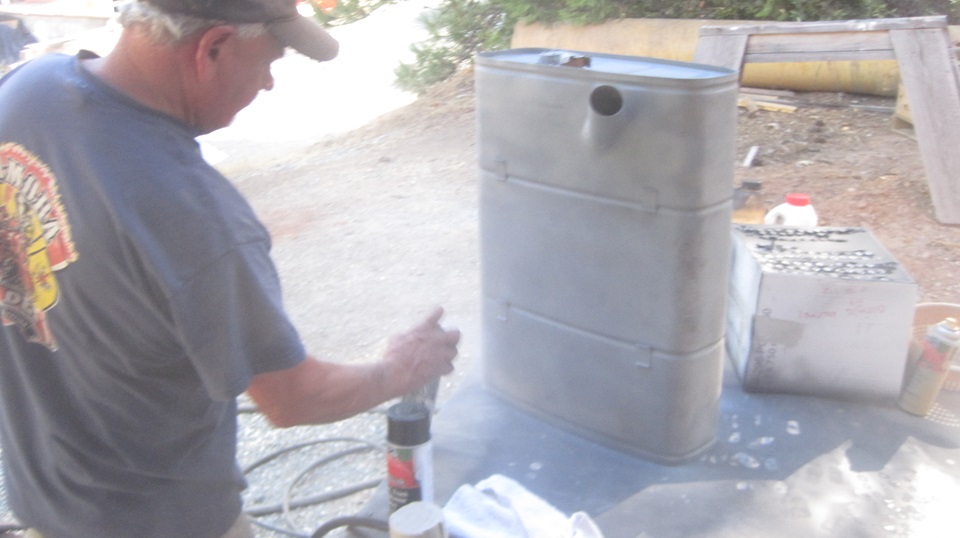
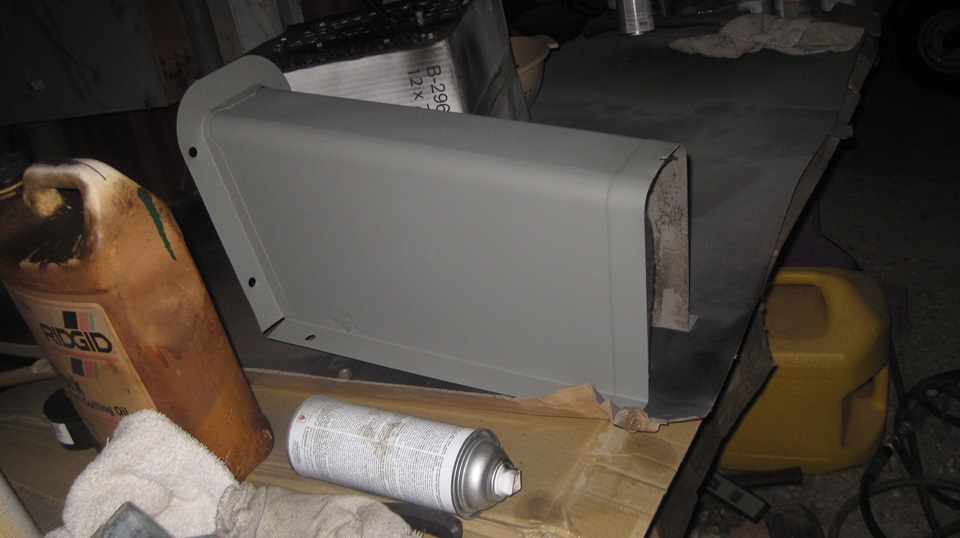
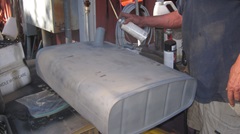
Up early again, having breakfast while finishing up the order list. Did get the order called in by mid day, hoping it gets delivered in a couple of days. Something else to dotoday. Haul out the fuel tank and hangers and bolts, get it sand blasted, and get some primer paint on it. Left to dry, plan to paint it black tomorrow. Well, we do have a couple days to kill.


Wednesday August 14, 2024:
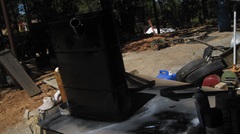
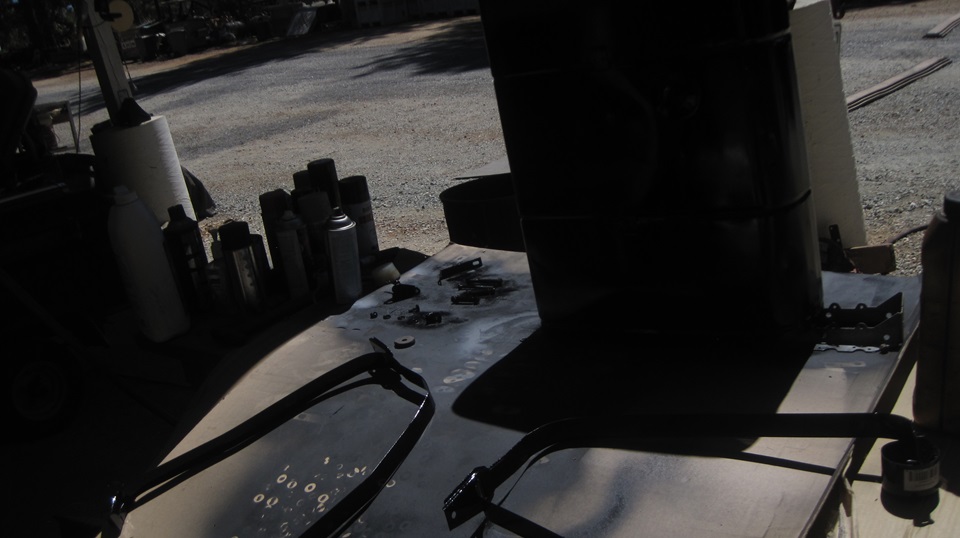
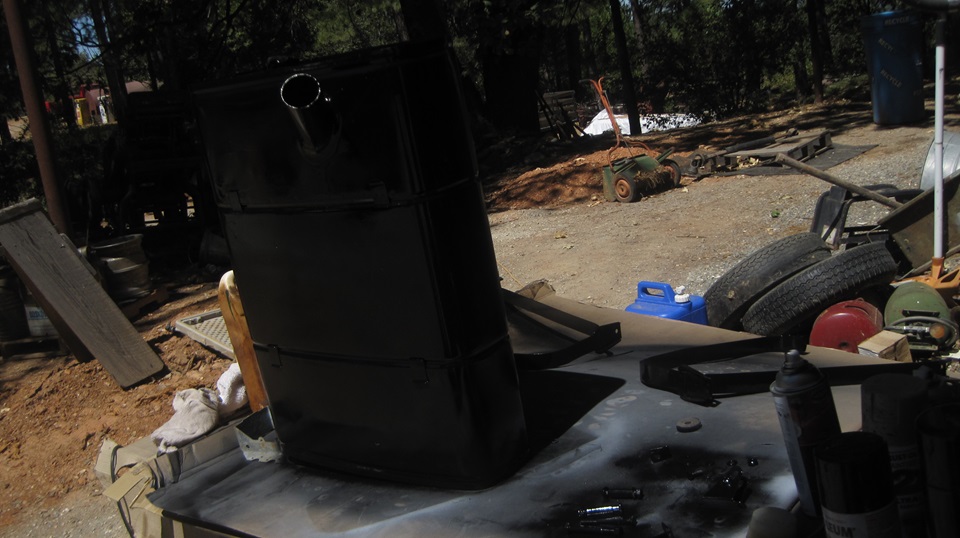
Sprayed a coat of black paint in the fuel tank and mounting straps this morning, and of course they are comaflaged in bright daylight.
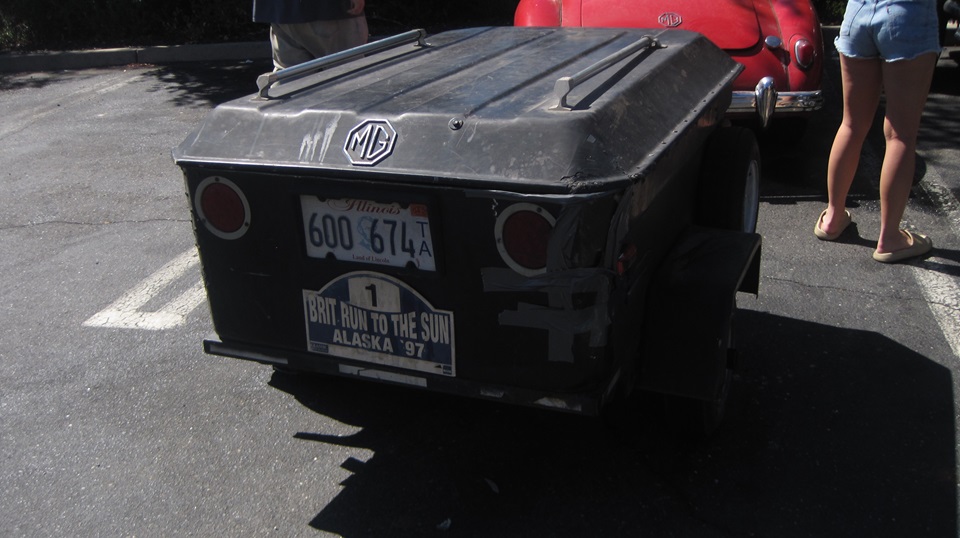
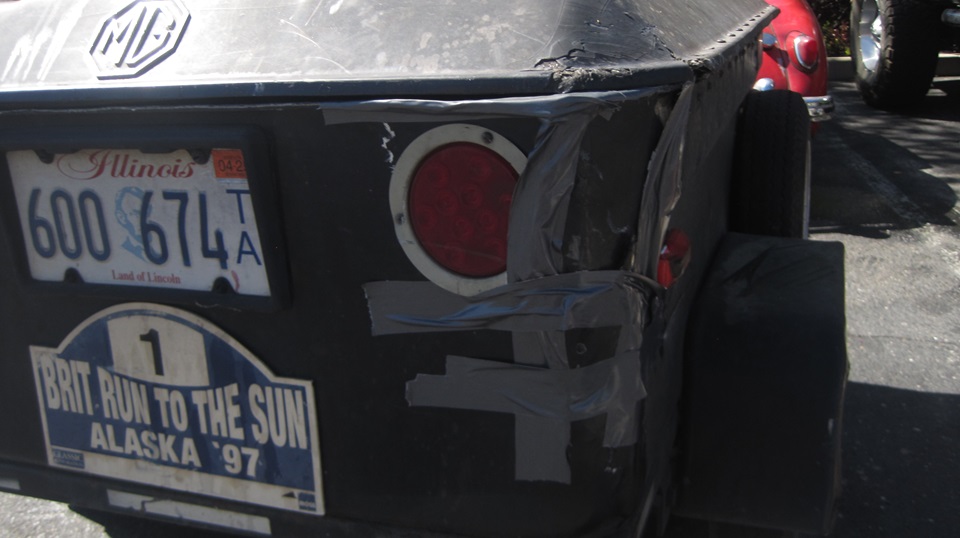
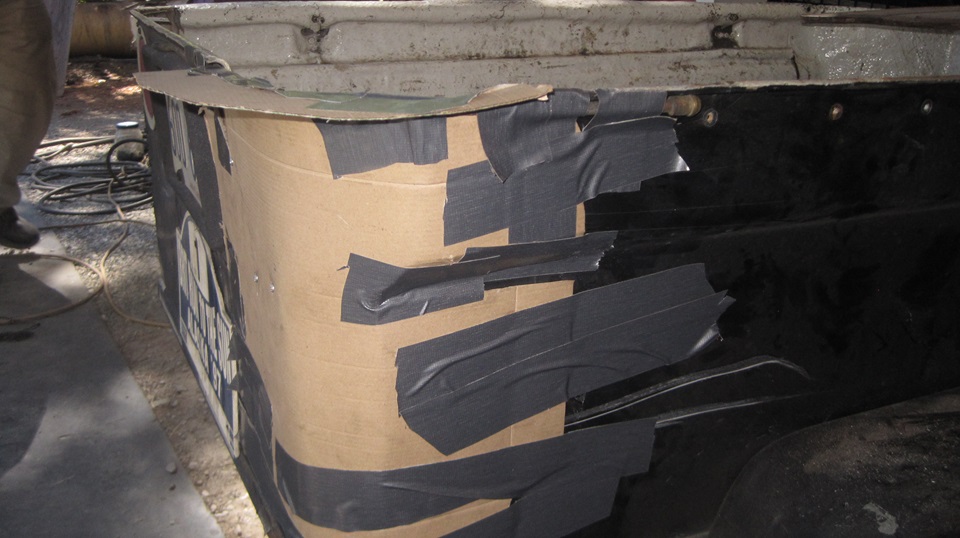
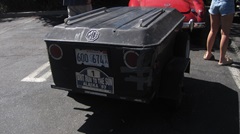
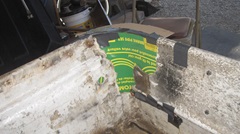
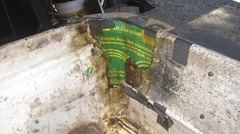
WiFi spotting out early afternoon, so we decided to go to McD for lunch. Minding our own business when someone smashed our trailer in the parking lot (again). Crap,we didn't get it fixed since the last time it got hit eight weeks ago. Grrrrr. Okay,get all the pertinent paper work information, and tape it back together with Duck Tape well enough to be street legal. Going to be a job for tomorrow I suppose.


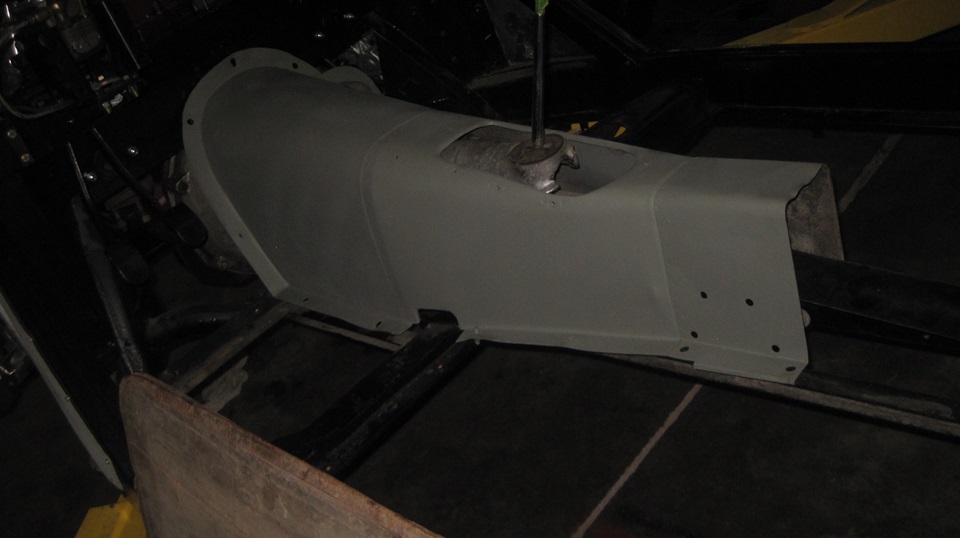
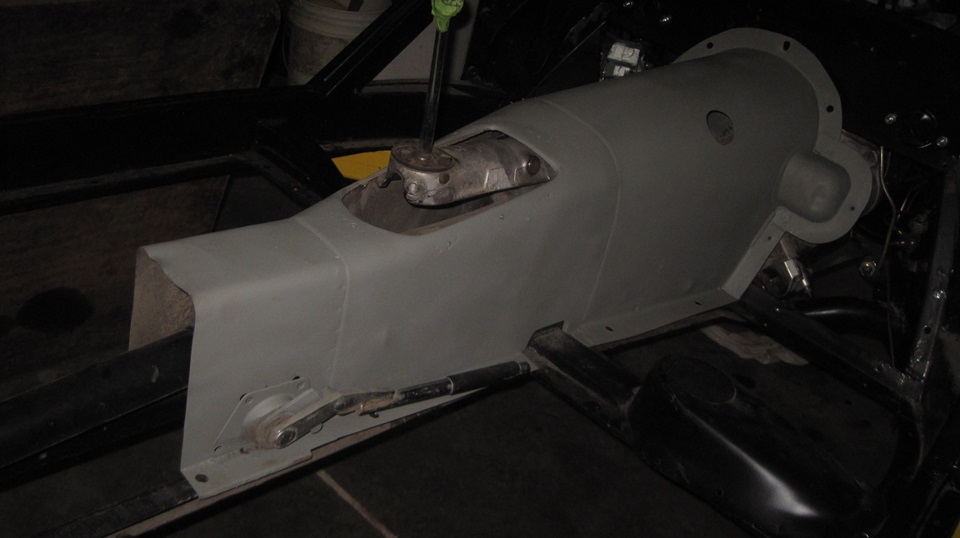
Back at the shop, there was the fuel tank and straps sitting inside. Stu had been working on blasting and priming the tunnel parts. This could be intereting, seeing if he can figure out how to make the MGA tunnel fit over the MGB 4-synchro gearbox.


Thursday August 15, 2024:
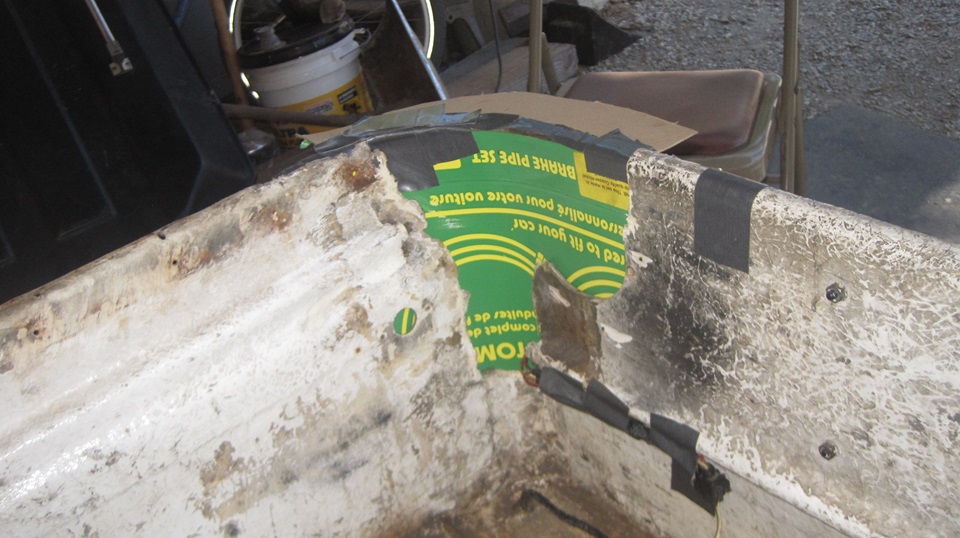
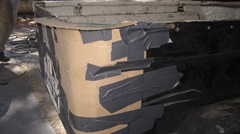
Early start, empty the trailer, remove a bunch of #10 screws from the piano hinge to remove the cover. Remove lots of broken fiberglass from the right rear corner, remove the tail light, tape back some electrical wiring. Cut to fit and tape up some cardboard around the outside to hold the form for the right rear corner, mirror image of the left rear corner. You might notice in the first picture below a piece of 5/16-inch fuel line pipe formed around the corner just below the top flange. That was bent around the LR corner for pattern, then flipped over to serve as a mirror image guide for shape of the RR corner. Being taped in place, it also provides a level surface reference for the top flange that also needs to be re-created. -- Cut some 1-1/2-inch wide strips of fiberglass cloth, mix up some resin, and paint in the first layer of fiberglass to cover and fill all of the open edges inside.That was setting up nicely by sundown. Will do more layers in the morning.
|