The MGA With An Attitude
| MGAguru.com |
|
MGAguru.com |
MGA Guru Is GOING MOBILE - (September 1 - September 15, 2024)
Sunday - September 1, 2024
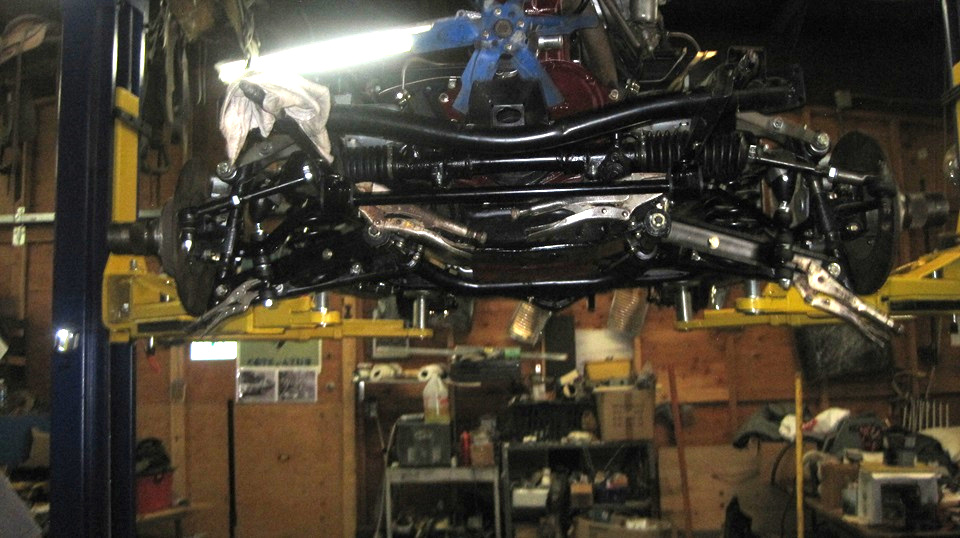
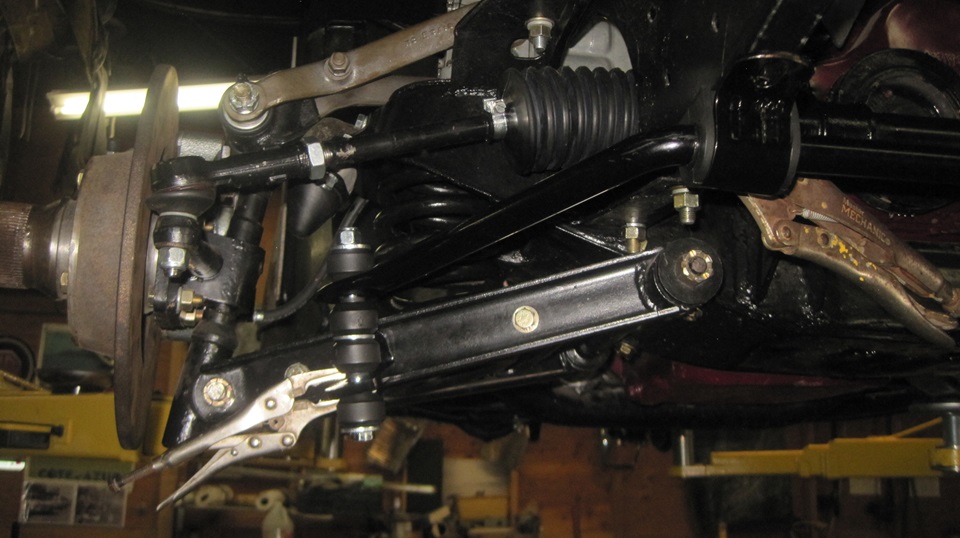
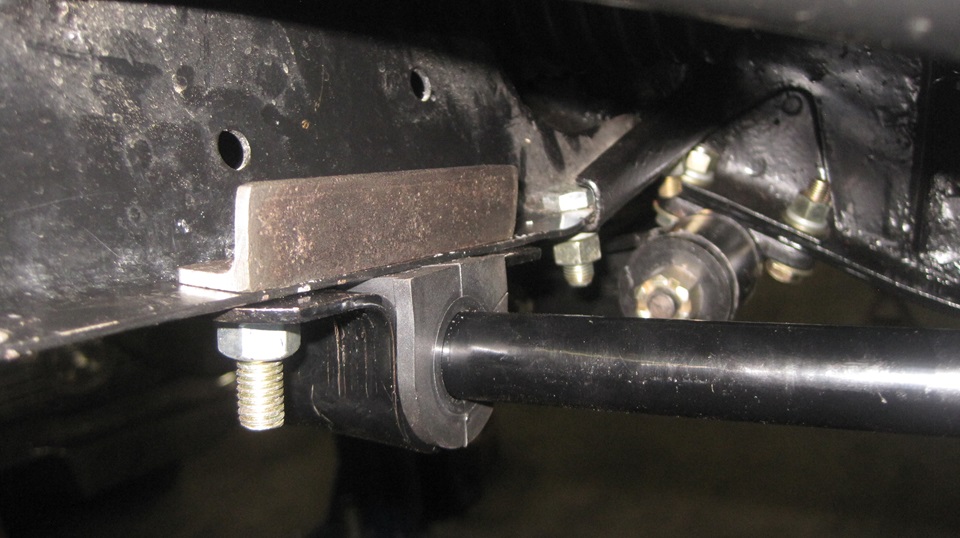
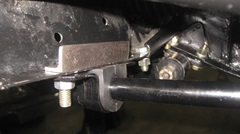
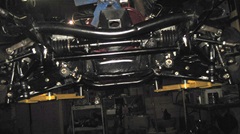
Now that the front face of the suspension looks like all MGA 1500 style parts, the Addco sway bar kit should bolt right on as intended. Start by assembling all of the parts together on the work bench (or on the floor), but off the car. Then offer up the assembly to the car, hold it in place, and position all of the parts in proper alignment. From there is is essentially drill six holes and install the fasteners. This is what I clearly remember doing 37 years ago, in about 30 minutes start to finish. Here we have four Vice-Grip for assistance, two holding the sway bar frame mount bushings, and two holding the end link brackets in the lower A-arms.
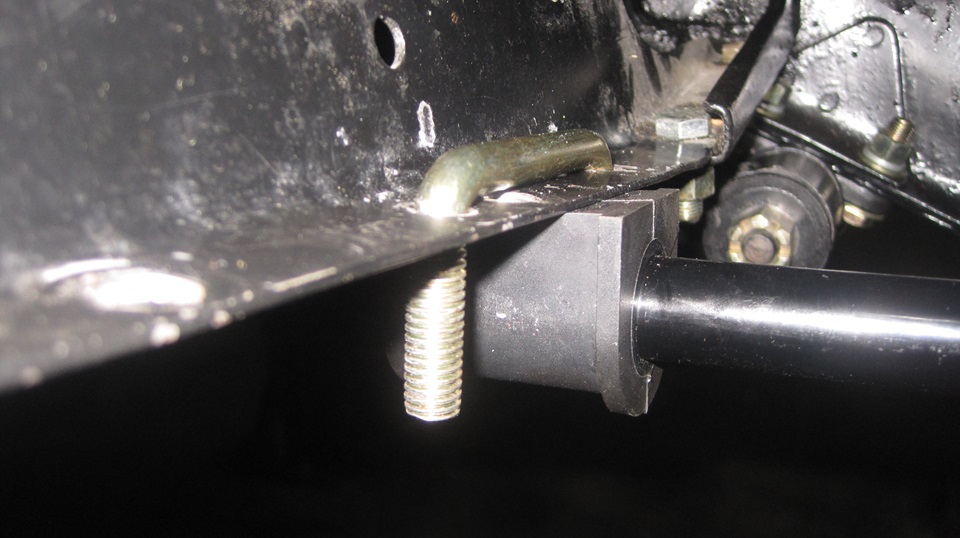
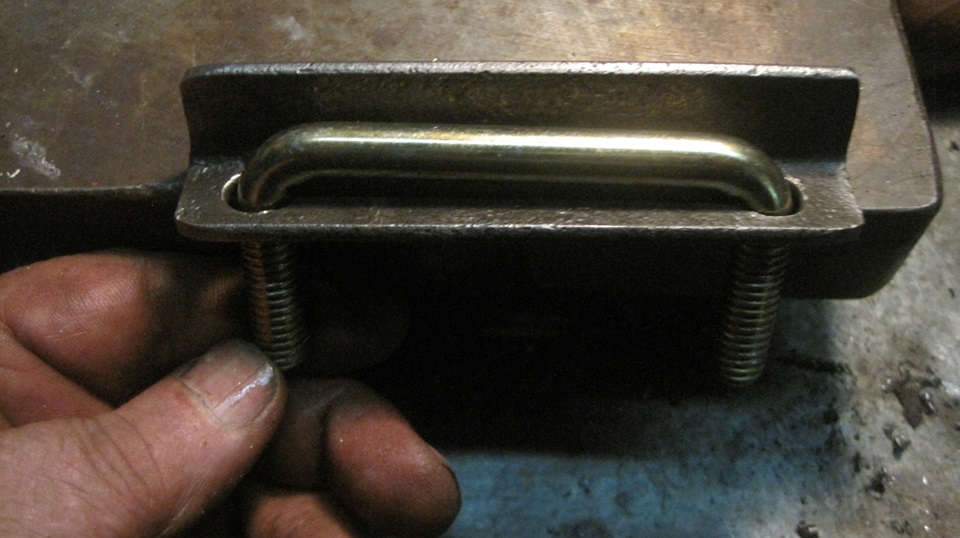
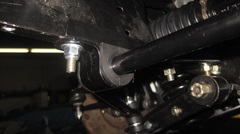
Then I have bit of an issue with the Addco design, with a solution gained by experience with competition driving back in the 90's. Addco uses a square U-bolt to attach the big bushing bracket to the frame, drill two holes and drop it in. The problem is, where the round shank of the U-bolt bears against the frame sheet metal, there is narrow line contact near the hole that makes a nasty stress riser point. After a couple years of vigorous driving, the lower flange of the front frame extension was developing stress cracks under that U-bolt,so the frame needs reinforcing at that point. My suggestion is a piece of 3/4-inch angle iron 4-inches long with two 3/8-inch clearance holes(13/32") drilled 3-inches apart.

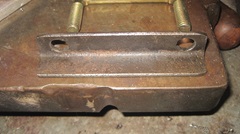

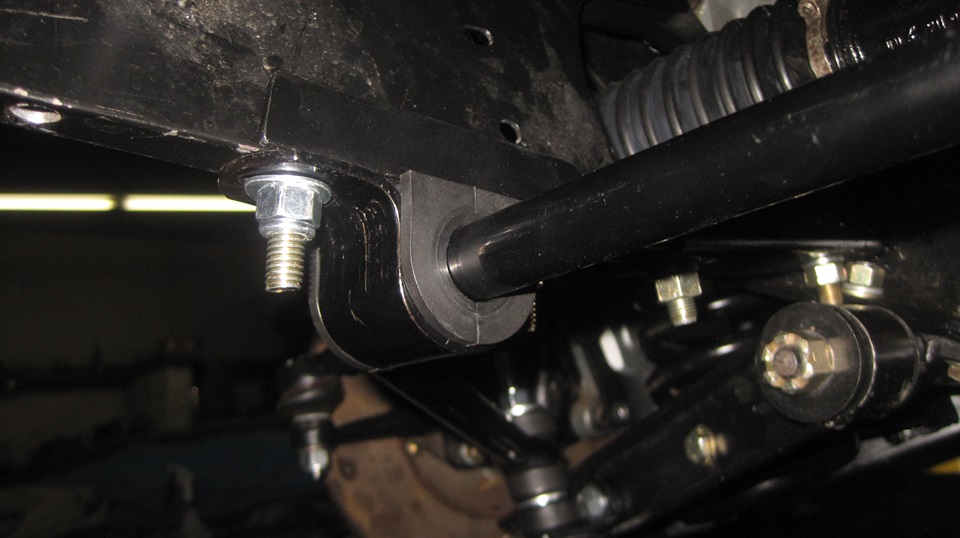
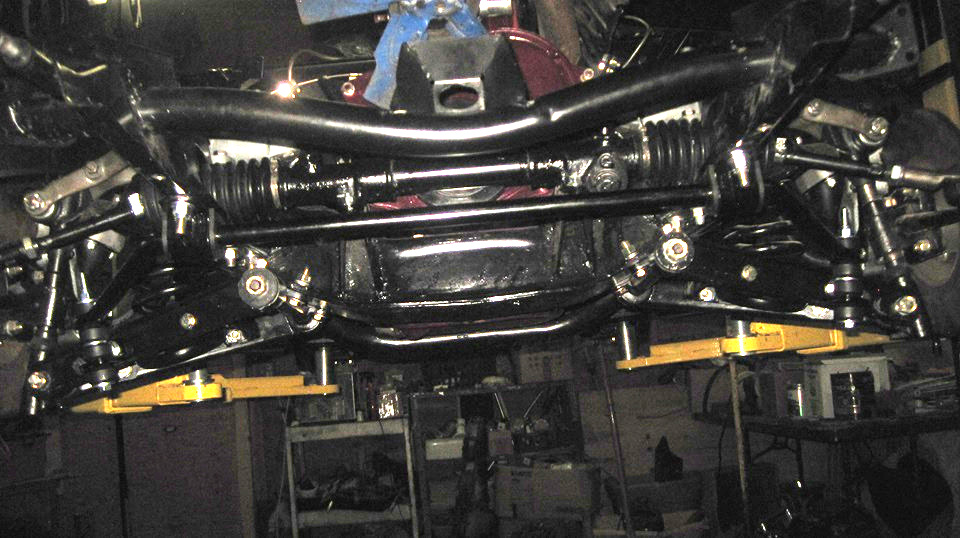
Here is the test fit to the chassis, followed by making three more identical parts, cleaning, priming, painting,drying,and bolting two of them into the chassis. The other two are for the next sway bar installation for Stu's daily driver MGA, which should be happening very soon. We also drilled one hole in the lower A-arm left and right, and installed the last two bolts to attach the lower link bracket. That's it, finished installation with six holes two u-bolts, and two more bolts in the A-arms.
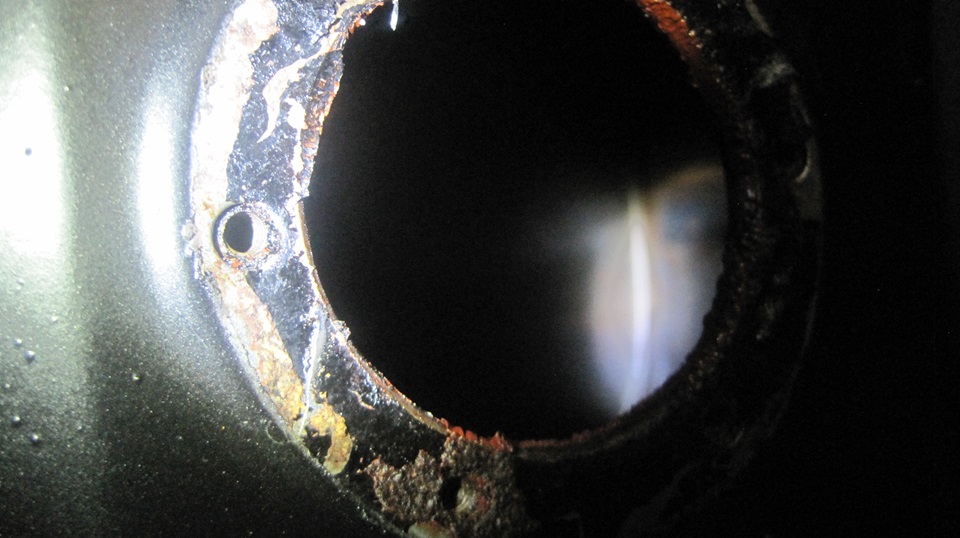
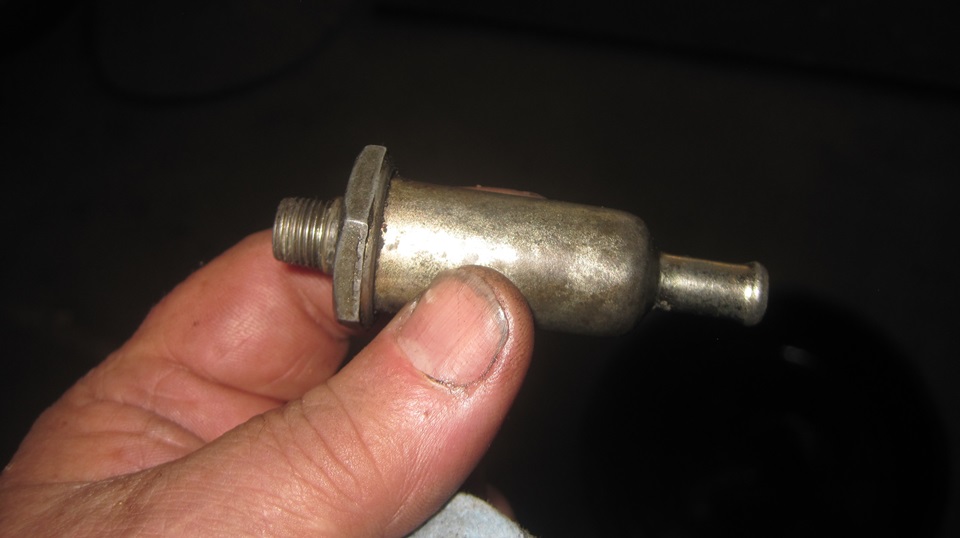
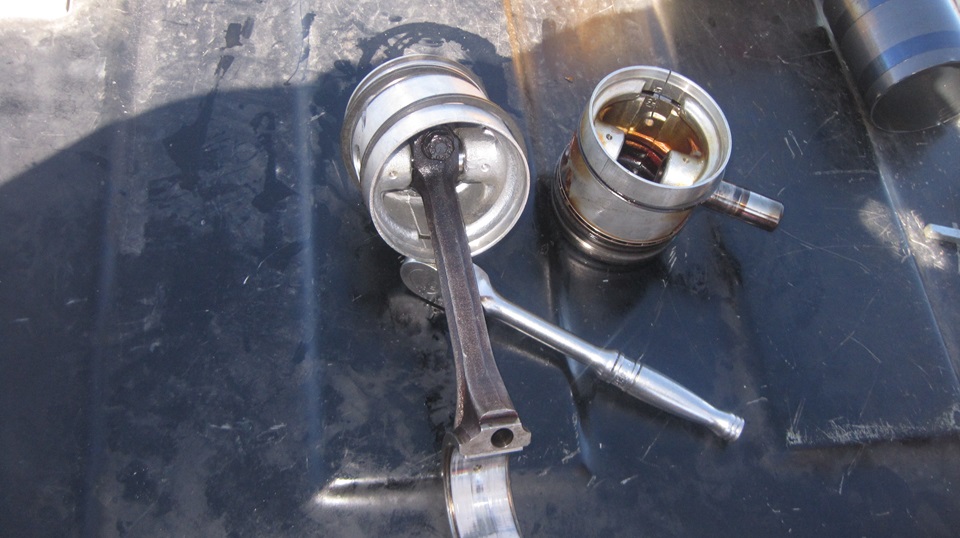
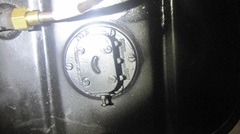
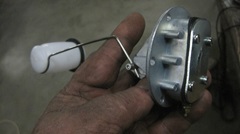
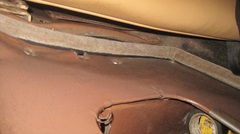
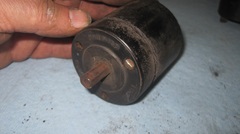
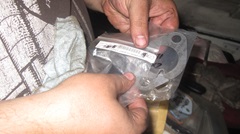
Getting on to late evening, navigator suggested it could be a good time to change the fuel level sending unit in the rolling chassis. I recon Stu had measured open circuit there some time back, and bought a new sender unit. Out of curiosity I wanted to check condition of the old one, and see if it could be saved, maybe. The original screws were rather tight, but they did come out without damage, good to be reused. No gasket. The last person (or two) here had used something like Indian Head Gasket Shellac (that stuff is still around ), and then too much RTV goop, but it would clean up okay. The float arm was tight, would not move by hand, let lone gravity. When I removed the electrical cover I was pleasantly surprised to find it very clean inside. Likely the cover had never been removed. Now encouraged, I soaked the arm pivot with penetration oil, and it moved a little with a good push. So I partly filled the cavity with P-oil, and soon had the arm moving freely. -- the bottom terminal and internal resistance coil and twin wiper arms were a ll testing good electrically, and showing correct resistance, 0 top 80 ohms. Unfortunately there was no ground continuity from the wiper arms to the case. One could solder in a flexible ground wire from the arm or shaft to the case, but that would require R&R of the terminal post and wire wound bobbin for better internal access. Too much fiddly time for now, so we set it aside and opted to install the new sender unit.
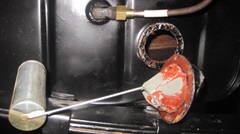

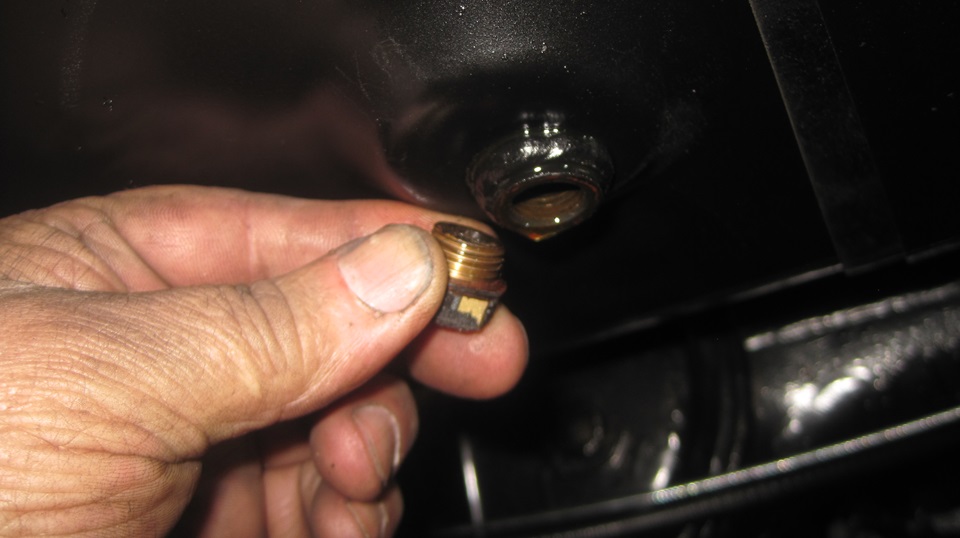
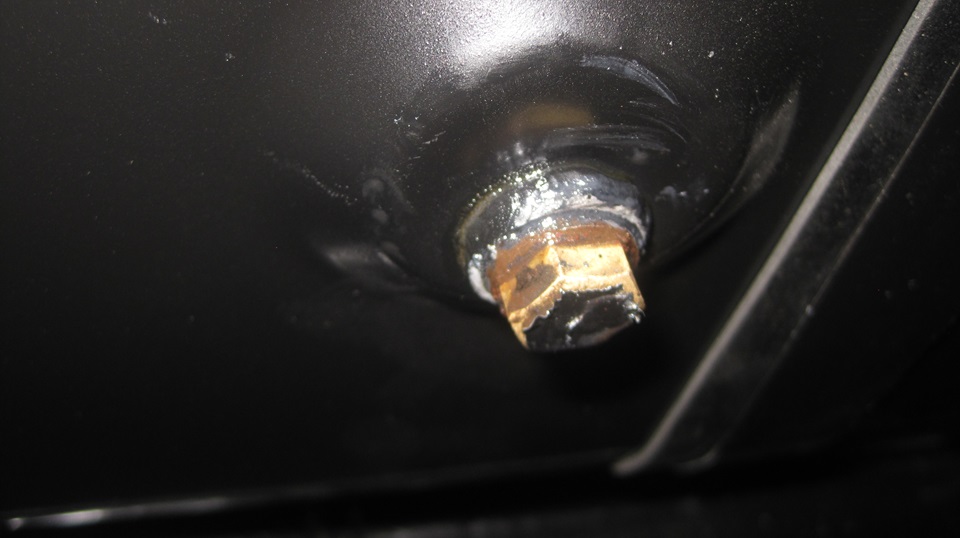
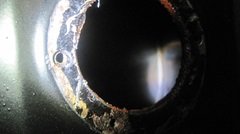
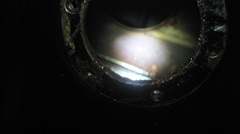
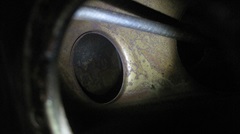
The tank looked pretty good inside, some minor surface rust but no serious corrosion or pitting. Even after sand blasting and painting the outside, and rolling it around to dump out as much fluid as possible, there was still some evil turpentine smelling stale juice in there. So we pulled the bottom plug just long enough to drain the remains.


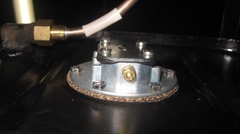
The new Moss Motors Classic Gold sender measured good 0 to 80 ohms with smooth transition as it should. We have had good service with these in recent years. The Moss "Premium Viton" gasket ($3.99 please) that came withe the new sender unit is a no-go in my book, because oversize clearance holes allow fuel to leak through the threads and drip off the screw heads. The Moss solution for this issue is to sell you a set of six nylon washers to place under the screw heads to stop the leaks. I suppose it will work, but why? The traditional cork gasket ($0.49 thank you) has slightly undersized screw holes (as original factory issue), so you push the screws through the gasket. When tightened, the cork squashes and constricts on the screws with no leaks and no sealant required. When tightening the screws it is easy to see the cork gasket squishing out around the sides while as it is constricting on the screws. I recon $0.49 cork wins on all counts.


Monday - September 2, 2024
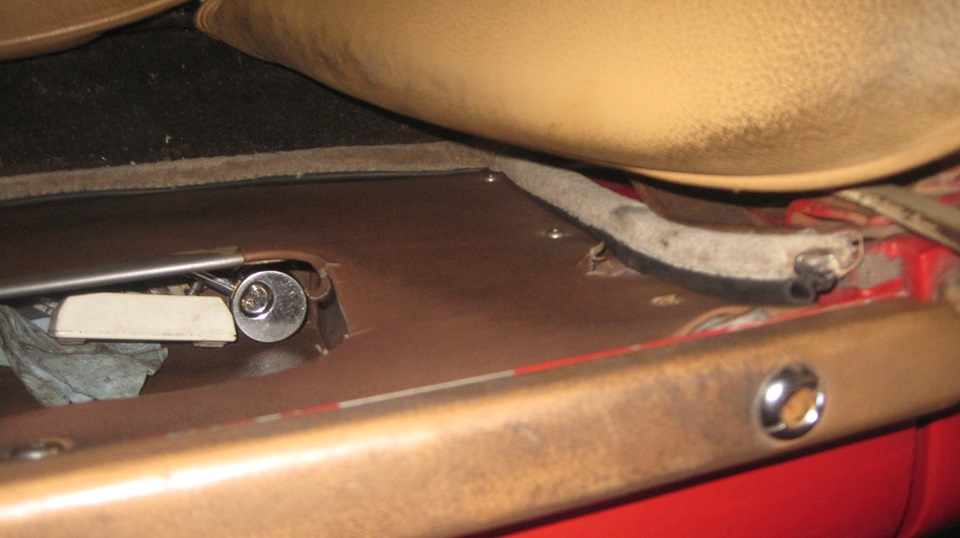
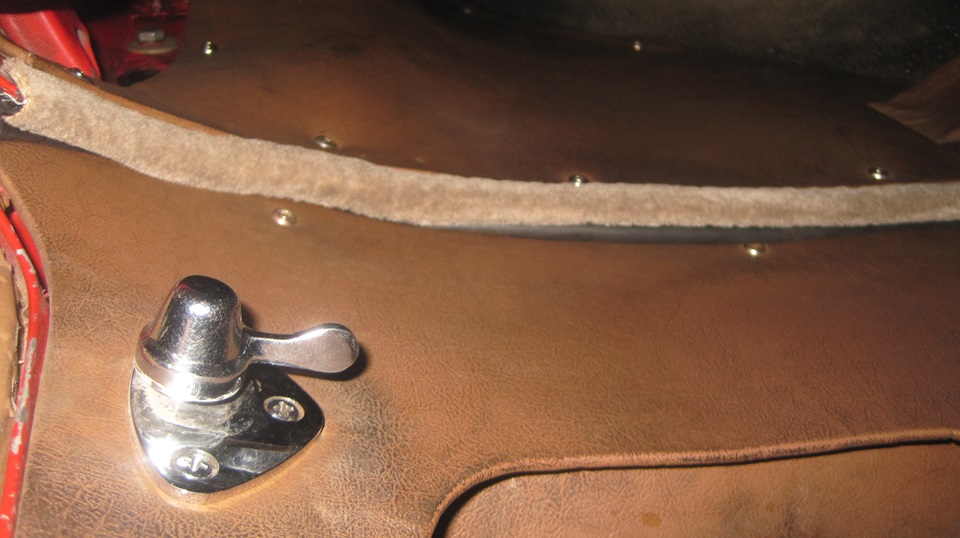
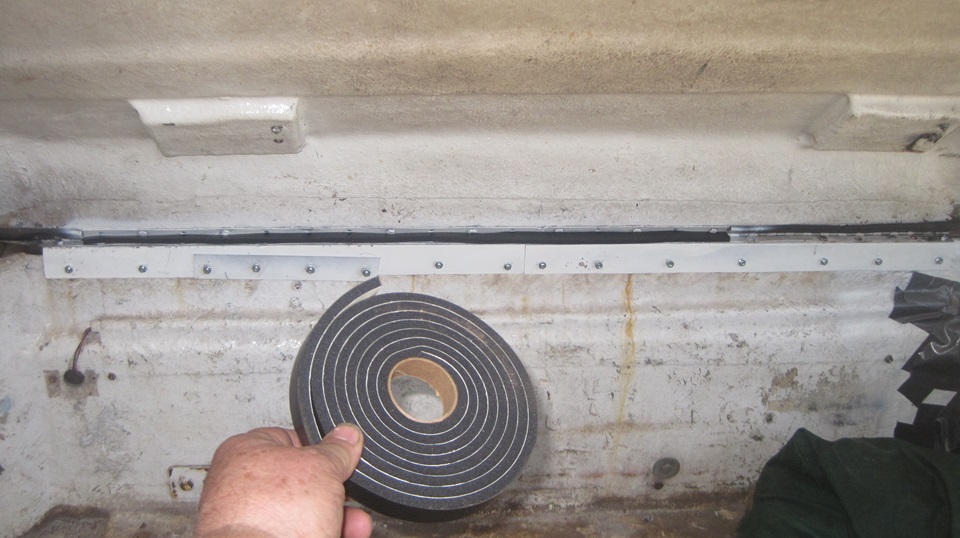
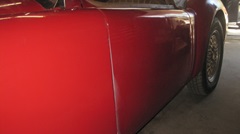
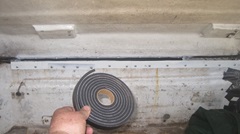
Labor Day holiday in the USA,all quiet here today. We must install our new door seals before we hit the road again, mostly because we don't want to carry the things around in the trailer any longer than necessary. Seals I had installed in 1986 from Moss Motors had a fat rubber tube on the outboard side that that horribly interfered with closing the doors, and would cause the door latches to pop open with bumps in the road. After fighting with those for 20 years and 200,000 miles I installed wonderful original style door seals from Clarke Spares And Restorations, Those had an outboard foam rubber wing that fit around the outside perimeter of the door shell. This sealed perfectly while allowing closing the doors with one finger. 16 years and 300,000 miles more those seals had been abused enough to need replacing. Unfortunately Todd Clarke is no longer with us, and those parts are no longer available, so we have been muddling along with failed seals for a couple more years.

 The current new door seals were procured from Scarborough Faire. They are not as original issue seals, but we are hoping they will work well enough. The S/F door seals have a small rubber tube on the outboard side where there should be nothing in between the Furflex and the door trim panel. For sure it should not interfere as badly as the old Moss door seals, just hoping it will not prevent us from closing the doors, and the latches will not pop open with bumps in the road. This was another one of those miserable jobs where we were to busy to take pictures uintil it was finished. The current new door seals were procured from Scarborough Faire. They are not as original issue seals, but we are hoping they will work well enough. The S/F door seals have a small rubber tube on the outboard side where there should be nothing in between the Furflex and the door trim panel. For sure it should not interfere as badly as the old Moss door seals, just hoping it will not prevent us from closing the doors, and the latches will not pop open with bumps in the road. This was another one of those miserable jobs where we were to busy to take pictures uintil it was finished.
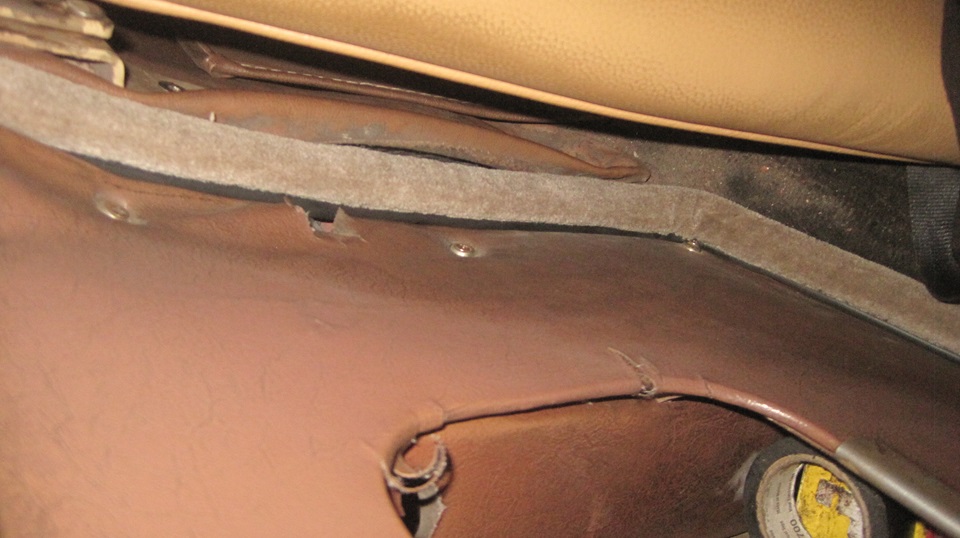
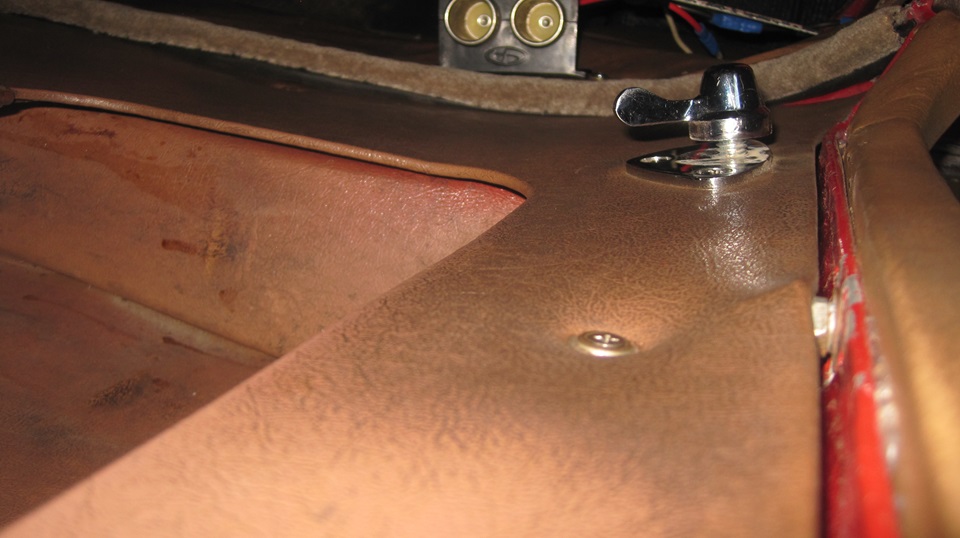
Installing these seals at front and rear sides of the door opening is relatively easy where the body flanges are only two layers of sheet metal. Along bottom of the door opening the sill flanges are three layers thick. making it substantially harder to press on the seal internal steel spine. At the square corkers it is near impossible, having to "break the back" of the steel gripping spine to open it enough to get over the body flange. Bending the seal assembly to the sharp corner twists and kinks the continuous steel spine. We were pulling the seal off to use a small screwdriver to open the steel spine a lot to get it installed. Then it would be widened and loose and not stay attached. Final fix there is to use a Vice-Grip locking pliers with 3-inch wide jaws (sheet metal benders) to squeeze the seal back together to be constant width and snug on the body flange again. As always, persistence (and enough creative swearing) ultimately pays off, so the deed was eventually finished. Then we got to take the pictures.

After fighting too hard on the passenger side, we removed the door on the driver side and reinstalled it after the door seal was finished. But that's okay, as we are by now pretty good at R&R of the doors using four hands and a power impact screwdriver. First time closing the doors we were very careful not to get the front post seal caught in some untenable position. It was moderately hard to slam the door to compress the rubber tube all around, but not half as hard as the old Moss seals with the fatter tube. When we did finally get things aligned and tightly closed, we swore an oath not to open the doors for at least 24 hours to hopefully let the rubber seal set so it might stay put and allow easier closing next time.


Tuesday - September 3, 2024
Still have things to do, so decided to skip the British Car Festival in Illinois next Sunday, and hang in here in California for a couple more days. Beginning to idle down, preparing to hit the road soon. Gave the MGA a lube job and changed the fuel filter. The filter was not badly restricted, but this would be good periodic service or preventative maintenance.


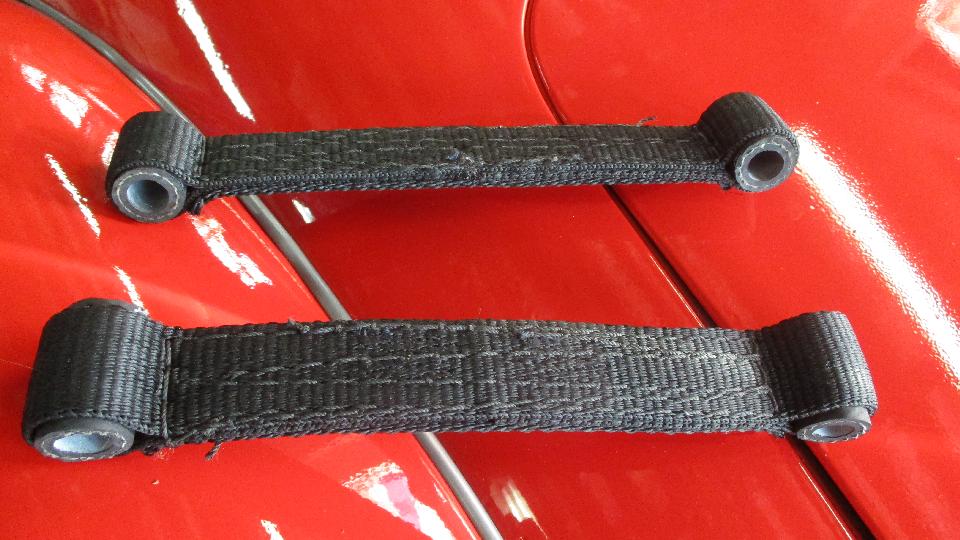
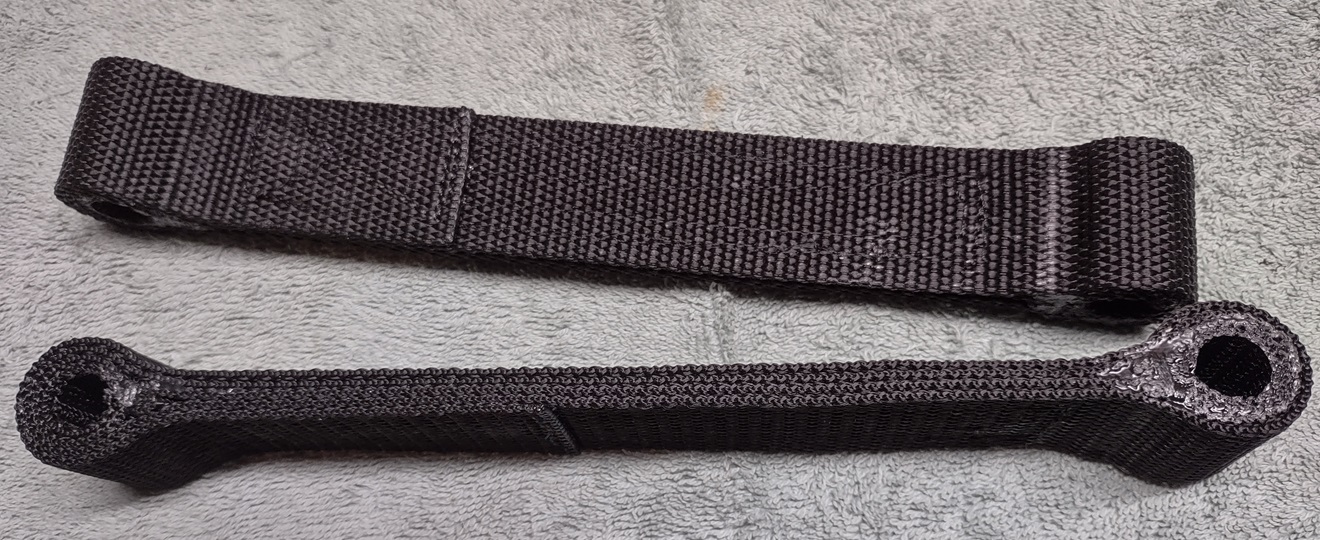
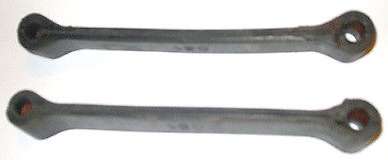
While we had the rear of the car jacked up and sitting on stands, for a reference point, we measured loaded length of the rebound
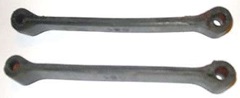
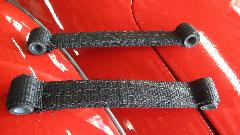 straps on our car. Picture at left is what they looked like when installed July 26, 2016. They were made with 1/2" truck air brake hose in the ends, 8-5/8" center to center, 8-3/4" as installed with initial settling stretch. Now 8-yr 2-mo and 197,500 miles on they are 9-1/4" pin to pin, so only 1/2" extension in 8 years.
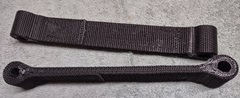 Picture at right is a new set made by Bob Shafto in 2019. These are 1-1/4" wide with four layers of Rayon in the center, stitched and glued for each layer. He will be sending these along to my brother's place in Indiana, where I should be picking them up in about a week. I think he has one more set that should be going to Stuart Mast here in California. Beyond that, I don't know who we can get to make more.
One last trip down the hill to the Post Office to mail return of the thin and narrow rebound straps, and pick up two more days worth of food and drinks. Tomorrow is Stu's return travel day, so I think we stay to chat with him on Thursday before we leave.
Wednesday - September 4, 2024
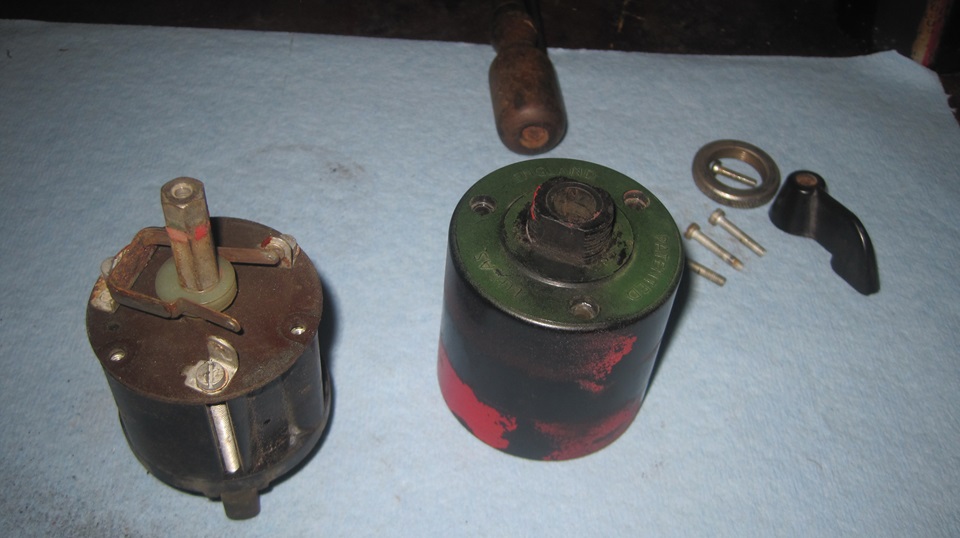
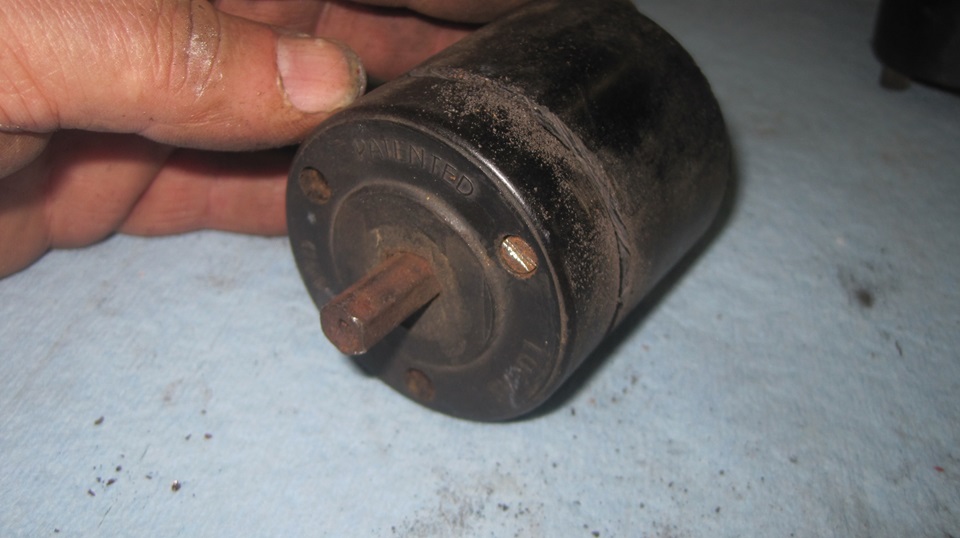
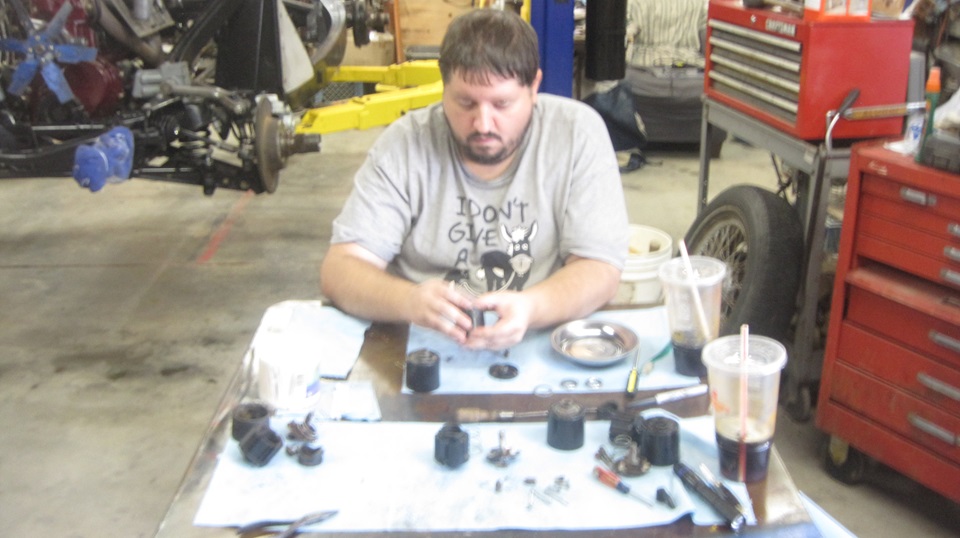
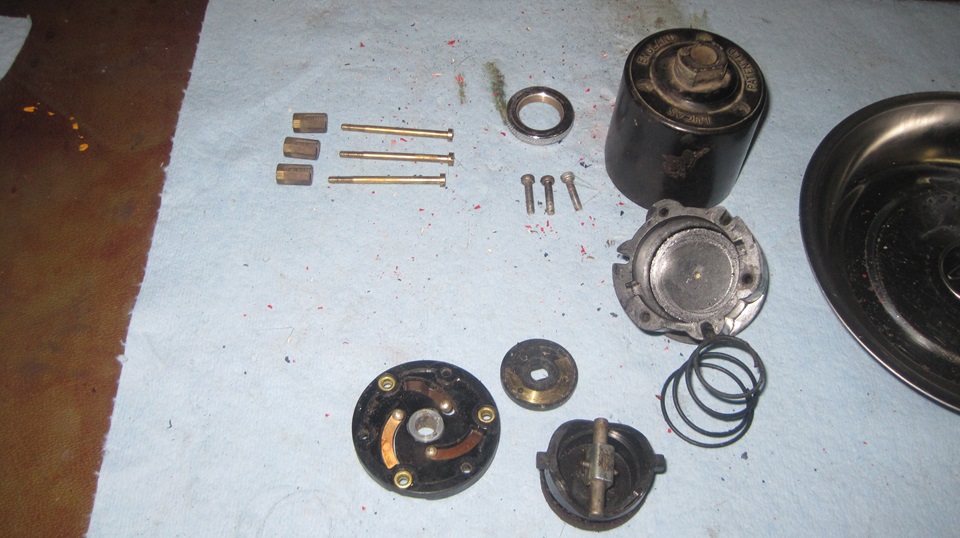
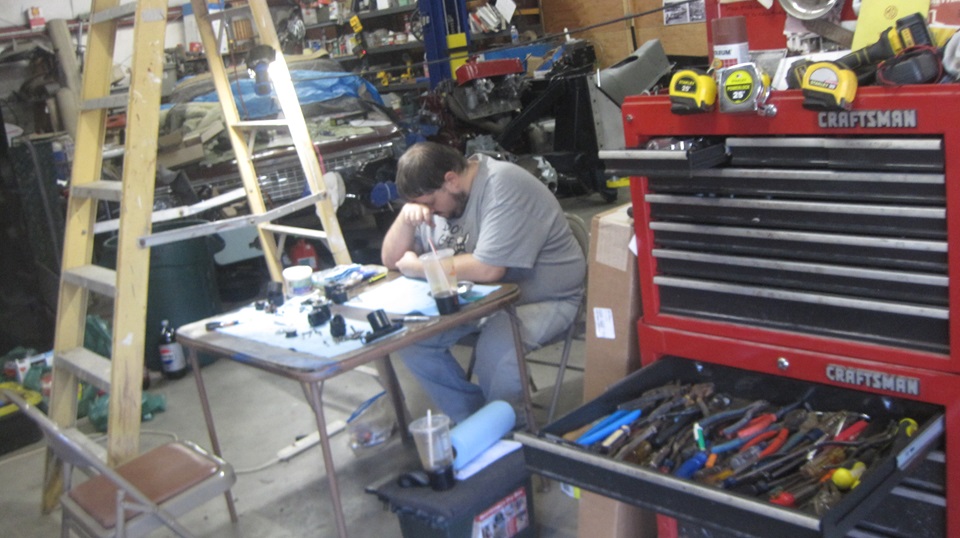
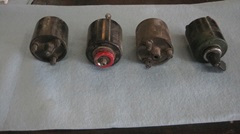
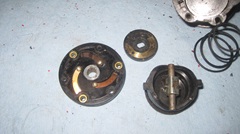
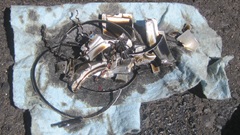
One last work day at Brice Station Vineyards and winery in Murphys, California. We will see what we can do with four non-working MGA time delay turn signal switches. Stu returned home from his eastern family visit trip just as we were getting started, but he had a doctor appointment and had to leave again, missing a lot of the following tinkering fun. -- Laid out at random, call them number1 1 to 4. the one on far right in the first picture is #1, the only one with an operating knob?handle,and the first to be disassembled. Remove the knob, bezel nut, three screws, and pull off the front cover. This one has the cam operated switch contacts with which I am most familiar. As long as the spring arms are not broken, these usually work okay electrically. In fact you almost never need to clean the contacts, because they have wiping contact motion and are generally self-cleaning.

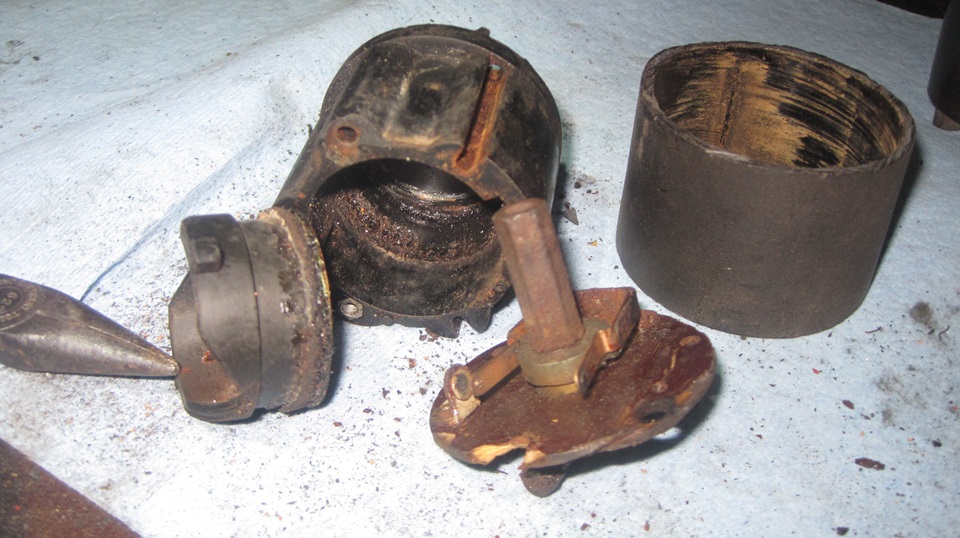
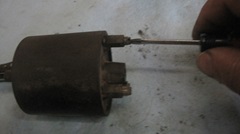
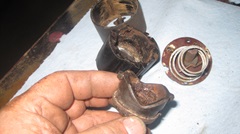
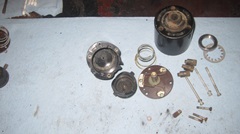
Next to open was #4, on left end of the line in first picture, because it was the dirtiest and might be the greatest challenge. The double-D threaded front mounting collar was also broken/missing, so the outer shell was trash regardless. Sure enough, the screws were stubborn, and one of the front three would turn but not unscrew. Apparently one of the small captive hex nuts inside was turning in the housing. So I( had at it with a hacksaw around the perimeter a half inch from the front, and proceeded to break up the outer shell for internal access. At least see how many parts we could save.

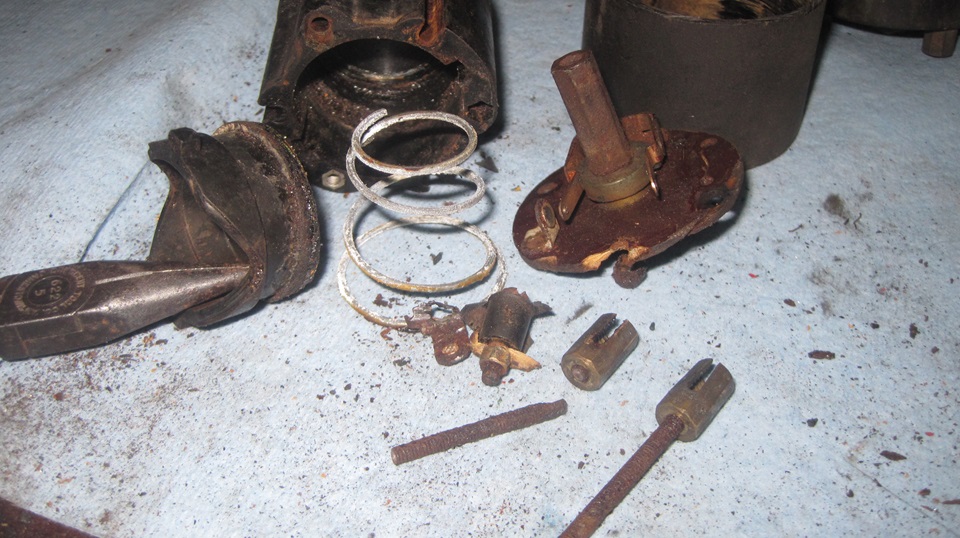
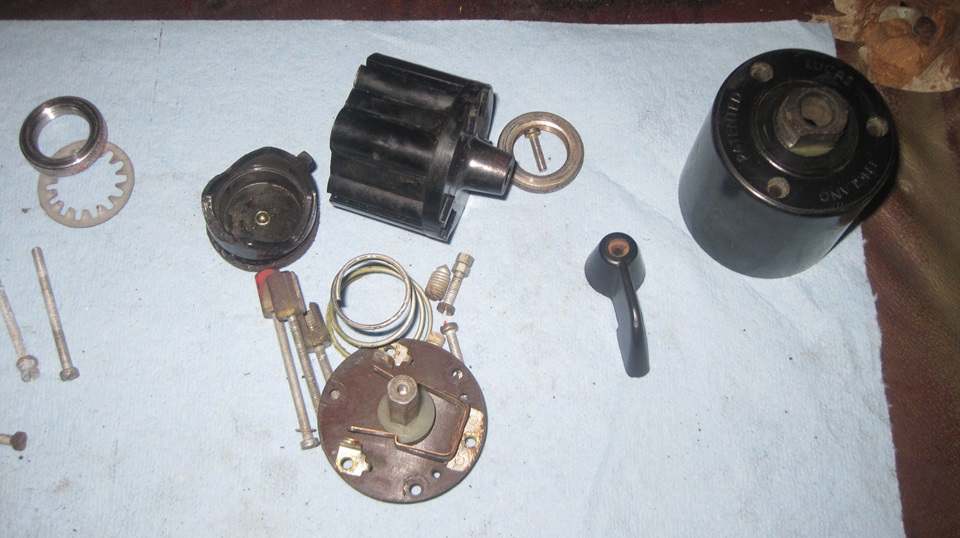
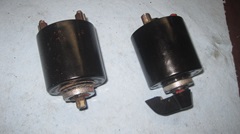
This one looked like it had been lying on its side in water for a long time. Two of the long screws were badly rusted and broke while trying to unscrew them. This left two if the rear wire terminal blocks useless with the broken screws inside. The leather seal cup was entirely disintegrated, which cannot be replaced without time consuming surgery, One of the electrical fixed contacts was broken away from the Phenolic plate, ruining the entire contact assembly. You might notice the wire connection blocks are hex shape rather than the more common square terminal blocks. so the rear of the housing has mating hex nests, so the rear housing and terminal blocks are not interchangeable with parts from another switch. There is another piston with a decent leather seal (below right), but we will save that for a different assembly. In the end, noting of switch #4 could be saved.


Disassembling switch #2 we found the vacuum piston to have a broken keying ear,rendering that piece trash, but the rest of the assembly seemed to be in good condition, so hang in there for a bit.

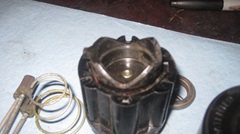

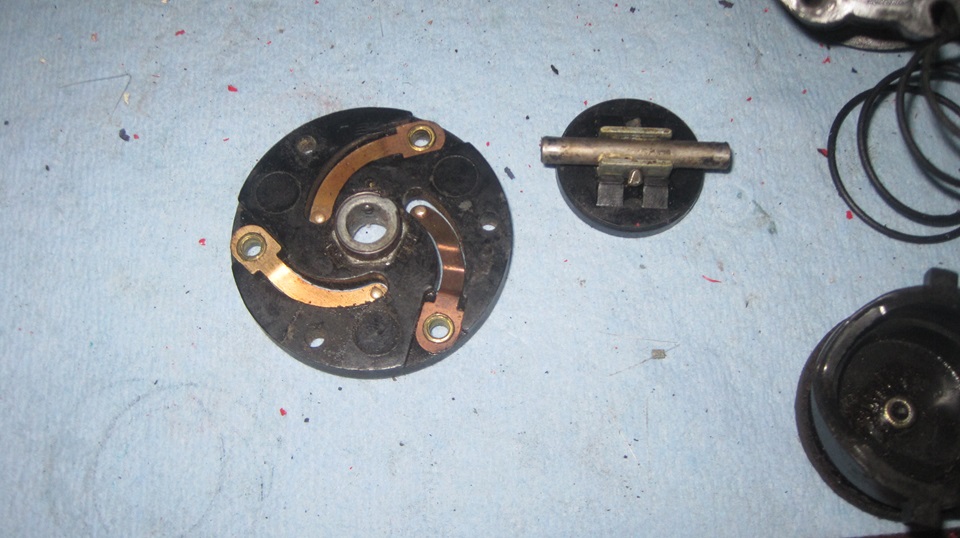
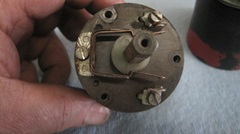
When we disassembled switch #3, we discovered it had a different contact arrangement with a rotary contact plate instead of being cam operated. It had the same style piston with a good leather seal which we could use elsewhere. The housing was okay, and could be interchangeable, except it had hex terminal blocks in back (like the junk #4). After due consideration, we thought we just didn't like the hex posts, so we wouldn't use that housing. The front shell had a counterbore inside to accommodate a different input actuator shaft. and the special input shaft was missing (not there when we disassembled it). Without the special input shaft, all of the rotary contact parts could not be used. Everything in the front of #3 with rotary contacts was different and incompatible with the more common style cam operated switches. So the only part we saved from #3 was the piston with good leather seal.
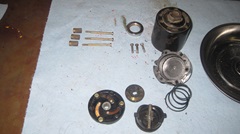

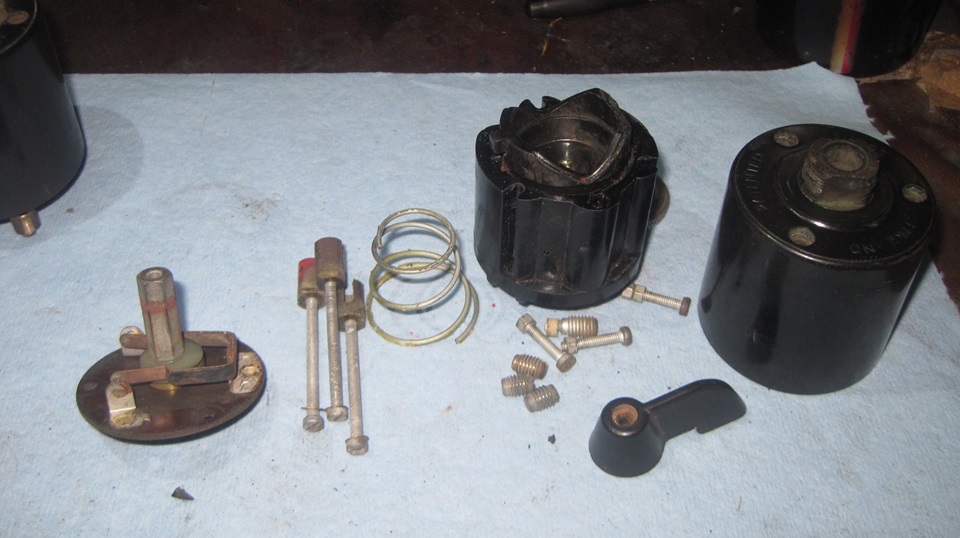
Stu came back about this time,bringing his brother along. There was a short pause for discussion before they again disappeared for dinner. -- After another 15 minutes of shuffling parts round, we had just enough parts to assemble two complete switches. Winners!


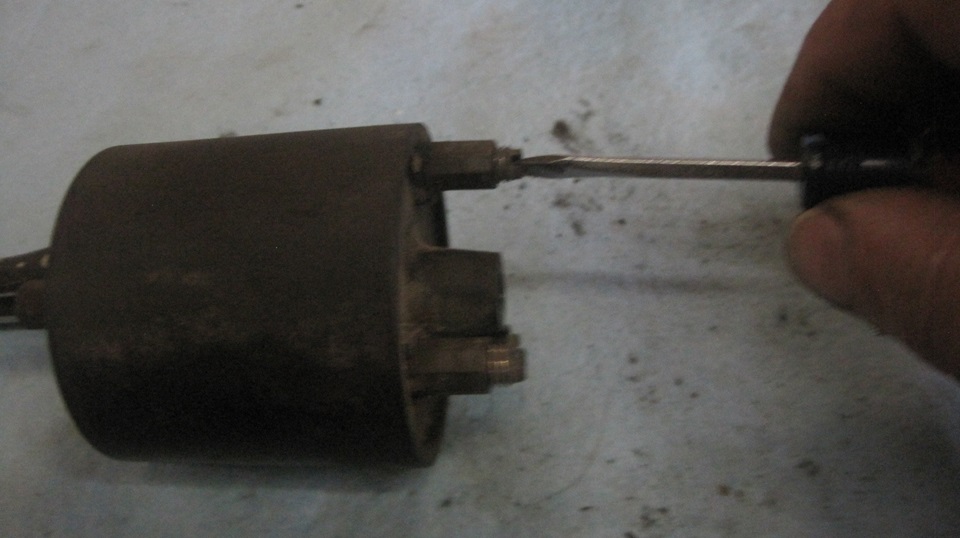
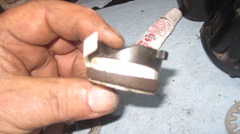
The key to making these pneumatic vacuum time-out switches work is to get a good vacuum seal between the leather cup and the ID of the housing. First clean out all of the old dried out grease, and make sure the leather seal cup has good flexible lip. Then apply silicone dielectric grease to the leather lip and to the inside of the housing. That lip is commonly worn or has taken a compression set, so it may or may not seal on the first try. With the spring behind the piston, push the piston full in with your thumb, and cover the bleed hole in back with your finger to seal it. Pull back your thumb, and the piston should stay depressed indefinitely, if it has good seal. Remove finger from the bleed port, and the piston should move freely forward.
 If the piston will not keep a seal to stay depressed, the solution is to insert a narrow strip of paper behind the leather lip. If the piston still doesn't seal, use thicker paper. If the piston sticks and does not return, use thinner paper. Cereal box cardboard may be 0.018" thick. Waxed card box from freezer food may be 0.016" thick. A thin paper plate might be 0.010" thick, same as a Manila file folder. An index card (recipe card) is likely 0.008" thick. Printer paper or notebook paper is usually 0.003" thick. You get the idea.
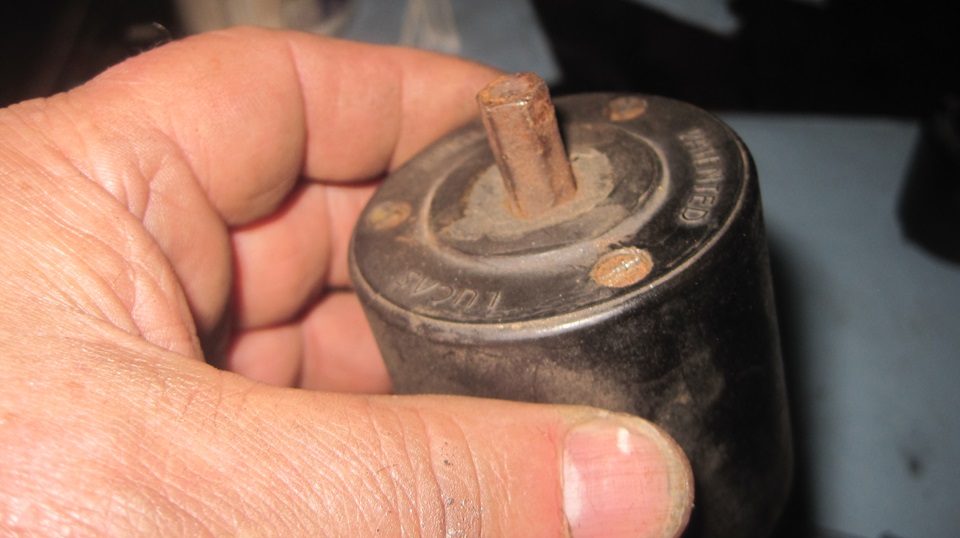
At rear of the switch there is an air bleed hole with a small felt pill covered by a pointed set screw. The set screw compresses the felt pill to regulate air leak back rate, controlling the time required for the piston to return and cancel the switch. If the felt pill is missing or compressed too much, you can replace it with a pinch of cotton from a cotton swab balled up and stuffed into the port before the set screw. A small amount of cotton makes it tricky to get the exact required screw adjustment. more cotton allows greater adjustment for the change of restriction, so easier to adjust. In the end you should aim for about 20 seconds delay before the switch will cancel.
 We have done this a lot, so by now it's old hat. In due time we had two switches working and cancelling and passing continuity test for the electrical contacts. Then just a matter of rime and patience to fiddle the bleed screws with successive cycles timing the canceling time-out until they would trip at about 20 seconds delay. Then a few more hours to process all the photos and post the notes for you to be reading this. -- Enjoy.
Thursday - September 5, 2024
 Departure day. Spend an hour chatting with Stu about state of the rolling chassis and what needs to be done going forward. Installed a foam rubber seal strip in the piano hinge on the trailer cover. One thing planned but not done was to repair another defunct analog temperature gauge,but not critical or urgent, so that can wait a while longer. Time to clean up the shop space, pack up the tools and trailer and head east. Planning to be on the other side of Ebbets Pass in Nevada by evening. and should be back in Illinois by Wednesday.
Then Stu had to be somewhere else for a while, and came back later. We had some time to sit and chat some more, clean out the fridge, eat the last of the food, and finish packing the trailer. in the end we bailed out of Murphys, CA heading east at 6:30-pm, meaning we wouldn't clear Ebbets Pass before dark. the MG ran through the steep hills and tight switchbacks. like a champ, drove the last half hour through the trees after dark, and in just over two hours popped out of the pass into Minden, Nevada for a pit stop and fuel. Running well, feeling good, we continued on for another hour plus to a Love's travel stop on I-80 in Fernley, NV for late dinner. From here, about 1850 miles on I-80 (boring?) to northeast Illinois. We will not be there by Sunday for the British Car Festival,but we should make the Wednesday Night Garage Club by Wednesday.
Friday - September 6, 2024

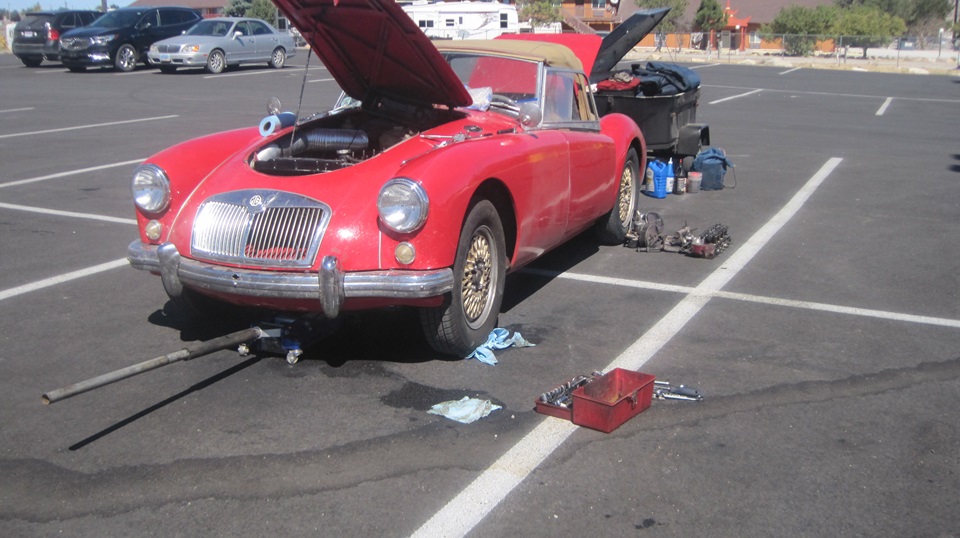
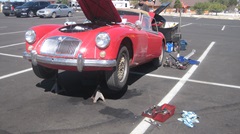
Off to a good start. Early breakfast and head east on I-80. One tank of fuel down, mid day fuel stop at Valmy NV (wow, expensive fuel here), and continue on. Another half tank down, time for late lunch at Loves/McD in Wells, NV, and might as well top up the tank were the price is reasonable. As we pull off the expressway and roll in at idle speed, we notice an engine knock and low oil pressure. What? This is new, and a complete surprise. the car has been running perfectly with 50-60 psi oil pressure at road speed and 40-psi at idle with hot oil. Now we have a knock on #1 cylinder. Pull off the #1 spark wire and the knock goes away. Damn. Last November the engine was out for machining to sleeve two cylinders, and in the process getting new rings, all new main and rod bearings, new oil pump and pick-up screen. It has been doing well for nine months and 15,000 miles, so this knock is total mystery, just shouldn't happen. Maybe oil pressure is not too bad, just showing kind of low at slow idle with hot oil right off the expressway. Oil level was more than a quart low after 135 miles, which is also a concern. Low oil level contributes to high oil temperature and lower idle oil pressure. As soon as we topped it up with fresh cool oil the oil pressure looked near normal.
Quick situational analysis, small fuel stop town in the desert, one NAPA store that cannot get the parts we need, no work space facilities, so we don't want to pull the engine out of the car. Doing triage with a time limit.Most expedient plan is to express deliver new rod bearings, drop the oil pan to replace at least #1 rod bearing, inspect the crankshaft, hoping it is still good enough not to eat a new rod bearing right away,and see how far we can carry on. immediate hitch in the plan is being 4:30-pm Pacific time, it is after hours for ordering parts, and it is Friday, so we likely cannot order parts until Monday, and next next day delivery in the dessert is likely to be 2 or 3 days. The Moss Motors is definitely closed for the weekend, cannot ship until Monday. On the outside chance, I called Scarborough Faire in Rhode Island, three time zones to the east, and someone answered the phone at 8:30-pm EST. Really. I explained the situation, and they had the rod bearings in the correct size, but too late to ship by the common carriers. However, They have access to USPS mail drop at a local McDonald's drive-up window open until 10-pm. Wow. Give it your best shot, and we will deal with what ever happens.
Saturday - September 7, 2024
Morning reality check. Must be a miracle, they got the parts packaged and labeled and dropped off just before 10:00-pm Friday night, and we have a USPS Priority Mail Express tracking number. The delivery address is the truck stop street address, and no local mail delivery in Wells, NV, everyone has to pick up mail at the Post Office, and the PO is closed on weekends. I hope it does not "Return To Sender" because it is not deliverable. I called the Post Office, and fortunately someone answered the phone. Yes the door is closed, but some administrator was there, likely the Postmaster. I explained the situation, and gave them the tracking number. They assure me the package will be there first thing Monday morning, they will keep an eye out for the express package and will hold it for pickup. Oh, goody. USPS Express Mail is indeed one business day, in this case probably one day better than the common carriers Next Day Air service to a remote area. Relax and take the weekend off.
Sunday - September 8, 2024
Worrying won't help. Relax and enjoy the day off.
Monday - September 9, 2024
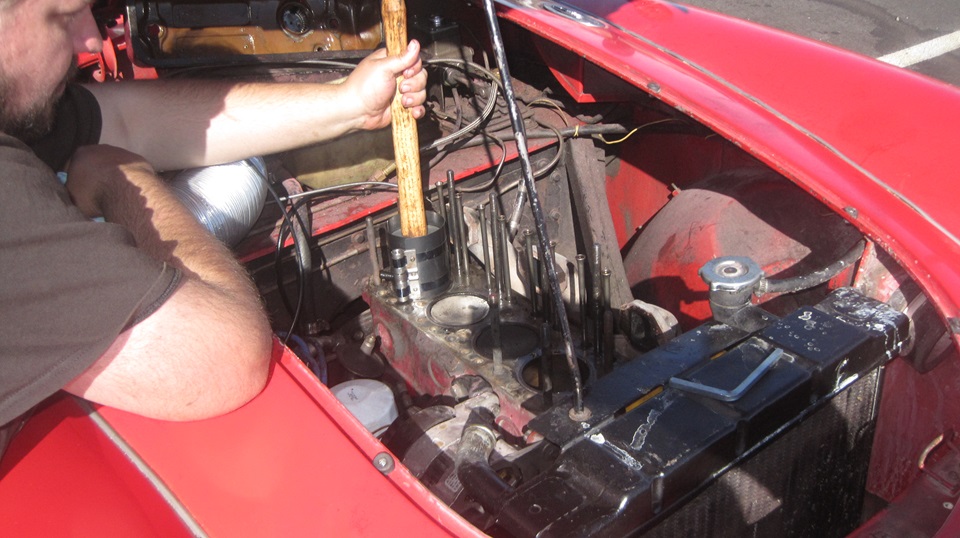
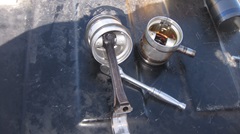
Up for breakfast, keep an eye on the clock. At 9-am, remove #1 spark plug, on general principals, drive on three cylinders with no
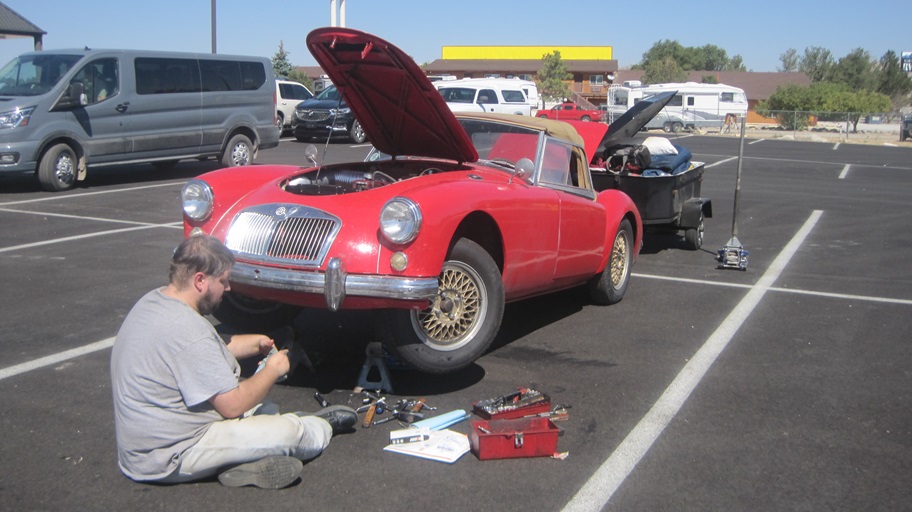
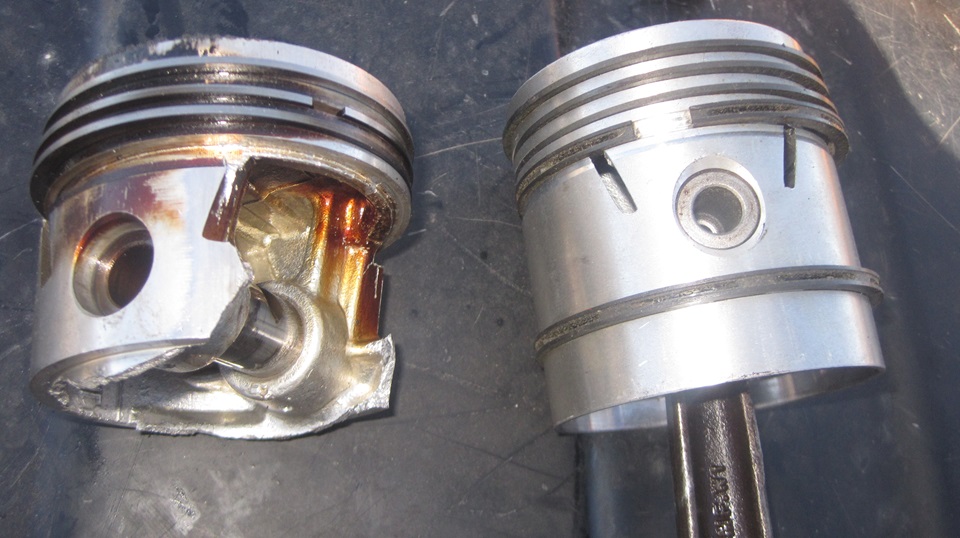
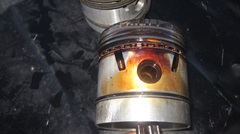
 compression on #1. Kind of noisy and slow, but it runs okay on three. Mile and a half away, pick up the package with rod bearings at the P.O. Casual question, friendly advice, find a clean parking lot at the grocery store next to the Napa just around the block. Jack it up best we can, remove oil filter, drain oil, and proceed to remove the sump. We did remove the #1 rod bearing for inspection, nothing wrong there, but install a new one and keep the old one with the new set. -- Looking farther up, we found #1 piston is broken. Oops. BTDT, getting more PO'd about repeated broken cast aluminum pistons. Been thinking for many years that I would like to have forged pistons, but it has never been convenient. Maybe now would be a good time to make it happen.
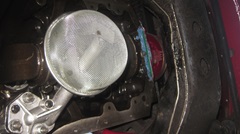
 Here is the stuff we fished out of the sump. A few pieces of piston skirt, broken one-piece iron #5 oil wiper ring, broken 3-piece #4 oil wiper ring, no trace of the top three 1-piece compression rings. The piston crown down to and including the thick metal around the wrist pin seems to be in tact. Remember it was running well when we drove in, except for the knock. Oil consumption would be a result of the broken oil wiper rings, while the knock would be "piston slap" due to part of the skirt missing. We wouldn't want to drive it much farther with the broken piston skirt, at least not under power on #1. We did clean and reinstall the sump, filter, 4-quarts of fresh oil, and drove it back to the truck stop (with three spark plugs).
Now that we know what it is, panic mode is off, time for late lunch and consider some plan(s) of attack. There will be a small delay.
Tuesday - September 10, 2024
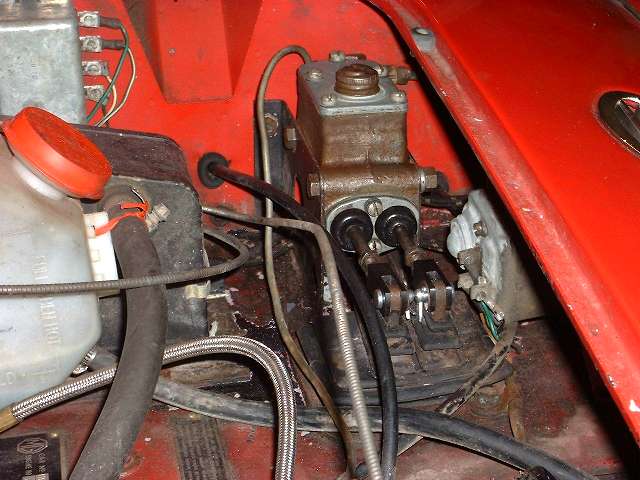
In response to a tech question (over breakfast) I posted a new tech page for Repacking/rebuilding the MGA master cylinder In Situ. the advantge there is that you don't have to disconnect the steel hydraulic pipes for clutch and brakes, which have difficult wrench access.
----
After due consideartion, in the evening I posted a note to tthe MGA forum looking for a good used MGA 1600 standard size piston.
Wednesday - September 11, 2024
Have had a few nibbles on the request for a good used 1600 Std piston, but nothing panned out. Okay, we can cancel the request. After some internet search and some phone calls, I thought we might get a good used one from Sports Car Craftsmen in Arvada, CO. They didn't have one, but they did have a set of 4 with rings, New Old Stock,for a reasonable discount. not afraid of ageing new parts (all metal), I'm sure they will be serviceable. Shipping USPS Priority Mail Express with a tracking number, to arrive here in the middle of nowhere come Friday for morning pick up at the post office, I hope). Day off tomorrow. Anticipating having the car back on the road late Friday. -- thanks to everyone for their consideration.
Thursday - September 12, 2024

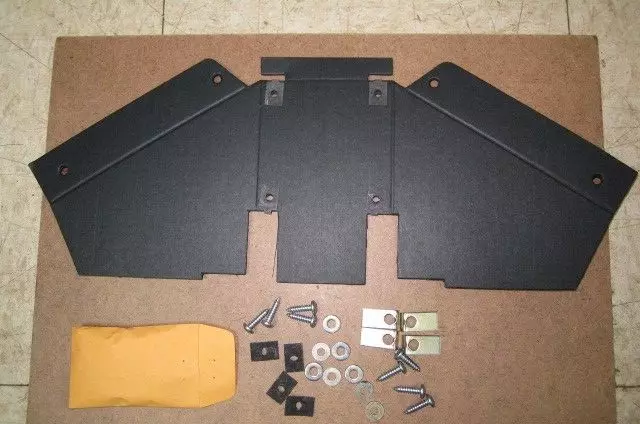
An interesting item on eBay today. This is an original style MGA radio speaker mounting kit, as manufactured by Todd Clarke, posted for sale on eBay by British Miles. this is the first Clarke Spares and Restorations item I have seen available since British Miles bought the business after Todd's demise. A few have been sold, 2-pieces (at least) remaining today. I suspect once inventory is depleted there will be no more produced. you might check the eBay vendor British Miles to see what else might be available. --- There are (or were) also a few New Old Stock MGA rear axle rebound straps, which I cannot find anywhere else (as original). I was about to download the pictures to post on a new tech page for original parts, but then I thought it might be a good idea to buy those parts while they were available, which I did. But then the ad and the pictures disppeared from eBay. Bummer. Now I guess I will have to wait for delivery to take my own pictures.
 While I was at it, this seemed like a good time to post a new Part Numbers tech page for the AHH5081 rebound strap. This page now includes notes on originality of the parts, warnings about faulty parts, and cross references to other tech pages related to rebound straps. Faulty straps seems to be a never ending problem that may never be fixed. All I can do (short of manufacturing good parts myself) is to spread the word to keep the public informed. While I was at it, this seemed like a good time to post a new Part Numbers tech page for the AHH5081 rebound strap. This page now includes notes on originality of the parts, warnings about faulty parts, and cross references to other tech pages related to rebound straps. Faulty straps seems to be a never ending problem that may never be fixed. All I can do (short of manufacturing good parts myself) is to spread the word to keep the public informed.
Had enough time to review the Polaris Dawn two-person spacewalk.
Friday - September 13, 2024
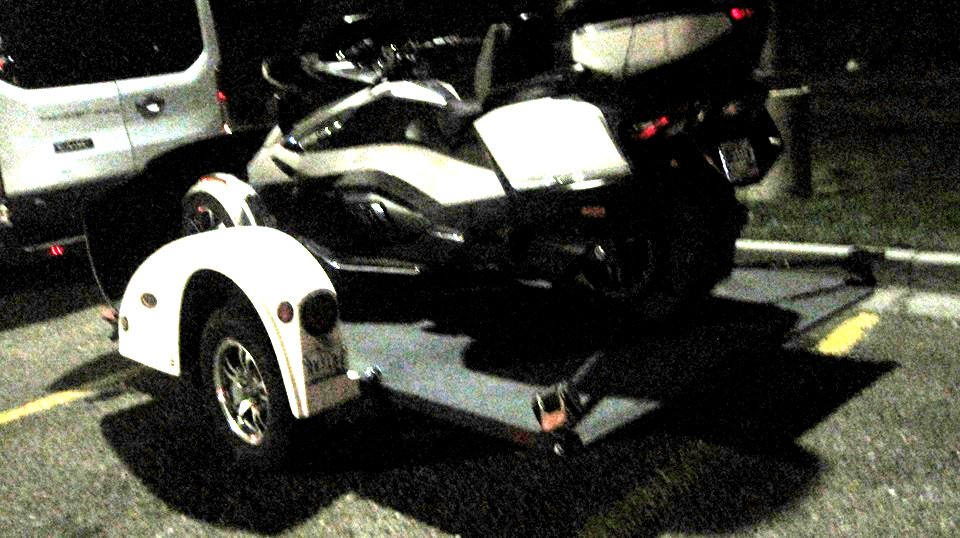
Saw this in the dark a minute after midnight. At first I thought it might be some vintage British sports car converted to a luggage trailer, but no. Turned out to be a modern large 3-wheel touring motorcycle on a matching flat bed trailer.


11:15am, tracking our postal express package. Last word was it was departing Denver yesterday morning, not yet noted as"Preparing for delivery", but still scheduled to arrive today before 6:00pm. I recon it's a long truck run on I-80 from Denver, CO to the Wells, NV post office, with stops in other towns along the way.
Two phone calls today. One from a guy Florida bought an MGA in the northeast, shipping it to Florida, inquiring about changing the windscreen glass. Second call from someone in Connecticut who spends winters in Florida, looking to buy a car in Michigan, wanting to know if we could stop in Michigan to inspect the car before purchase. We might do that (optimistically). Incidentally it would be an MGTD with a Mitsubishi engine (should be interesting).
Mid afternoon, getting concerned about lack of tracking information . Guessing the package should have bounced off of Salt Lake City last night. Called the local post office to inquire about closing time and possibilities. Yes it would likely make a stop in SLC, should have been on the way today, total mystery about delivery failure today and more mystery about lack of tracking info. Last word was it left Denver Thursday morning, then nothing. By 4:30pm it was certain the package would not be here today, but likely normal truck drop-off time may be 4:00am. If that does happen,then we could pick it up 9-11am Saturday. If not,then we may be stuck until Monday morning. Hurry up and wait.
Saturday - September 14, 2024
9;30am - Tracking says the package arrived this morning, one day late, but we can pick it up now. Car still running on three cylinders for a ew miles, pick up package with New Old Stock pistons, then around the block to the open parking lot in front of
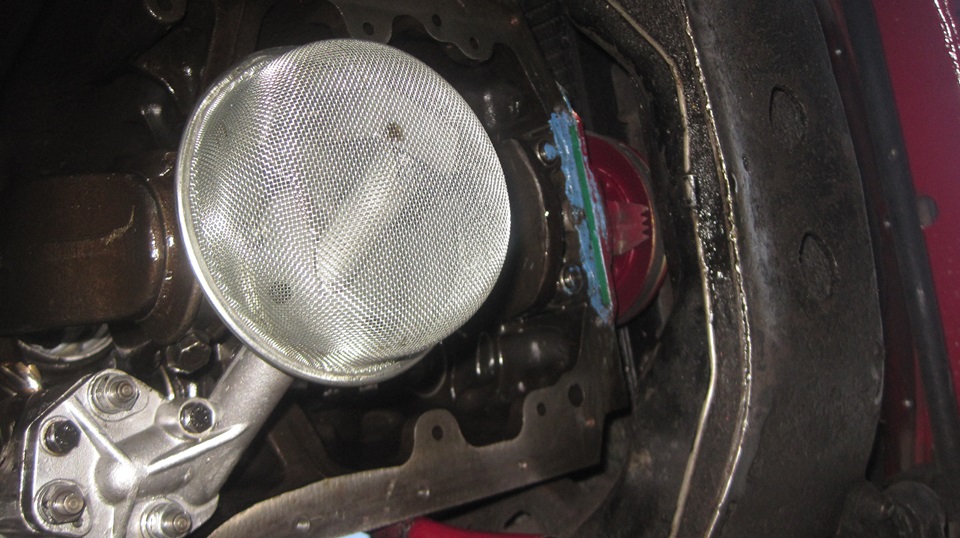
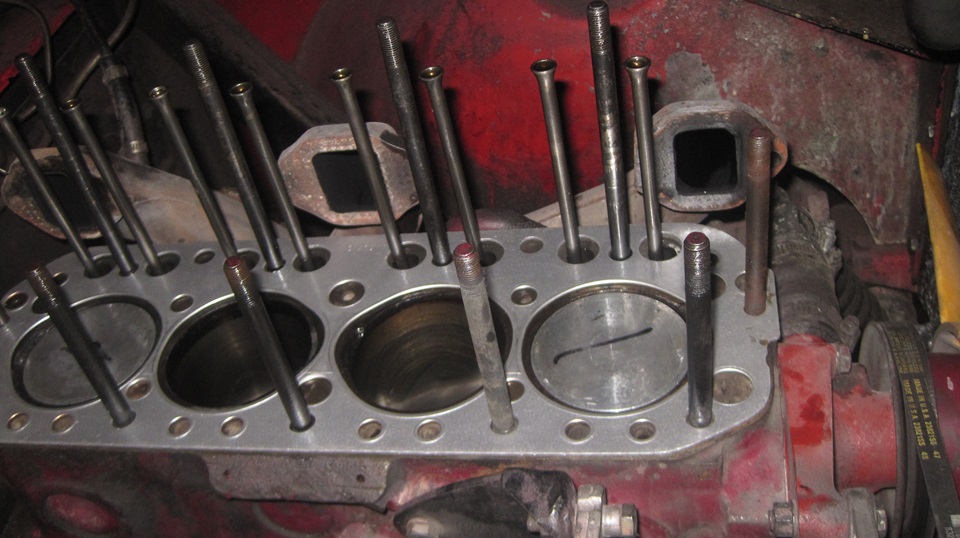
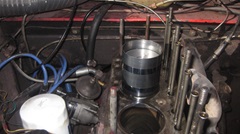
 Napa. Drain coolant, jacking up rear of car for better draining from engine block. Set it back down and remove carburetors and cylinder head, setting those parts aside. Jack front end and set jack stands as high as possible. Drain the 5-mile, 5-day old oil to a catch pan, and set it safely aside where it can stay clean, just in case. Note to self, get into the Napa store sometime before they close. Navigator said it would be 4:30-pm, but as happens, they closed at noon, and we didn't get in there. But that's why we were Saving the clean drain oil. Remove the sump and oil pump this time, and set them aside, get some pictures.
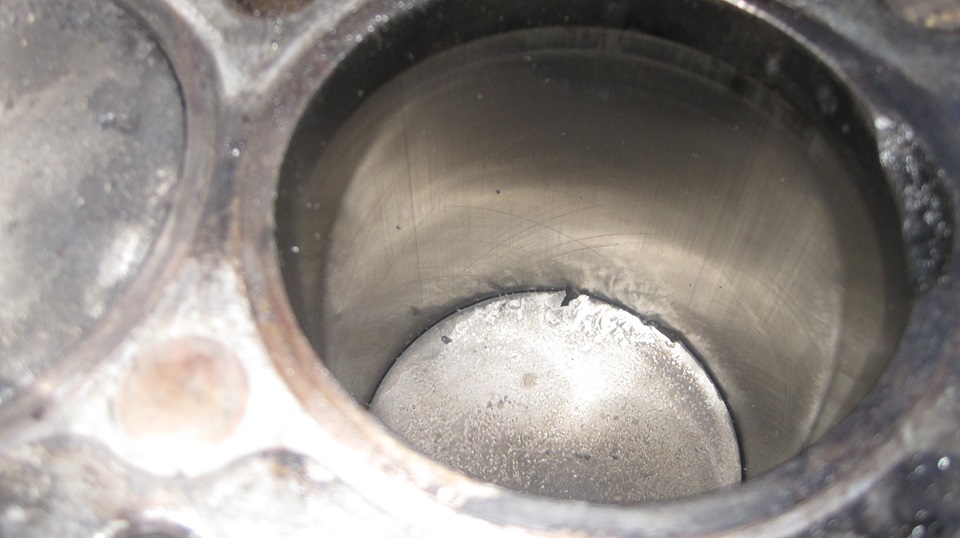
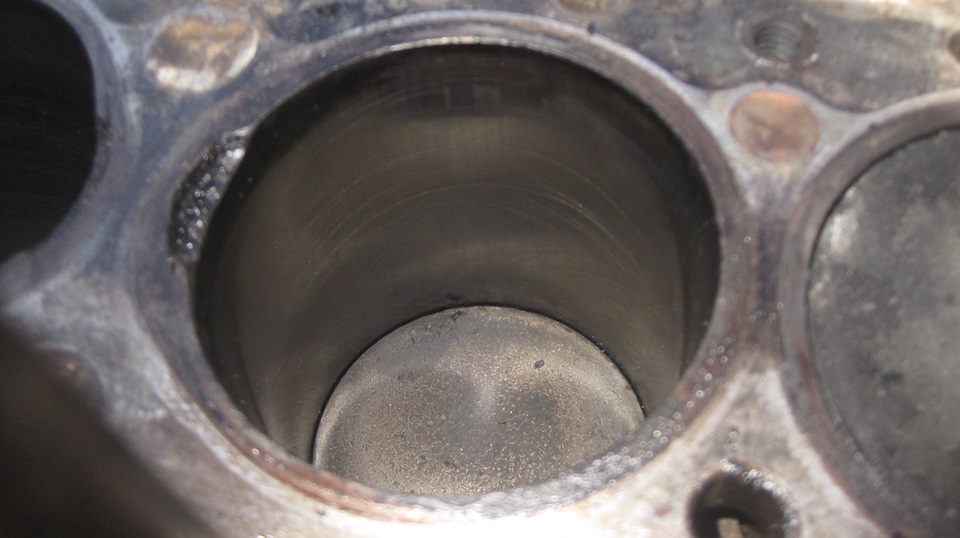
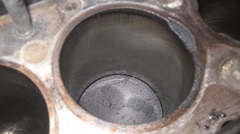
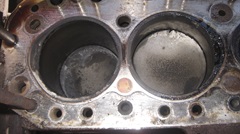
One by one, disconnect a big end bearing cap, push the piston out the top, inspect and remove old piston,and install a new piston on the con-rod. Clean and inspect the cylinder bore, oil the new piston, apply ring compressor, drop and push the new piston down the bore, and reattach the big end with a new con-rod bearing. Rinse and repeat 4X. Photos to follow. I was taking lots of pictures to review later, most of them ultimately not shown here. We were lucky this time that none of the cylinder bores had any significant scratches. in fact, there were still very shallow honing marks that had not polished complete clean from the last honing and new rings 15,000 miles earlier. Must have been coarse honing, I didn't do it, but we know who did. We decided not to hone the cylinders again, perhaps the remaining fine hone marks will hold some oil on the cylinder walls during seating in of the new rings. Incidentally, all of the rings on these NOS pistons are cast iron, no chrome edges, so I have hopes that the rings may seat quickly.


We knew from Monday's inspection that #1 piston had the broken skirt and missing oil wiper rings (reason for the knock). Now navigator was the first to notice #3 piston had a mottled top and small kerfs around the edges. Good spotting, he's getting good at this stuff. This implies there may be a broken compression ring allowing compression gasses to blow past the top corner of the piston. Yup, spot on, #3 was missing most of the top ring, again lucky it didn't scratch the cylinder wall. Final count is two junk pistons,and two others good enough to save as spares.

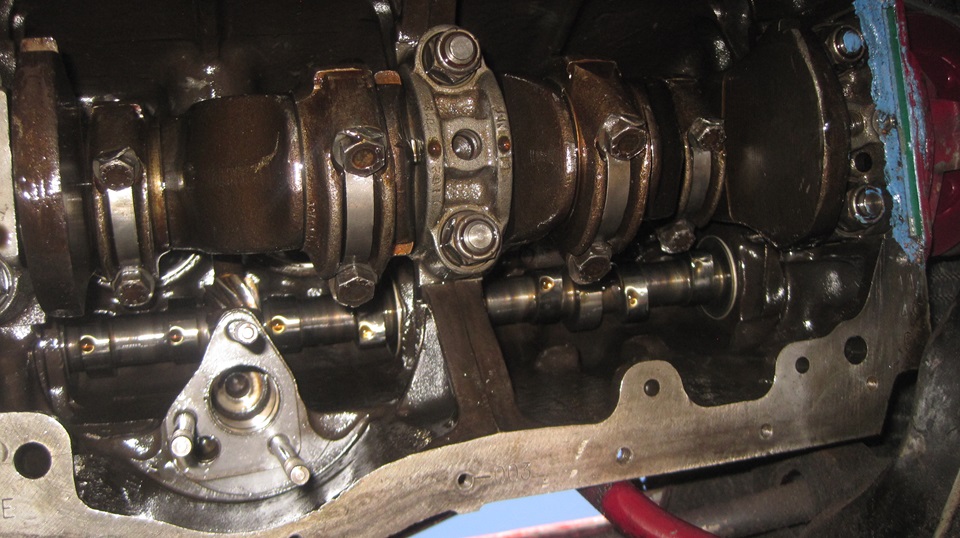
Not too long to swap four pistons onto the con-rods, align, oil and compress the rings, drop them down the bores and reattach the big ends.

Four con-rods reattached to the crankshaft, oil pump installed, button up the sump,

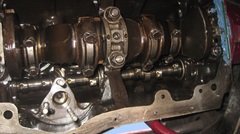
Drop the car off the stands, and get on to reinstalling the cylinder head.
As soon as the head gasket was on with the head dropped on top, we ran our of daylight and had to do the rest with flashlights, so not many pictures allowed in the dark.


Head torqued down, intake manifold and carburetors installed (curse the linkages in the dark). Rocker cover, hoses. oil and coolant installed, first fire at 10:30-pm, 12 hours after we picked up the package at the post office. It took another hour to clean up the lot, pick up trash, pack away tools and button up the Magic Trailer, and we were driving back to the truck stop by midnight. Yes it was a 14 hour work day, but really good to have it done. I think we will take tomorrow off.
Sunday - September 15, 2024
Much of the day spent processing pictures to post for yesterday's marathon engine work. More than 50 photos, but most of them were ultimately tossed out as being duplicate, too dark, out of focus,or not relevant. And too many photos takes too much clerical time. There was a brief unrelated incident withe the short handed restaurant staff, only two people trying to run the place with no manager present, and someone "blew a cork", (Not quite"postal"). After a brief chat with the sheriff's deputy, we collected the police incident report number and moved on about 5-pm. Next stop was West Wendover,Nevada, 60 miles on,right on the state line where we found a friendly Pilot Flying-J truck stop. We finally got late lunch and spent more time processing Saturday's photos, still not finished.
|