The MGA With An Attitude
MGA Guru Is GOING MOBILE - (June 16 - June 30, 2026)
Tuesday, June 16, 2026:

By popular demand, I have updated an engine Power and Performance tech page PP-201@ for installing an MGB 18G or 18GA 3-main bearing engine into the MGA. This may involve using an MGA water pump, which will not mate directly to the MGB engine block without leaking. So there is now a link to my fix for this as published in my November 2024 engine transplant travel log.
No kidding warm today, 94dF in mid afternoon at 4000-feet on the mountain.
 Ed Hollingsworth in Omaha, NE, USA did a nice job with a wood dash with glove box for MGA, so I just added a new
 Dash Tech page at DT-200D to link to his write-up with lots of photos and notes.
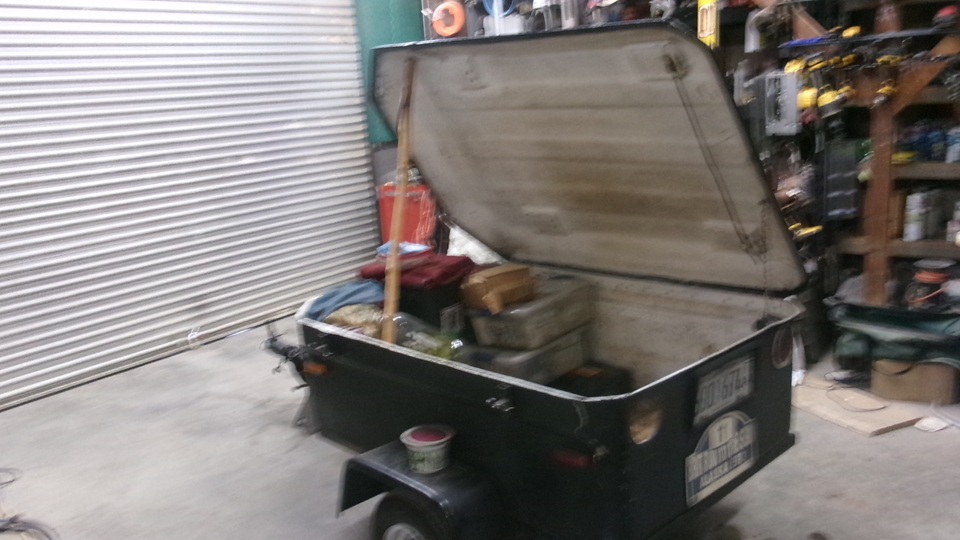
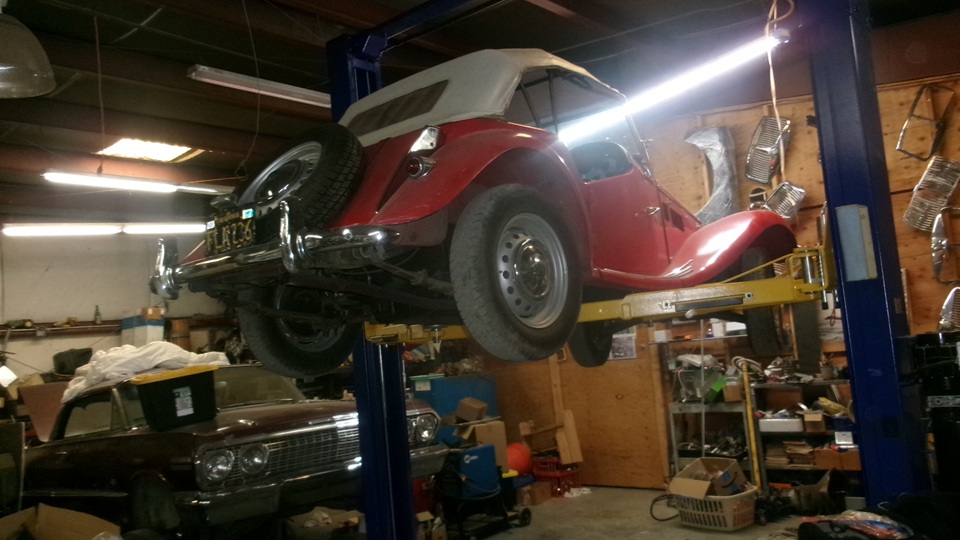
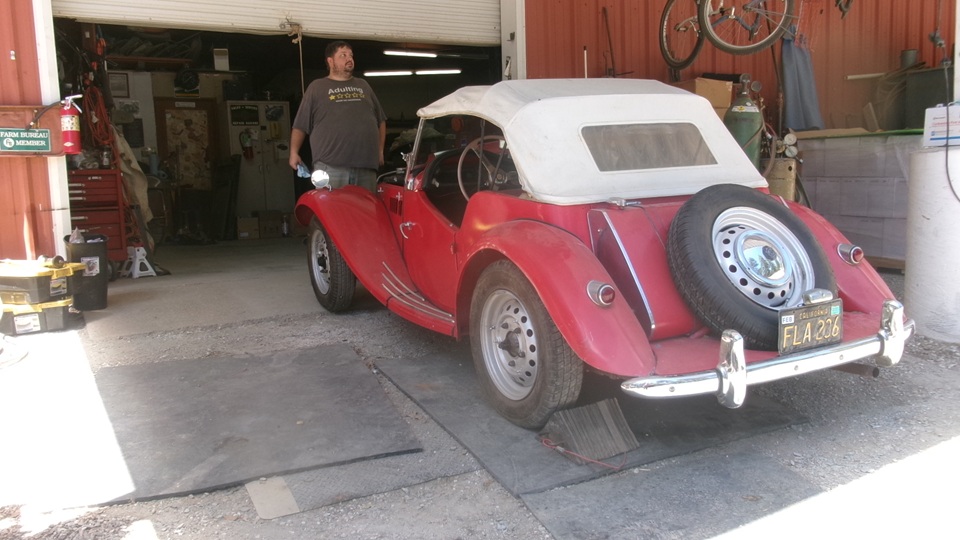
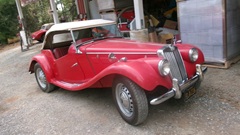
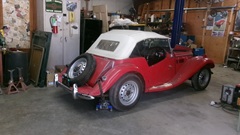
 Late night vehicle shuffling. Get the MG TF out of the shop space, put the trailer inside, and the MGA nearby outside. Late night vehicle shuffling. Get the MG TF out of the shop space, put the trailer inside, and the MGA nearby outside.
Wednesday, June 17, 2026:
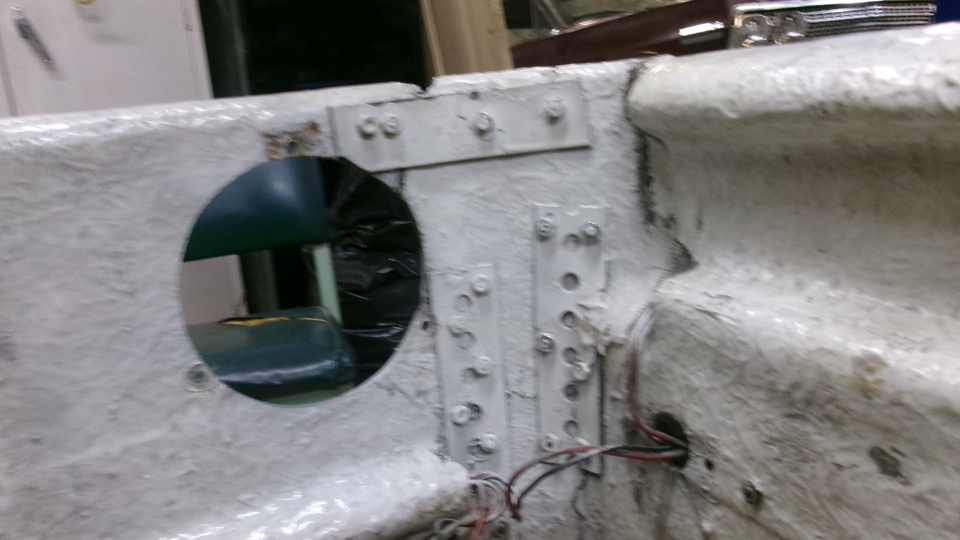
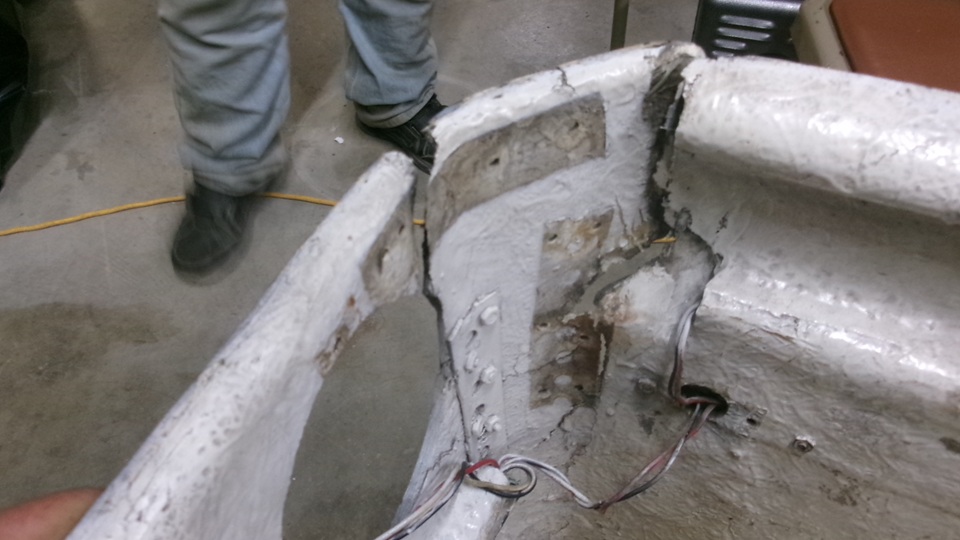
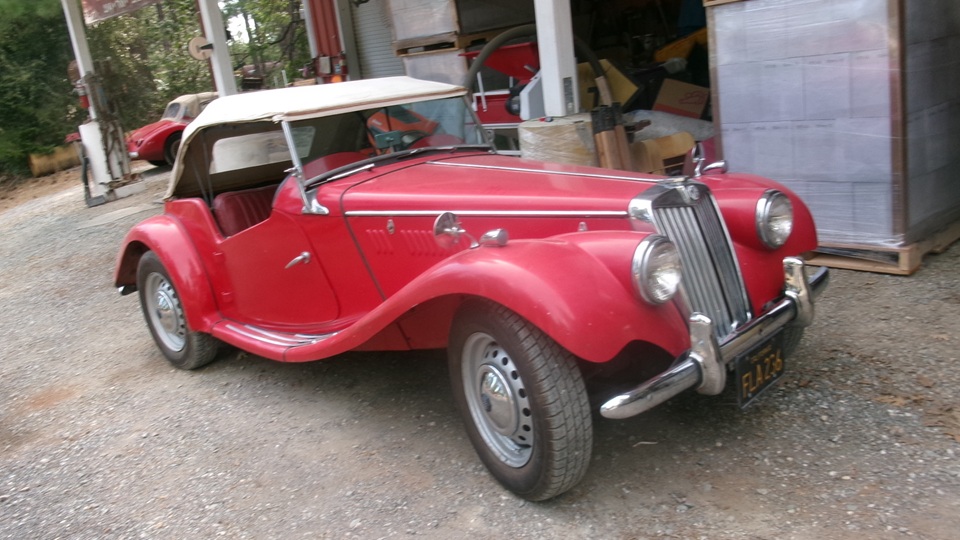
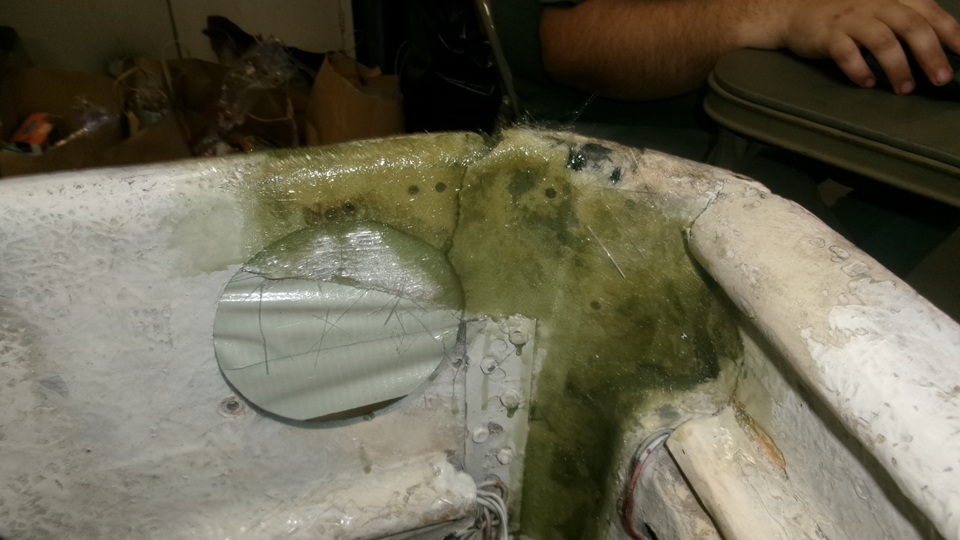
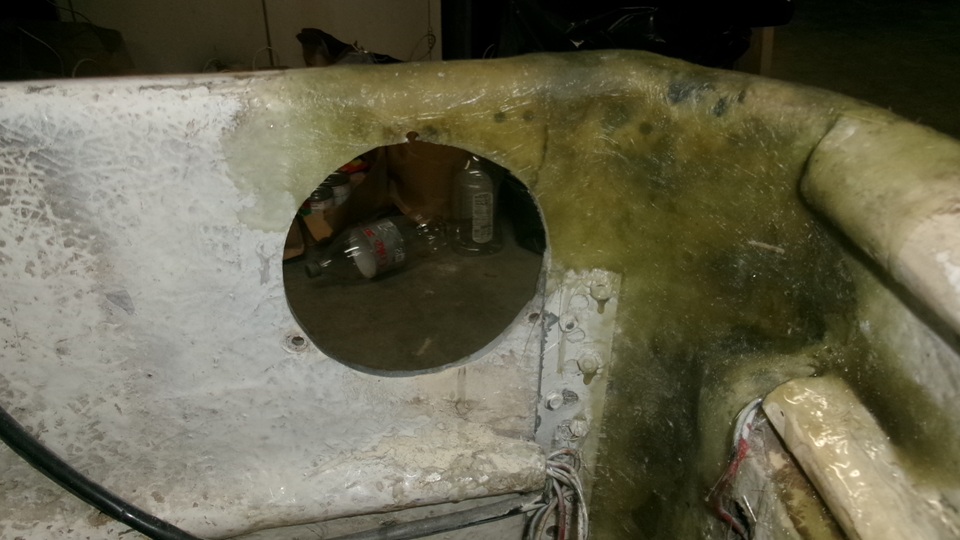
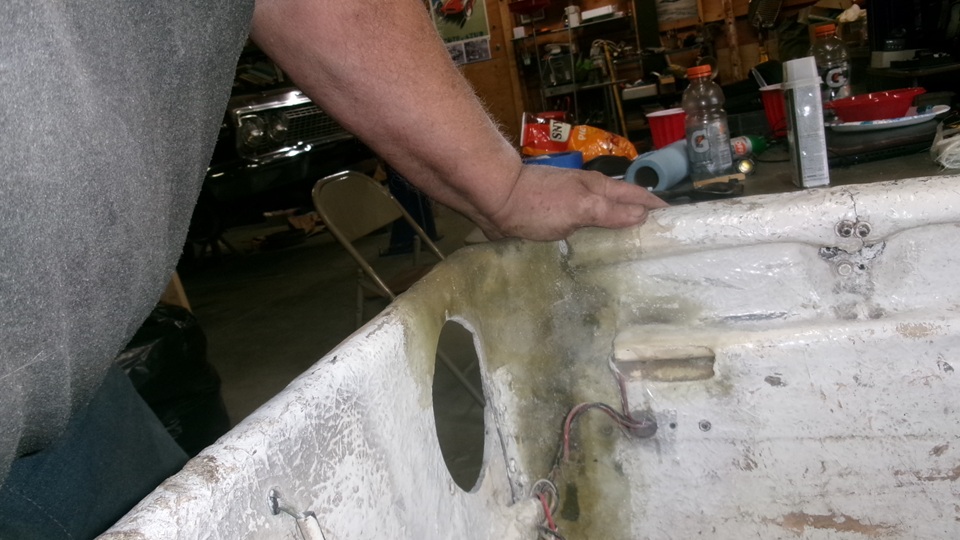
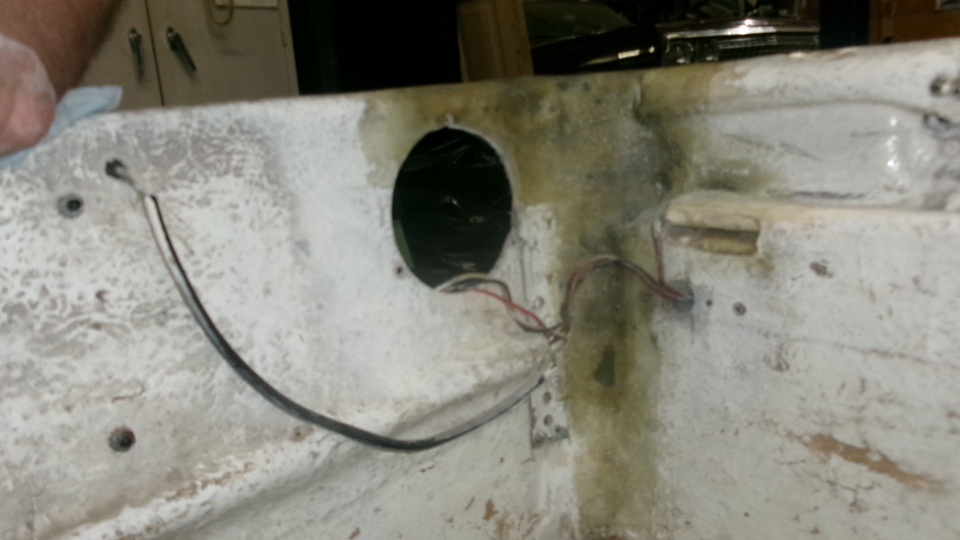
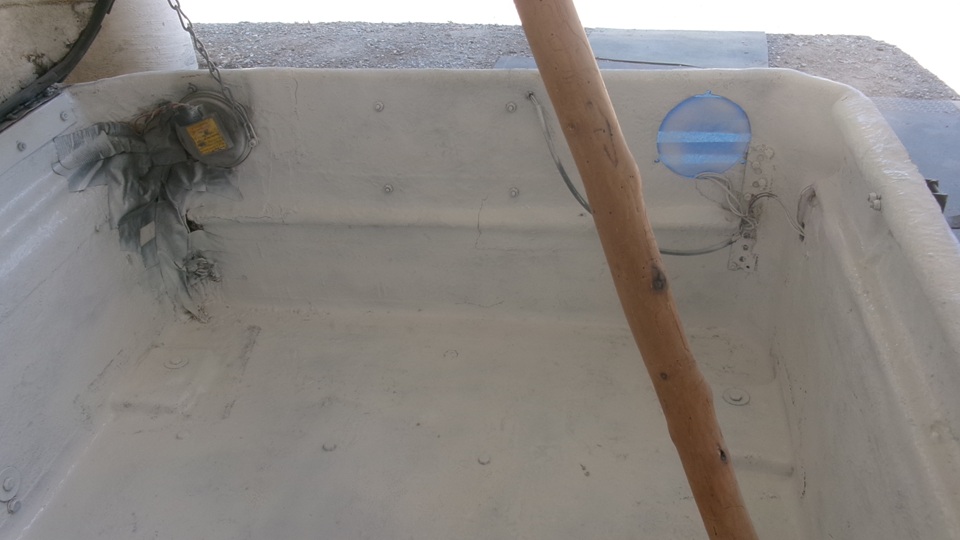
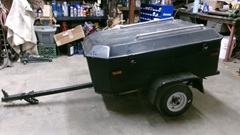
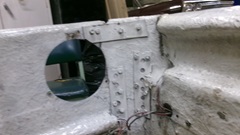
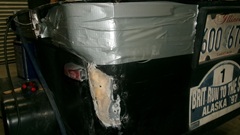
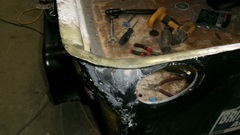
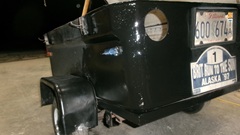
Time to get started on the trailer repair. Block it up level, and take everything out of the rear half. After being gently rear-ended by a school bus in Austin Texas, the left rear corner is a cracked up mess. It doesn't help that this thing has been repeatedly smashed and repaired, ever since it was first flipped over and splinted back together in 1997. A look inside shows some of the steel strap splints that have been in there for 29 years. Each time we do this sort of repair, we have an eye on removing some of the splints in favor of cleaner fiberglass repairs. This time we will take out two more, but leave one that seems to be still doing its job admirably. Some o the cracks have been there for decades, while the larger ones are new. The outside is also a mess,but not as difficult to repair as you might think.
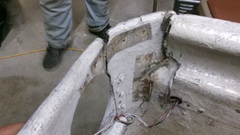
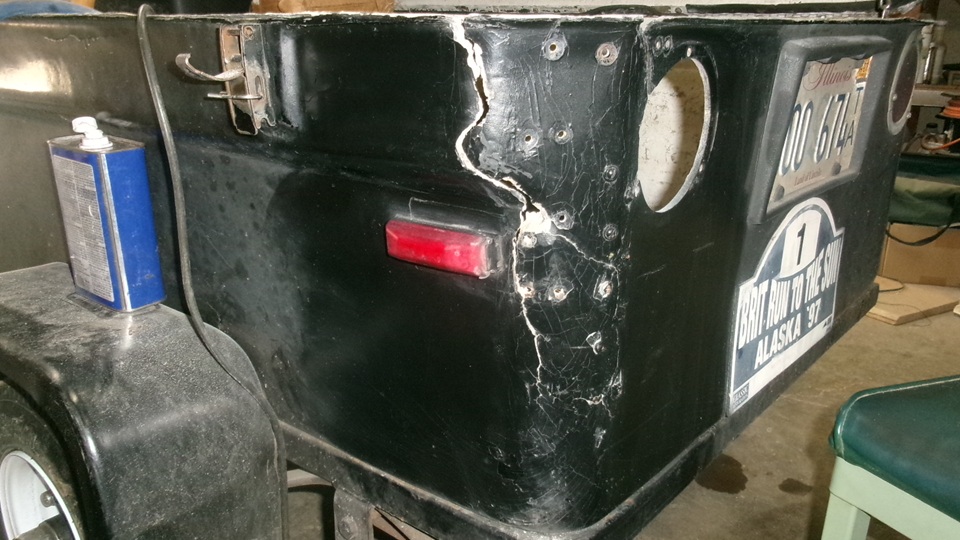
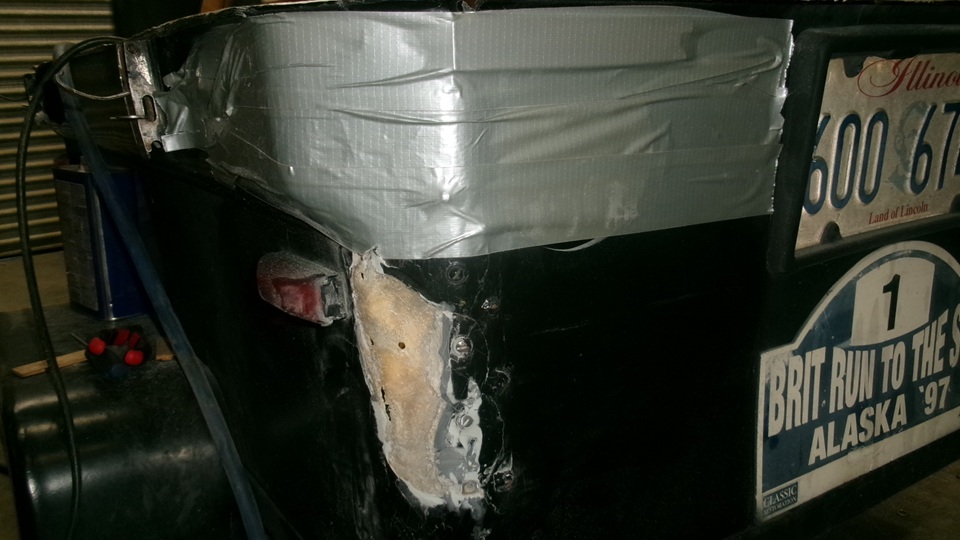
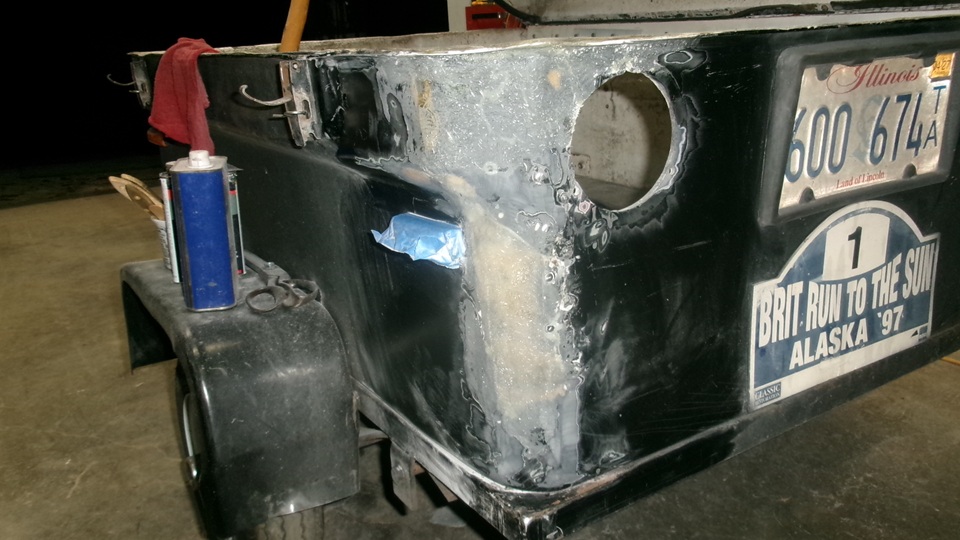
We start by going after the inside with a power drill and small sanding disc to remove excess paint and anything loose on the surface. Then die grinders to open any cracks a bit,and remove any delaminated layers. Once it was clean enough to receive plastic resin and fiberglass cloth, we could pull it all tight together to close most of the cracks, then Duck Tape the outside as tight as we could pull the tape. That made it look much better inside, and then it was time to be laminating new fiberglass.

Unfortunately the fiberglass repair kit we bought recently was in sad shape. The small bottle of resin had leaked some, maybe not serious, and the tiny tube of hardener looked like it had maybe exploded, split a seam., possibly from too much exposure to hot sun while it was in the trailer. So hop in the MGA for a quick trip a few miles down the hill to pick up more repair supplies.
Half way down there was the MG TF sitting on the side of the road pointed up hill. As soon as we got stopped in town we called Stu to inquire, what happened? He took the car down the hill to get gas, then was heading up the hill with vigor to check engine power under high fuel flow conditions, when the brakes locked up. Bummer. That's different, but at least the engine seemed to be doing okay. So Stu was off to get the flat bed trailer to take the TF back to the shop. -- Meanwhile, we got our fiberglass kit stuff in town and headed back up the hill to get back to work.
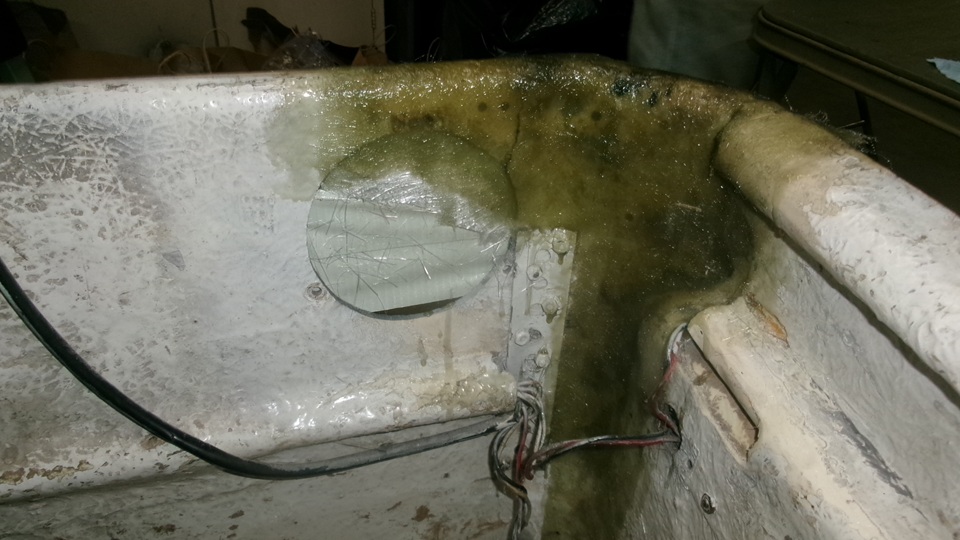
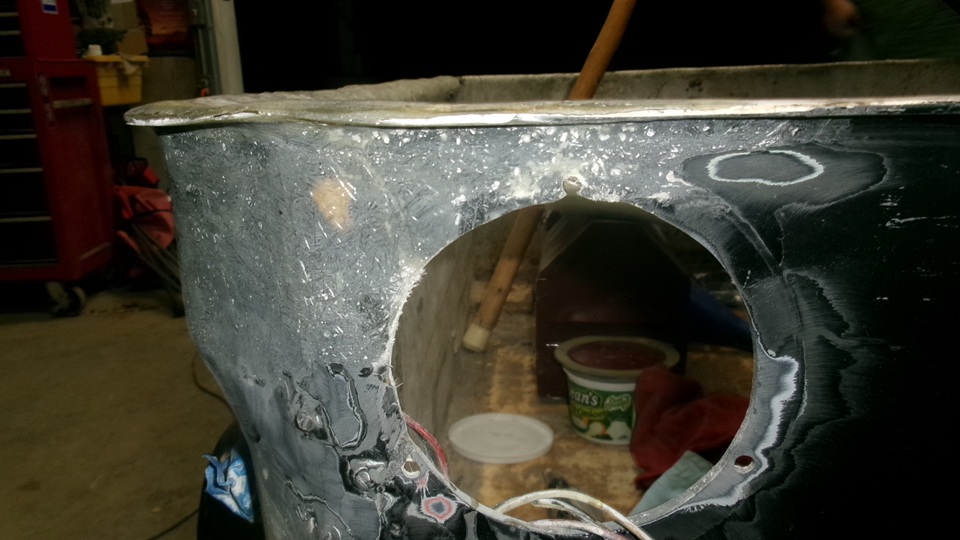
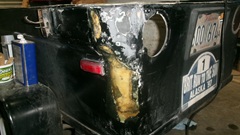
First we were stuffing small bits of glass mat into some cracks to fill the voids, then two layers of thin mat and resin brushed all through and over the top to be near flat. Looking better already. Then more small bits of mat to fill a notch on the top flange before two more layers of mat extending from bottom of the lowest crack all the way over the top flange, building up the structural thickness of the flange. Then two more layers of mat inside the top corner, also wrapping over the top flange. That's as far as we could get before the resin was setting up too much to be brushed any more, so stop and clean the tools, and take a lunch break for couple hours for the stuff to harden.


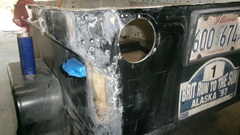
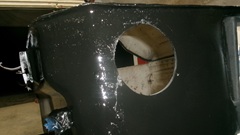
After hardening we cut out the tail light opening and re-drilled the mounting screw holes, then sanded away excess fiberglass at edges of the top flange. Then we sanded a lot on the outer surfaces to get rid of any delaminations and loose stuff in the cracks, smoothing out any rough edges. Cut a couple pieces of mat to fit and fill lowered surfaces, and cut lots of postage stamp size scraps of mat to fill cracks and holes.Mix more resin, and go at it with the brush, filling cracks and holes before laying the last two layers over the top to end up close to flush on the outside. Then getting late, and needing curing time, so clean up the tools and put things down for the night, and I get to process these photos and notes.
Thursday, June 18, 2026:
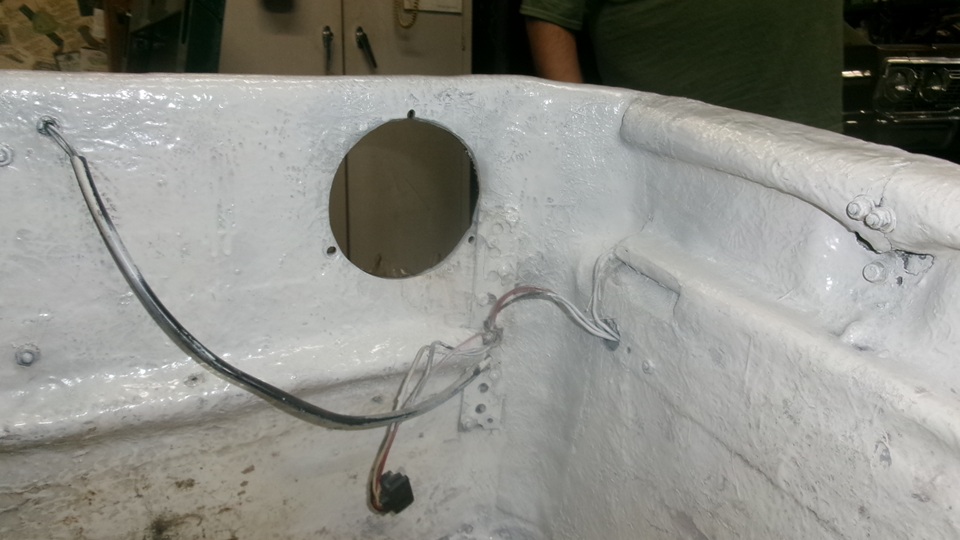
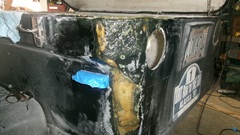
Three screws and a connector to reinstall the trailer tail light. Hitch up and roll it down the hill to pick up a gallon of lacquer thinner and a few more disposable brushes. Then a stop at the local market for more food supplies, and back up the hill to stash it all away. Trailer back in the shop, block it up level, remove the tail light, and back to work on the fiberglass. Smoothing it out as best we could, the yellow spots in particular are still a bit low and need more laminating for full thickness, better strength, good contour, and to fill and cover some remaining old screw holes. So we cut more fiberglass mat to suit, mix up more resin, and slap on a couple more layers, then more waiting.

By early evening it was cured enough for sanding smooth, after which we decided it was good enough for a trailer, and put the fiberglass repair kit away.


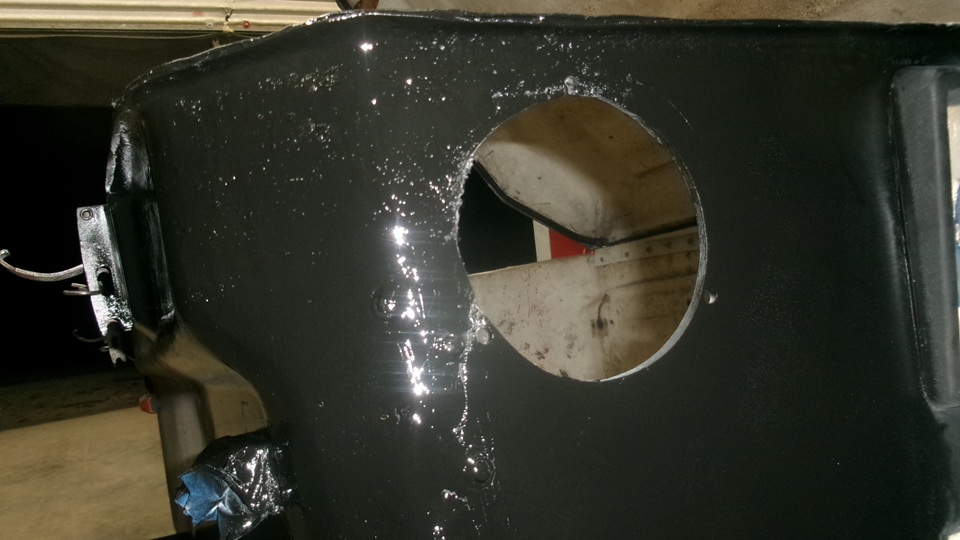
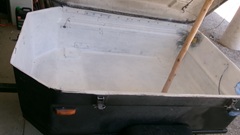
After a bit of wash and dry, we applied one coat of Duplicolor white inside (which was mostly already painted except for the patches), and one coat of Ace Premium Paint and Primer, Gloss Enamel black on the outside. As said, it is just a trailer,and we have never had any problem with paint adhering to the fiberglass box. It will wait until morning before another coat of paint.

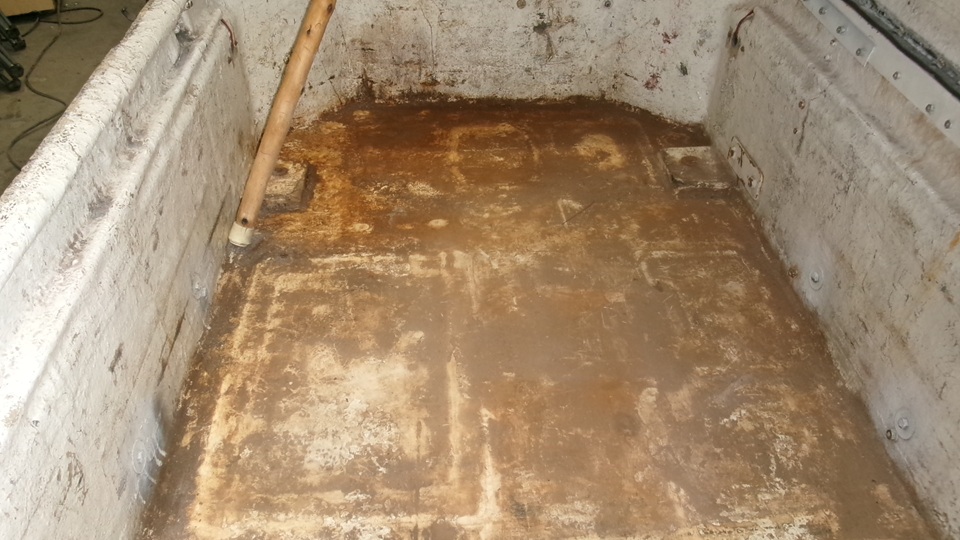
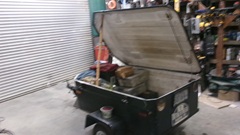
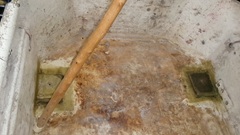
 Much of the interior floor of the trailer has a generous patina of rust stain. This I'm sure is a result of twelve years of the old hip roof steel tool box sitting on a wet floor until there was no bottom left in the tool box. In April we welded a new bottom tray into that tool box, got it nicely painted inside and out, and put rubber feet on it to hold it up away from the often wet trailer floor. Tomorrow we may consider how to banish the rust stains, with muriatic acid, maybe. It would be nice if it could be clean and white inside again.
Friday, June 19, 2026:
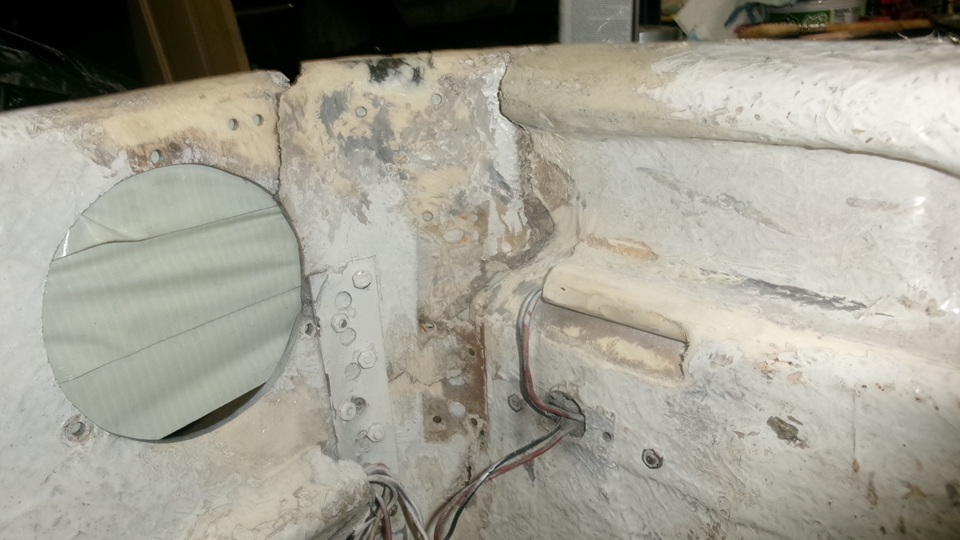
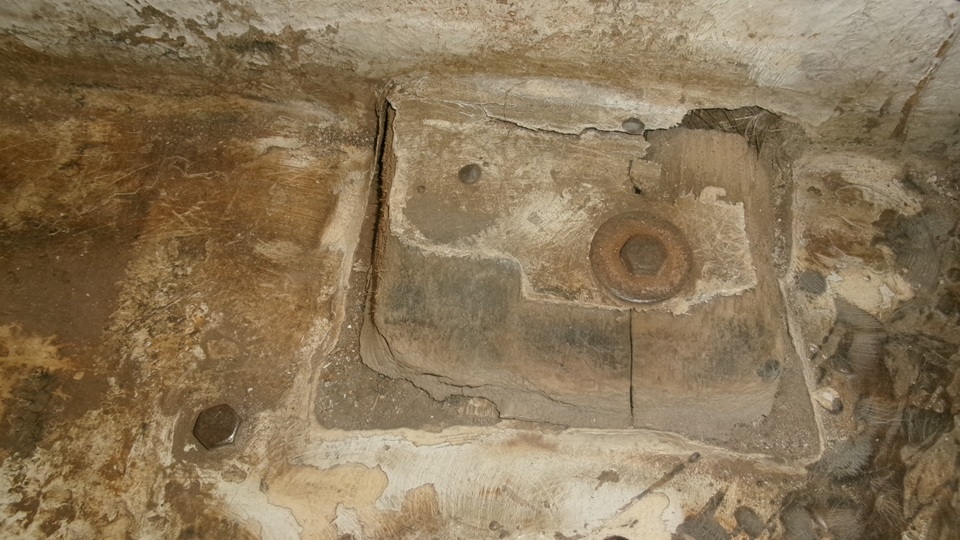
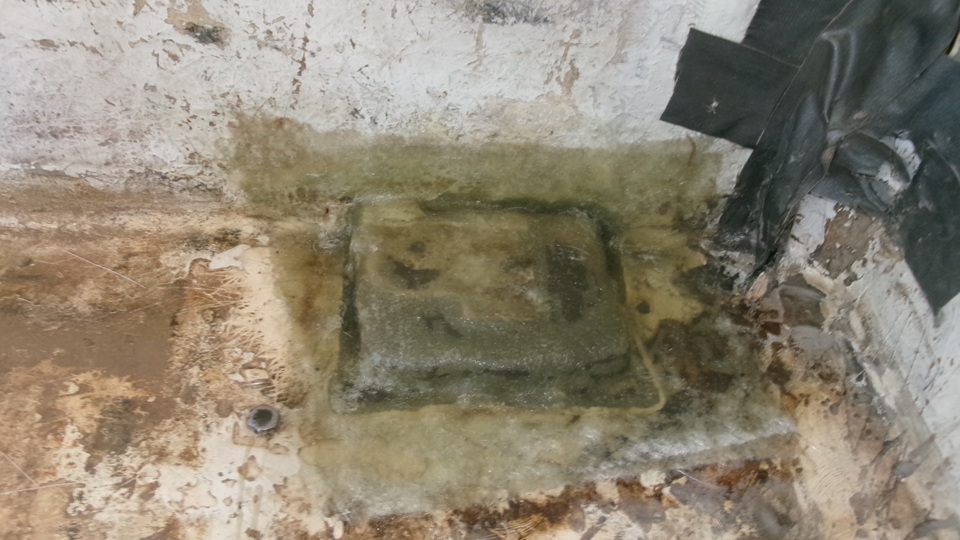
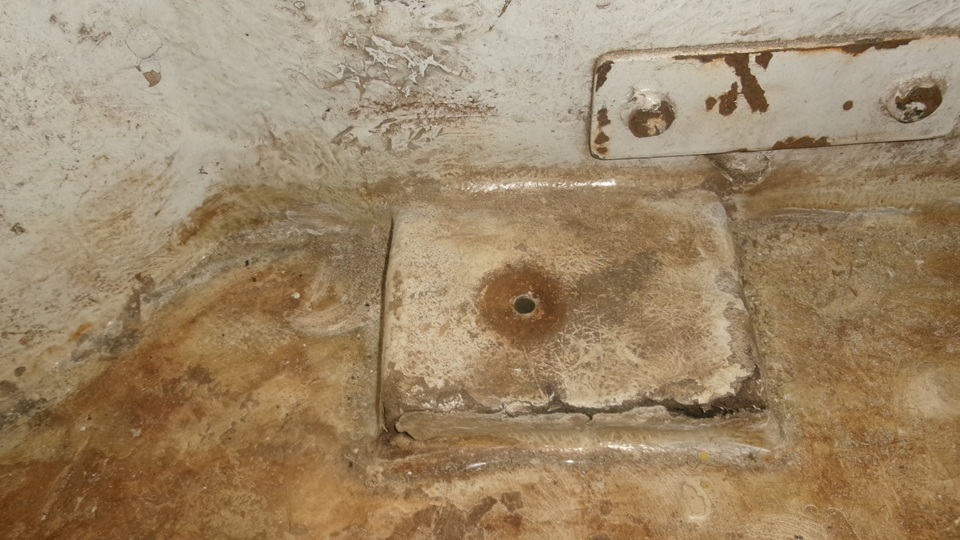
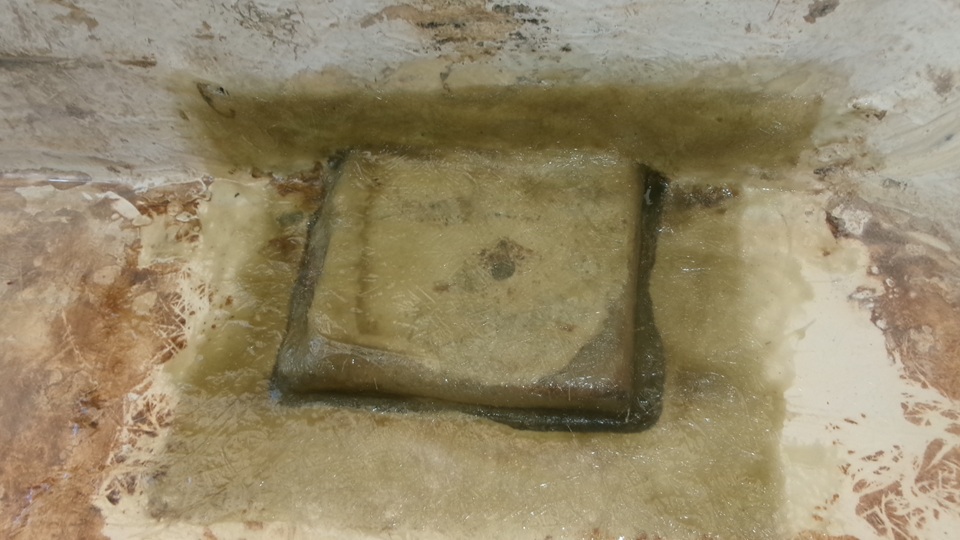
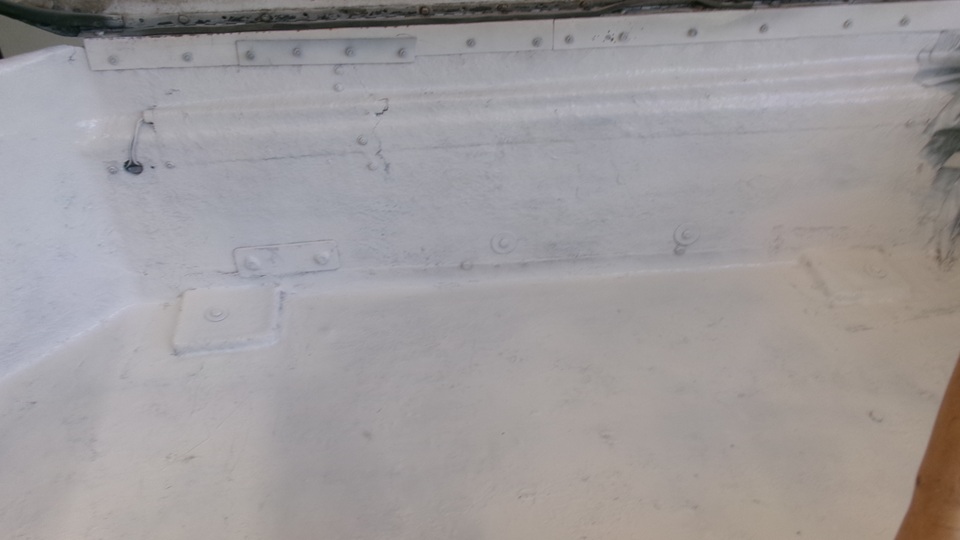
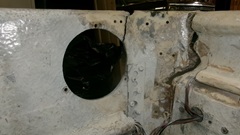
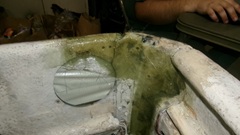
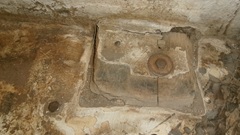
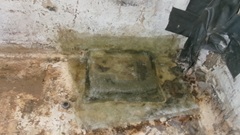
After much consideration, we got this figured out, and no muriatic acid needed. We used a cup wire wheel in electric drill to buff rust and much dirt off of the entire trailer floor. Then a 3-inch sanding disc to scuff up the surface around the embedded wood plate. Remove the hold-down bolt. Follow this by breaking away any delaminated or loose fiberglass around the wood block. Then laminate two layers of fiberglass mat, roughly equal to four layers of fiberglass cloth. It took a while, but came out okay. While working on this, it was apparent that the original factory blow-in fiberglass had been done poorly, leaving a lot of void space around the block under the fiberglass (no stick), which was why it was breaking up. this time we hope we have filled all of the cracks with resin, and finished with no air bubbles under the mat, so everything should adhere properly.

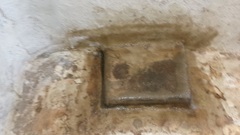
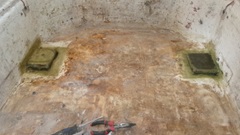
Okay, we got this. Rinse and repeat, and we soon have the right rear mount plate laminated in, similar to the left rear. Now wait for full cure time before drilling through the fiberglass
Saturday, June 20, 2026:

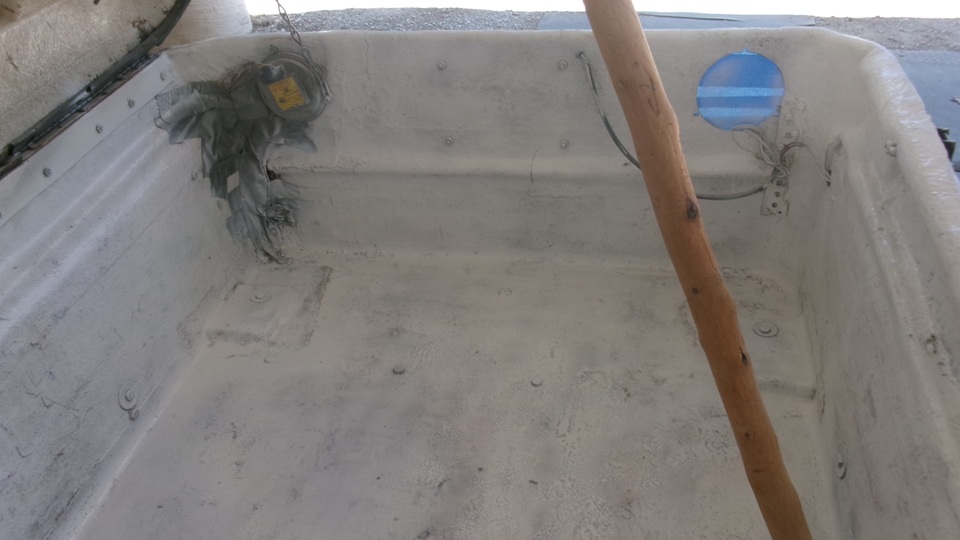
Up early, drill through two holes, and install new bolts at the rear mounts, including the P-clip for the wiring harness at right rear. Then we can remove two bolts from the front mounts.
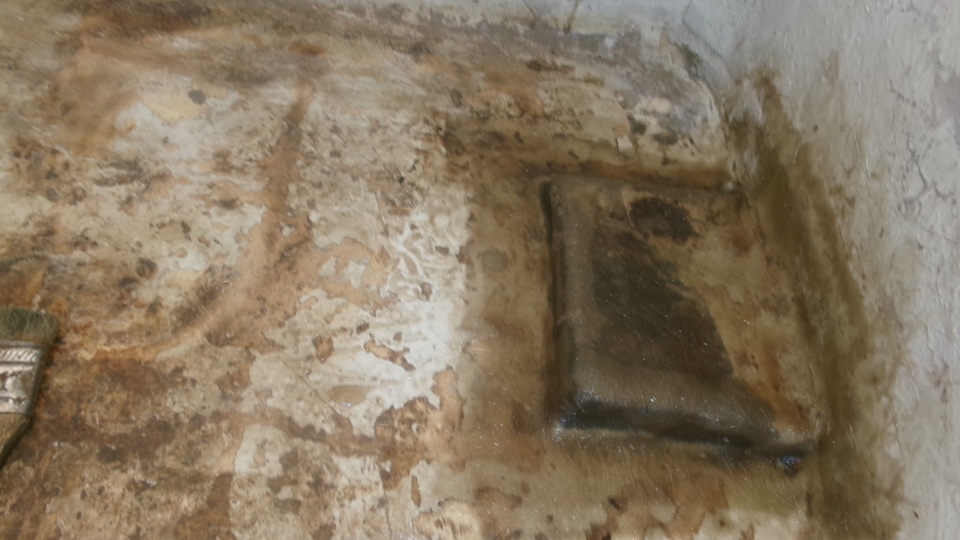
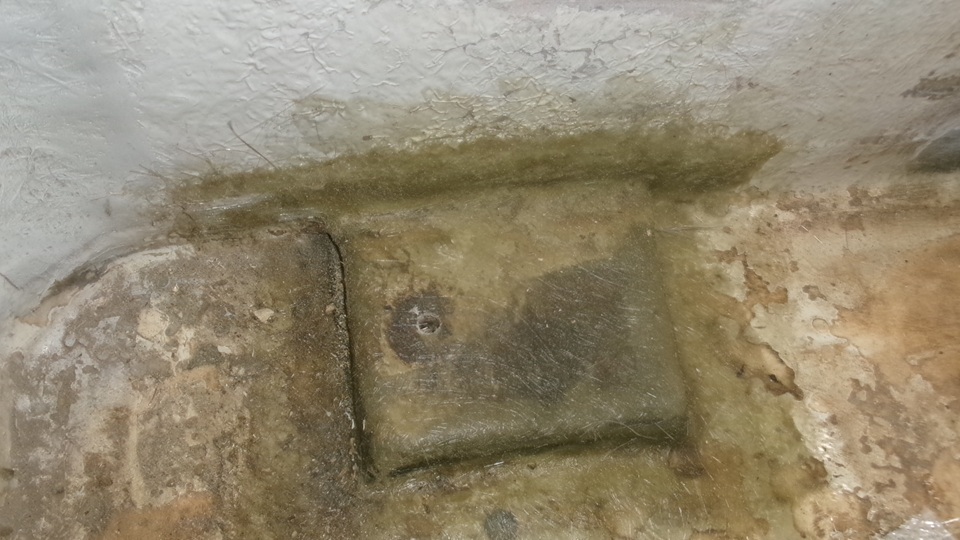
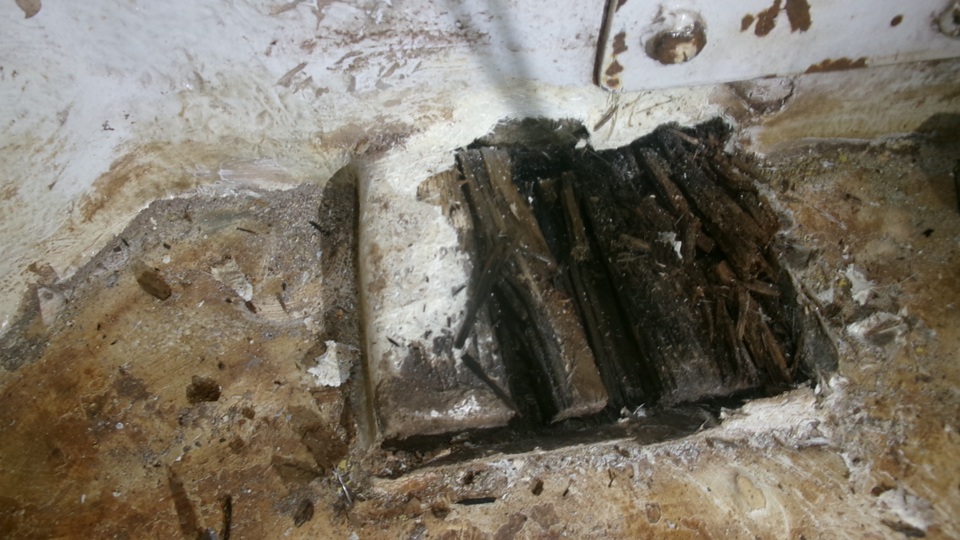
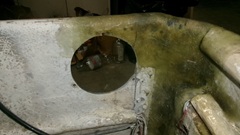
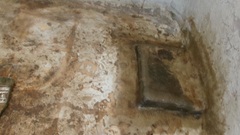
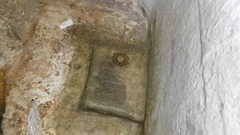
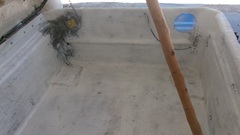
We were chipping away at the front mounts to remove delaminated, cracked and loose fiberglass. But the right front had been regularly wet, and the wood underneath was entirely rotted, so dig that out, clean up and sand all around. Then a short delay while we grouse around to find a suitable 1-inch board and cut a new rectangle block before laminating it back together. The painted steel plate with hex head bolts is part of the spare tire mount.


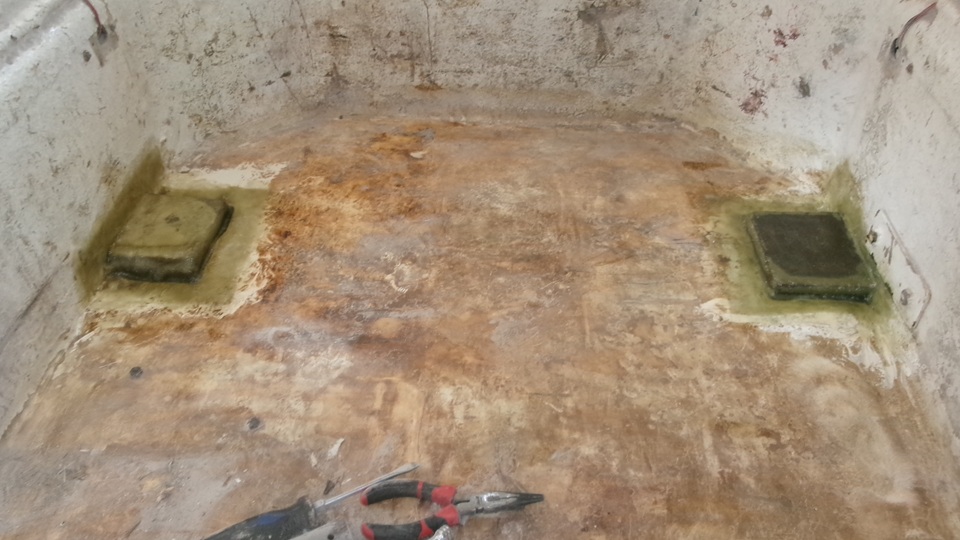
The left front looked as expected, much like the rear ones before they were repaired, so just sand around and laminate over that one after cleaning up the splinters. I recon it came out pretty good, somewhat better than original manufacture from 1989. Finished by mid day, needing to let it set half a day before drilling. And there will be a concert in the park tonight, so I recon it will not be painted inside until tomorrow.


Rest of the day off, mostly, and concert in the park tonight, so good time to stay out of the way. I took this opportunity to download and setup a fresh copy of DraftSite 2D CAD software. Since last computer crash a few years ago, I have been suffering
 along with no CAD program, and I really need to get one working again. For my re-introduction and first drawing exercise, I get to work on the simple door liner panel brace bar drawing, so someone might be able to make one next time the part is out of stock. After a few hours mucking round with no available instructions, I was drawing a few lines, doing line offsets, rectangles, circles and tangent arcs. got the part drawn up with no dimensions yet, and the inside space might be wrong, but it's a good start.
Sunday, June 21, 2026:
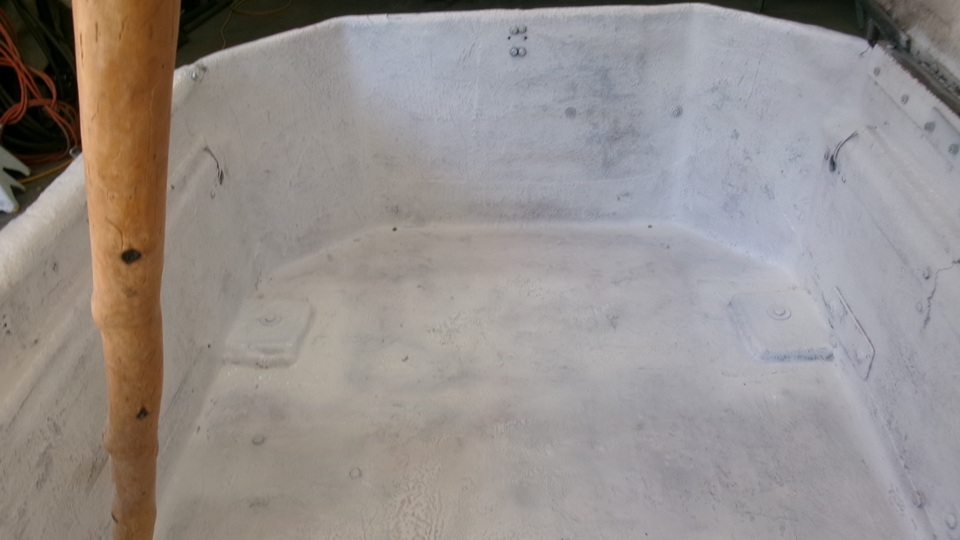
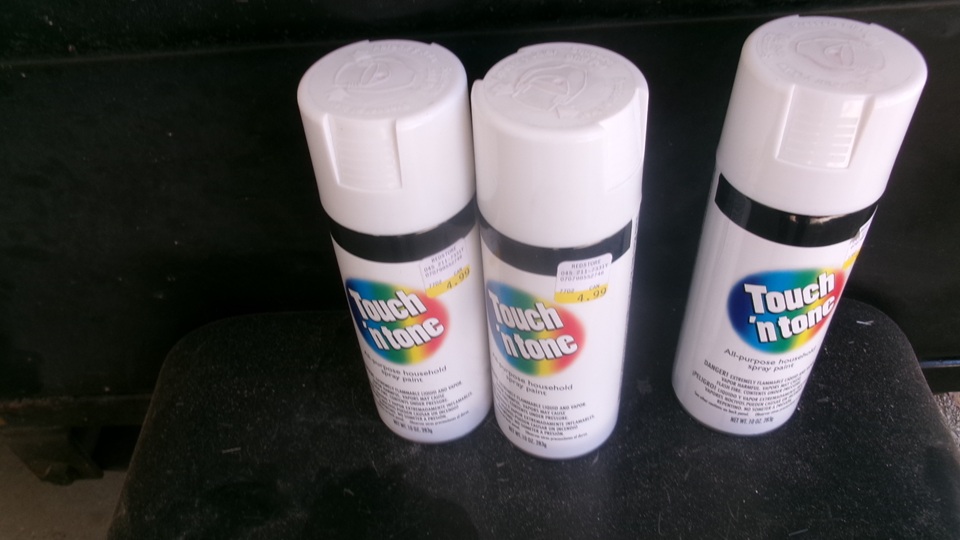
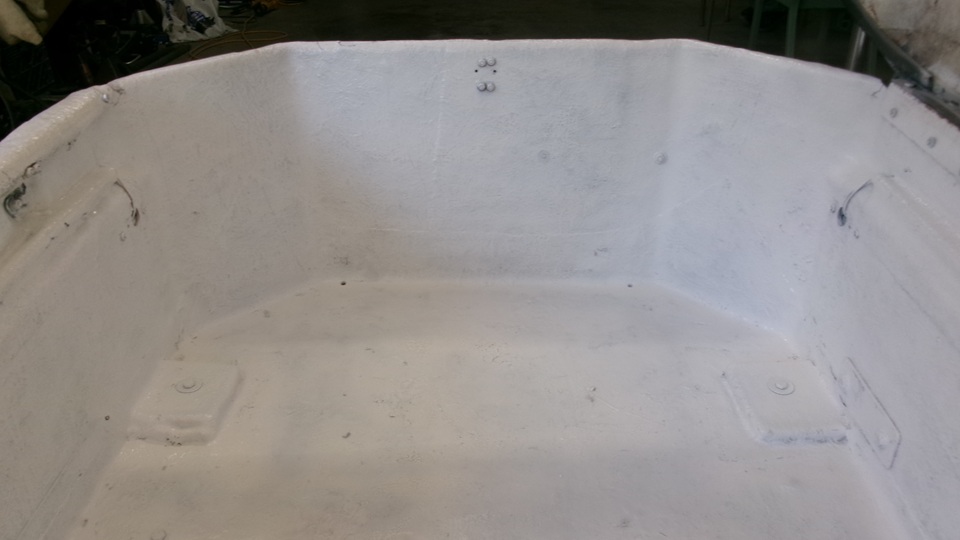
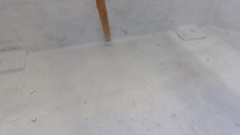
A good 18 hours curing time on the new front corner fiberglass laminations, so it was time this morning to drill two holes through and install the front mounting bolts. Then we ran a steel wire cup wheel around the new patches to smooth out and remove any snivels that could catch a finger. Then spraying white paint, beginning with new patches to seal off the surface weave. After spraying three aerosol cans of paint, it looked like a decent first coat, but definitely not covering.

So roll he MGA down the hill to The Red Store to pick up three more cans of cheap type Gloss White paint, and get back to spraying some more. Two more cans down and empty, one remaining untouched. I think we call that good enough for a utility Magic Trailer. Leave it outside to dry for 24 hours before we will reinstall the tail light, before we try to put anything into it against the new paint. That was fun, and several years over due, but it feels good now.


 With much of the afternoon and late night still available, I got to post today's photos and notes (above). Then work on the drawing for the door panel brace, while getting used to using the DraftSite CAD program. I actually made some good progress on the drawing, getting all of the dimension on it, although the drawing is still not finished.
Monday, June 22, 2026:
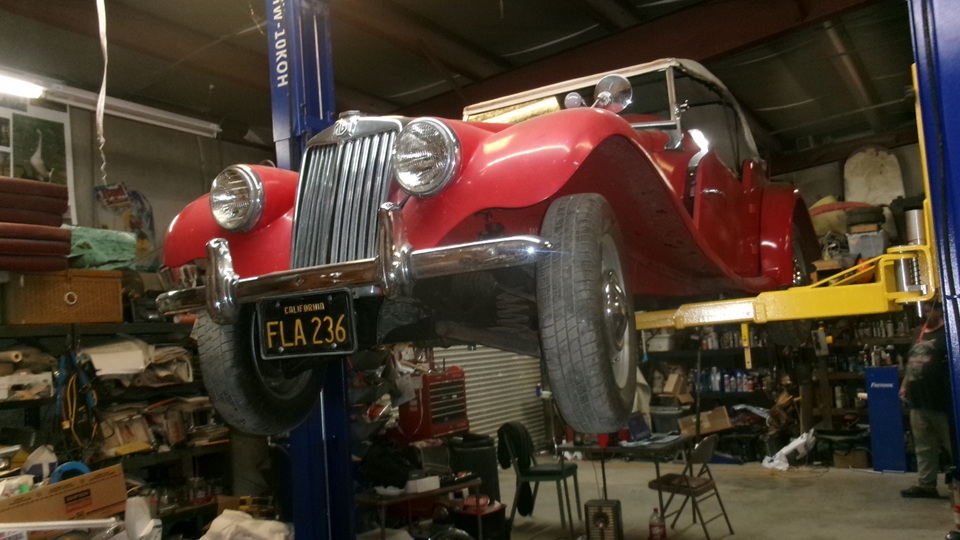
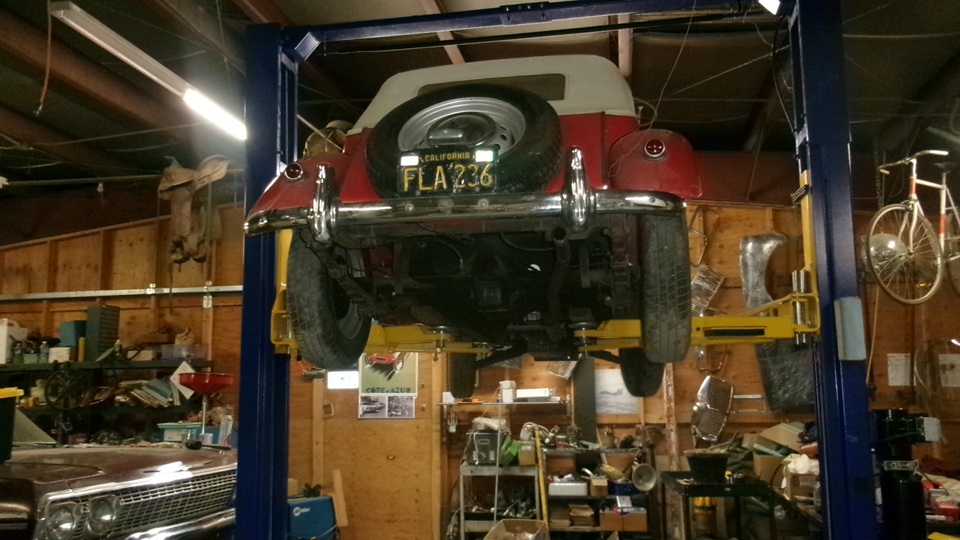
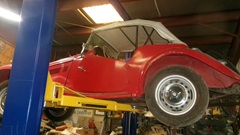
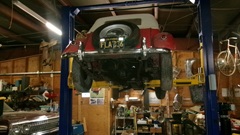
Good morning. The trailer interior had multiple heavy coats of paint, and so far less than 24 hours drying time, so we will put nothing in it today, just leave it outside and ventilated and dry. Meanwhile, let's move on to the MG TF with its multiple problems (after cleaning the fuel tank). I know the hand brake goes full travel with brakes on the right rear wheel only, and the lever will not latch in the raised position (push button stuck in the depressed condition). As the car was last driven, the hydraulic brakes were dragging so bad the car was trailered the last couple miles home. And the rack and pinion steering has gone so wonky that we had trouble maneuvering it into position for the hoist. So many problems at once? No wonder it hasn't been driven much recently. The less it is driven the more it feels neglected, and the more deteriorated it gets, and then the less it is driven. Deferred maintenance only gets worse with time, so get this one on the lift to see what we can do about it.


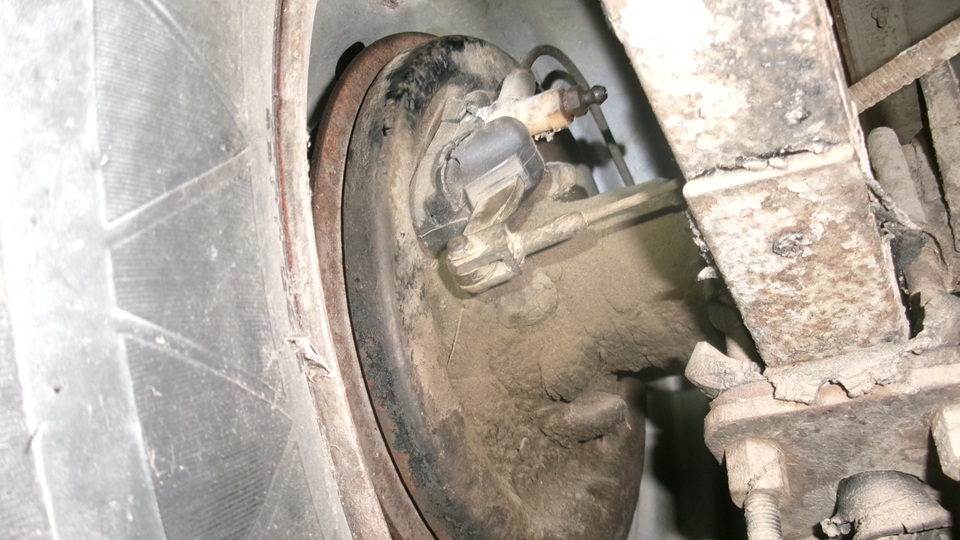
Do some easy diagnostics first. About the dragging brakes, step on the brake pedal and release it, and the front brakes drag badly, right side worse than the left. Crack the right side bleed nipple open, get a short spurt of fluid as pressure releases, and the wheel then turns freely, but the left side still drags. Hit the pedal again, and the right side is dragging again. -- Crack the left side bleed nipple open a bit, get a short spurt to relieve pressure, and the wheel turns freely, but the right side is still dragging. Okay, got this, both front brake hoses are clogged internally and need to be changed. Otherwise the front brakes work, and nothing leaking.
 Check the master cylinder while underneath, and that looks good, working well, nothing leaking, good rubber dust excluder boot. Moving on to the rear brakes, the right rear works with what sounds like a lot of free play in the shoes. Left rear doesn't work at all, stand on the pedal and the wheel still turns freely. One educated guess here, the shoes are adjusted so loose that the left rear slave cylinder hydraulic piston is hitting the parking brake lever inside before the shoes touch the drum. Get back to this later.

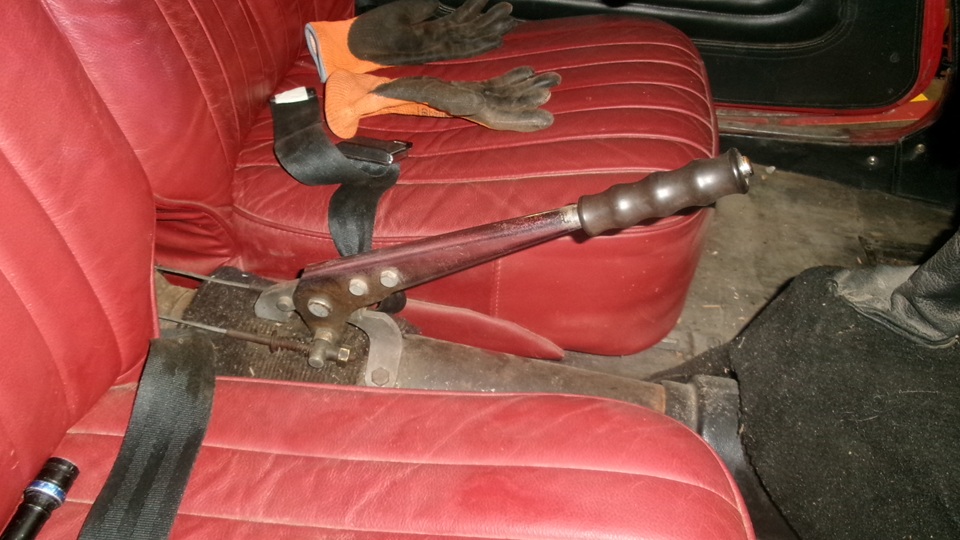
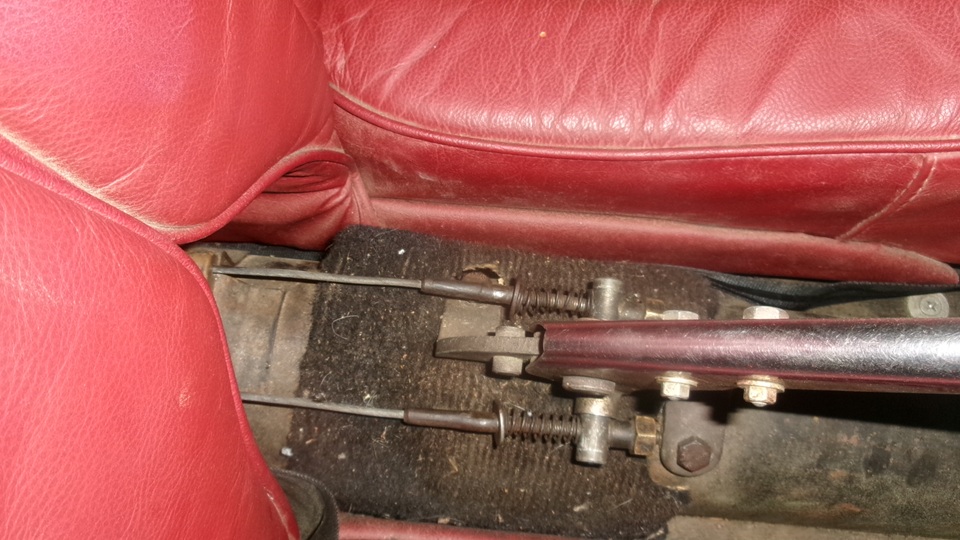
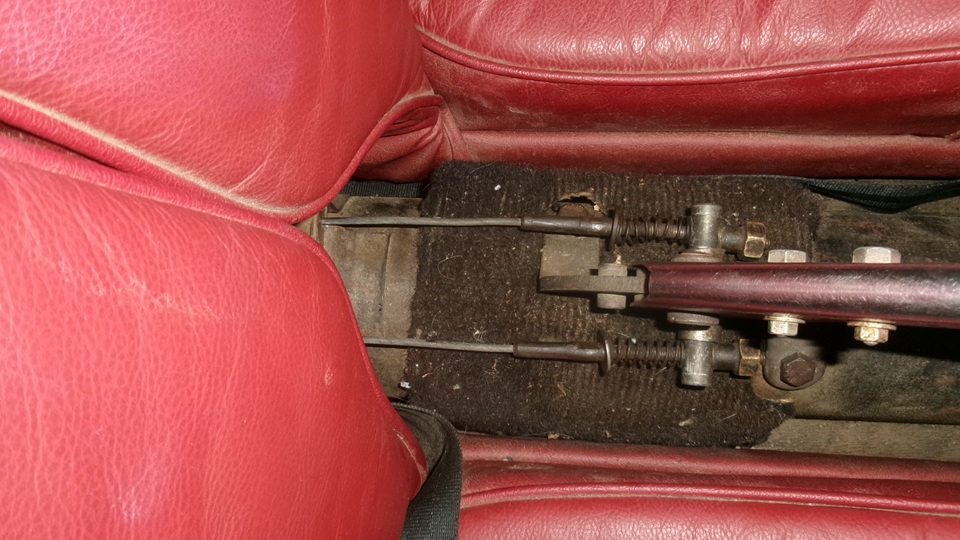
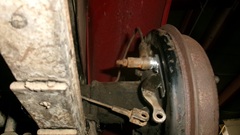
Checking the hand brake, the hand lever goes all the way up, works on the right rear wheel only. Thumb button is stuck, no pushing, no spring return, so the fly-off hand brake is only released, no latching. See if we can take this apart enough to figure out what's wrong with it. Looks easy enough. Remove two saddle shape adjusting nuts, two springs, two flat washers, and withdraw the cables from the cross bar. Remove two bolts diagonally opposed with captive nuts, and the lever assembly lifts right off.
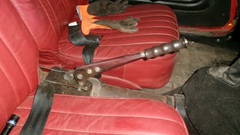
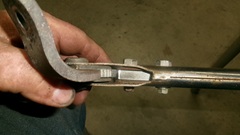
The ratchet pawl here is a slider with two in-line slots sliding on two shoulder bolts, but stuck so nothing moves. The black hand grip screws onto the front end of the lever housing, easy to remove. Take out the shoulder bolts so we can pry up the sliding pawl, and we discover the button is stuck because the thin pushrod inside is bent right at the bottom end of the button. No idea how that could happen, but we can fix it. Clamp the thin pushrod in a vice, hold the top end of the button with a wood clothes pin to protect the chrome while we have at it with large channel lock pliers to unscrew the button. Under the button one fiber washer, a spring, and a nice metal shoulder washer to stop the spring at top end of the lever housing. Easy fix here, screw the button back on, straighten the pushrod at bottom end of the button, and put it all back together. Works perfectly with nothing worn and no missing parts, so put it back in the car and reconnect the cables to the lever cross bar.
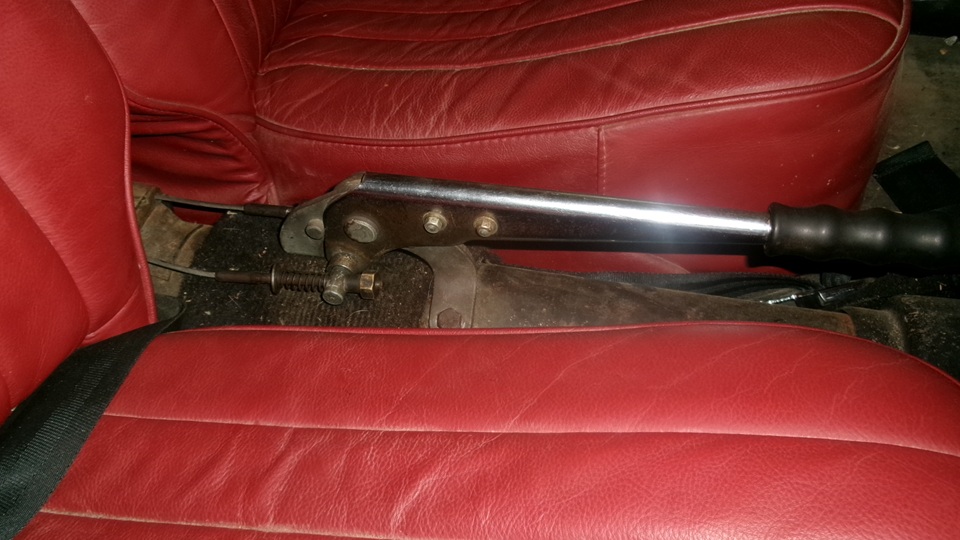
Lever up and press button, and it latches. Thumb off, lift and release, and it drops back down as intended. Peachy. Leave the cable adjustments loose until the rear brakes are working perfectly, and the cable adjustment will be last.


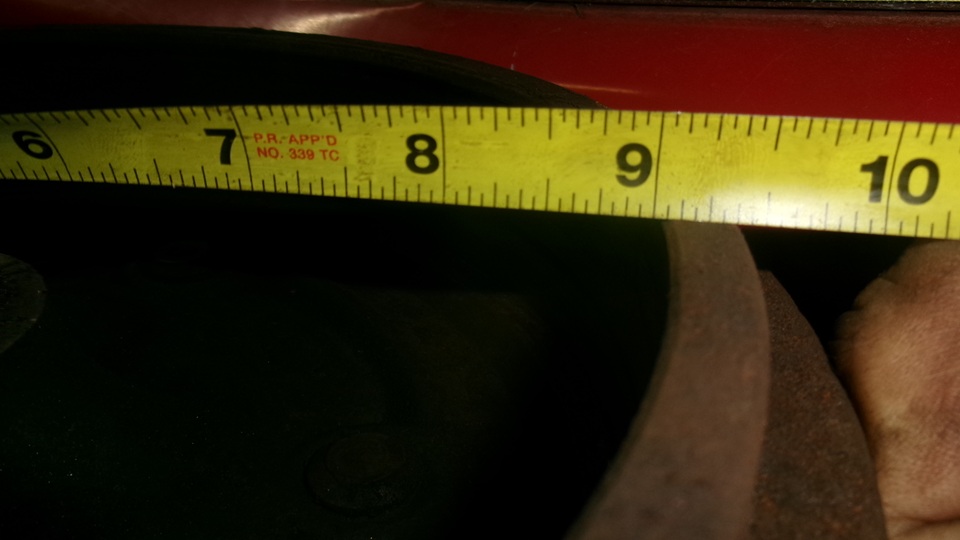
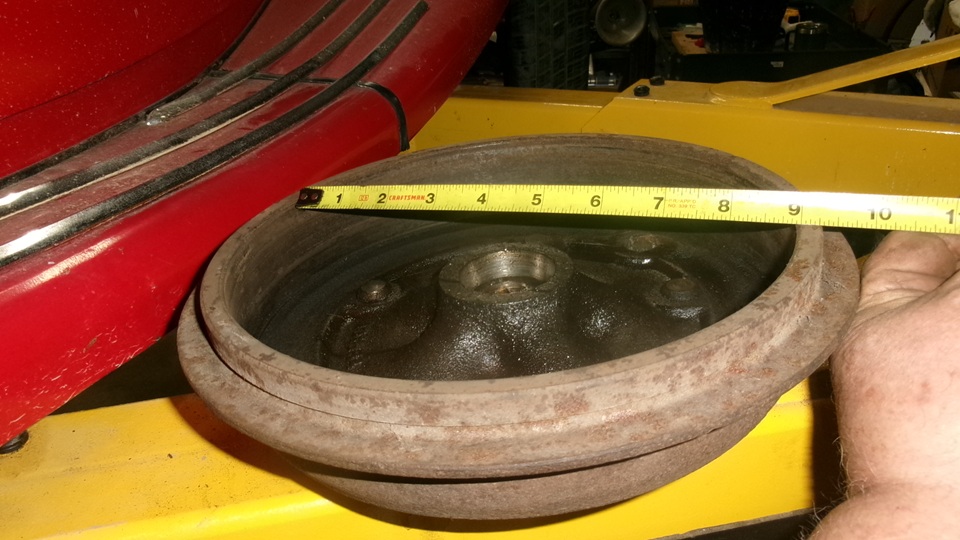
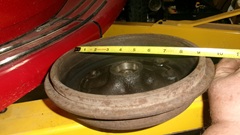
Alright then, remove both rear wheels and check/adjust rear brake shoes. Right side goes 18 clicks then falls off end of adjustment without locking up the drum. Bummer. Left side goes 8 clicks and stops with the drum locked. Better, but not perfect. Then remove both brake drums for internal inspection. Looks like both drums measure 9-inches as original, good as new. Swap the drums left to right, and it has same results, meaning both drums are the same, and not the problem here.


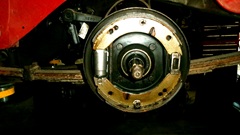
Drums off for visual inspection of the shoe assemblies,and everything looks correct. But the shoes are too far away from the drums, too much pre-travel before contact. This has been common in MGA in recent years, as a result of faulty replacement brake hoes being too short end to end.The trick fix here is to add a thick shim between the brake adjuster mask and the moving end of the slave cylinder to move the shoes closer to the drum at zero adjustment. Done this before, and we have a few special made steel shims in stock for this purpose. Pry the space open and insert a shim for test fit. The left side will get a 1/8-inch shim, while the right side will get a 1/4-inch shim.

Then we get to tack weld the shims onto the adjuster masks so they will not fall out in service. After grinding welds smooth, put the adjusters back together, install the drums, and make the brake adjustments. Now we can lock up the drums on both sides with 4 to 6 clicks, and it is ready to go.

Drums on with locking nuts installed, and shoes adjusted to minimal clearance. Time to shorten the manual brake cables for minimal free play. That done, the fly-off hand brake and parking brake work perfectly, put the wheels back on. All is well with fit and function of the rear hydraulic brakes and hand brake. We still need to replace the deteriorated rubber boots over the manual levers of the rear slave cylinders. Bad rubber parts from Moss Motors have been an ongoing problem for at least the past 15 years. Scarborough Faire is supposed to have better rubber parts, but I think they were out of stock last time we were ordering.

Way past dark, time for dinner, and get a start on processing the pictures for the day. Then it was suddenly way past midnight before we would knock off to get some sleep.
Tuesday, June 23, 2026:
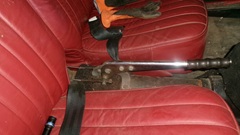
Nearly mid morning before we were up for breakfast and back to processing photos and notes from yesterday. Then Stu walked in, and we had some discussion of what was fixed and what not. We were checking again and fiddling with the steering gear when we finally spotted the problem up front. The steering column is connected to the pinion shaft with a rubber flex coupling with three bolts on the radial fingers. Two of the three bolts were missing, and the third one was loose. With very light steering effort it might work a little bit. Any more than minimal torque, and the input flange would orbit around the one remaining bolt with no steering output, and the orbiting flange would sometimes lock up against the engine oil pump housing to stop the steering column from rotating. Scary, thinking Stu was driving this thing on the highway a few days ago. This will require some knuckle busting, but at least we know what it needs to be fixed.

By 4-pm we had a break time, and the trailer paint was dry to the touch inside, reinstall the tail light. We rolled it down the hill to the market to restock the sodas and snacks (and some other necessary food). With less than half the normal load in the box, we were back up the hill all the way in 4th gear, nice.
Wednesday, June 24, 2026:
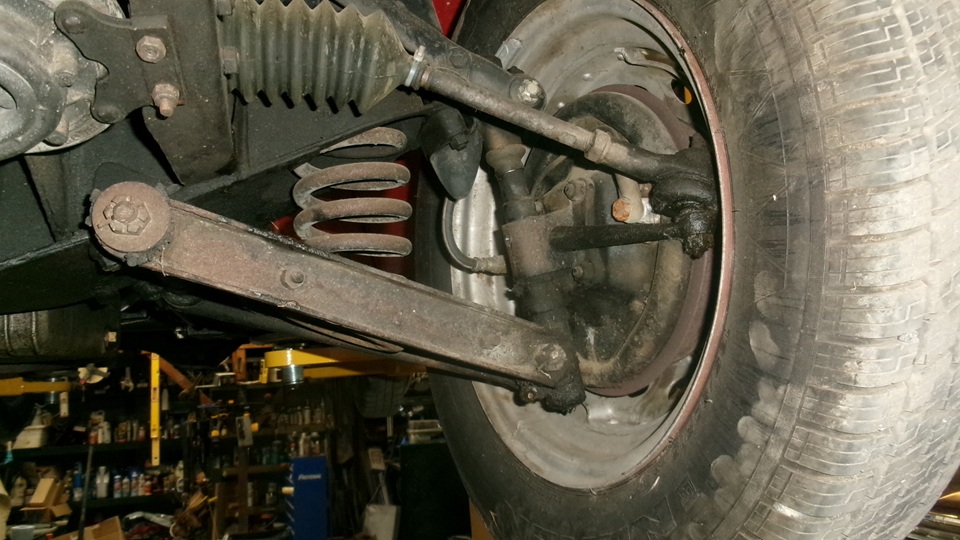
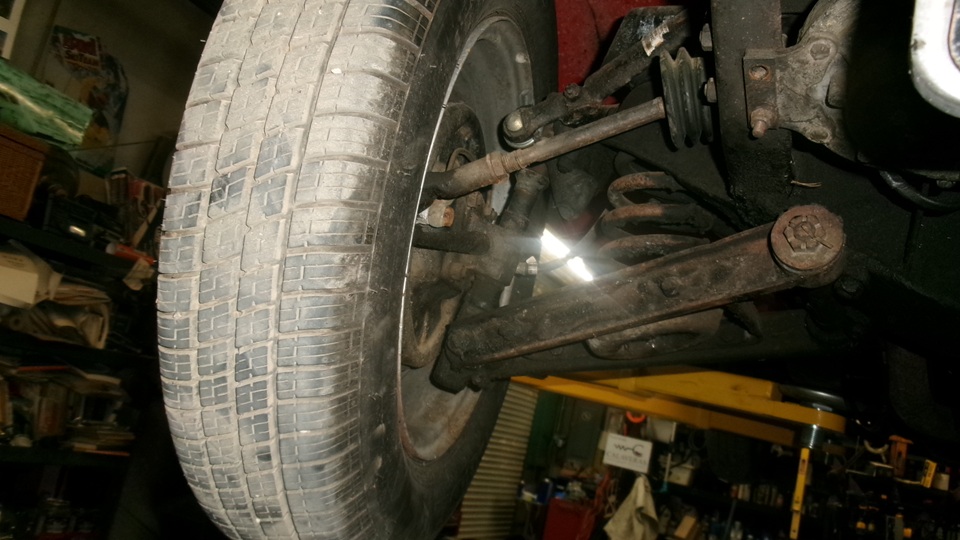
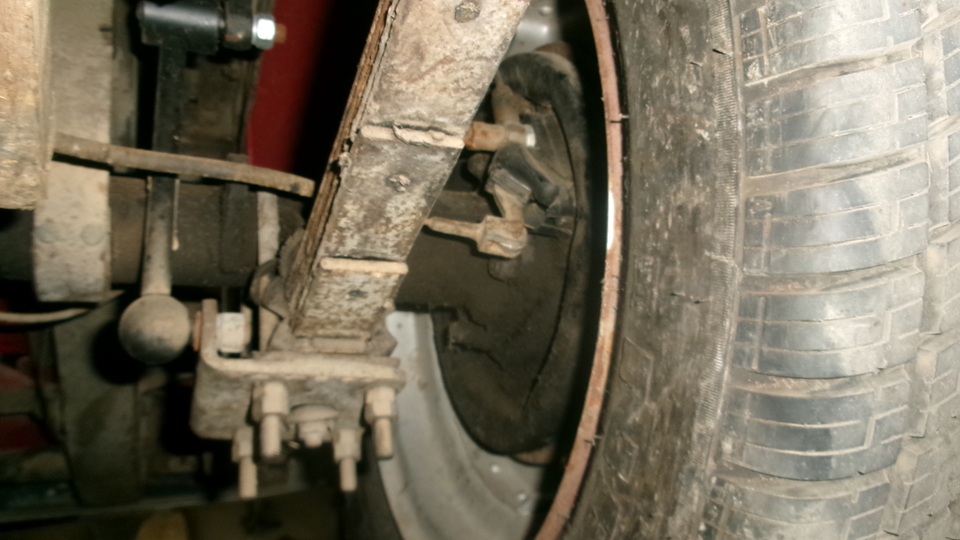
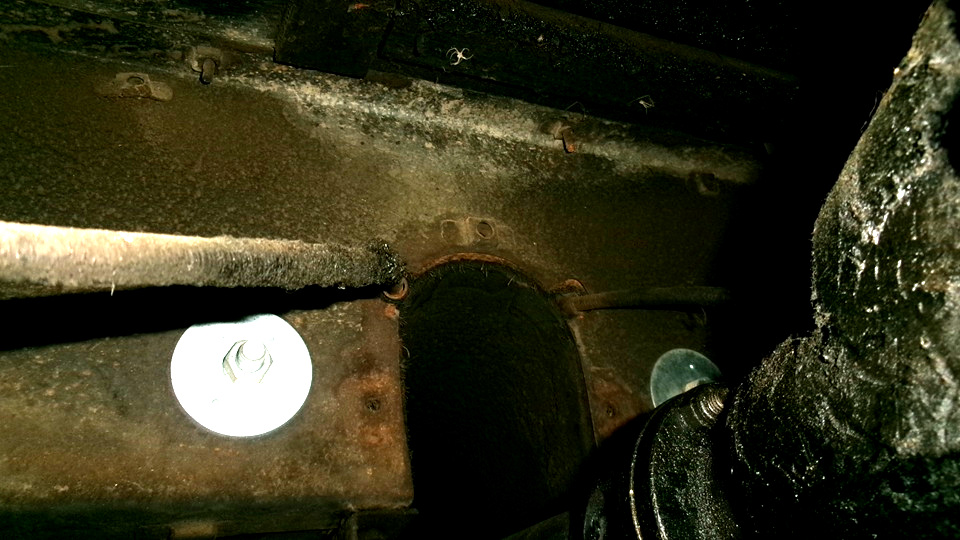
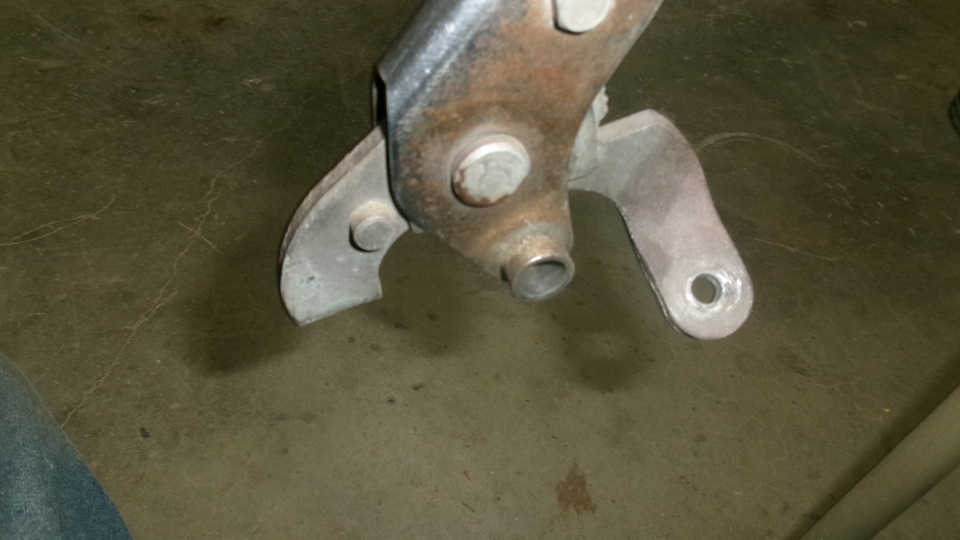
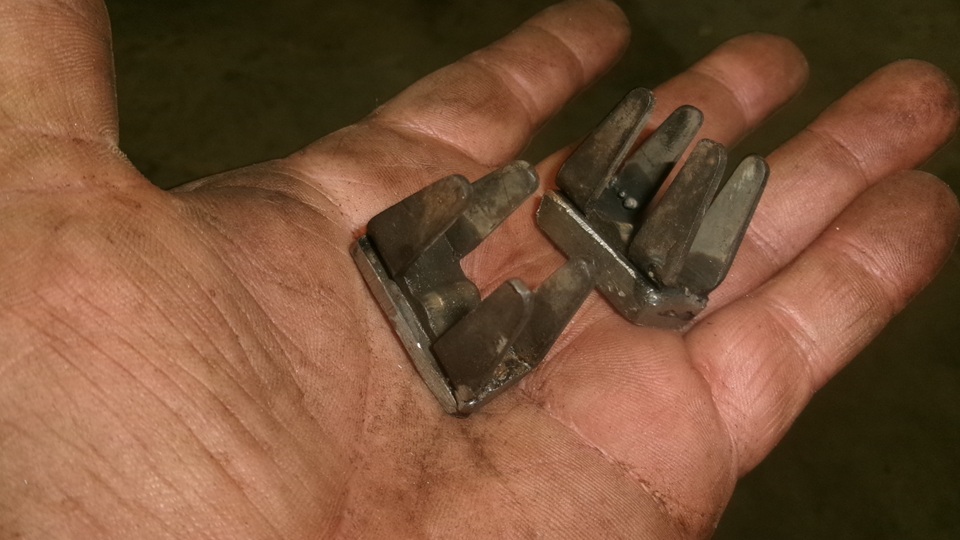
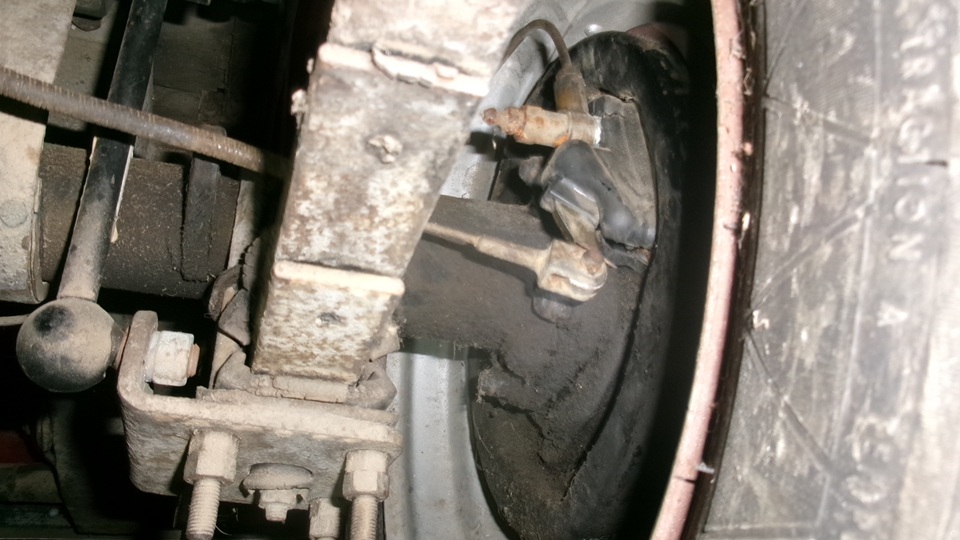
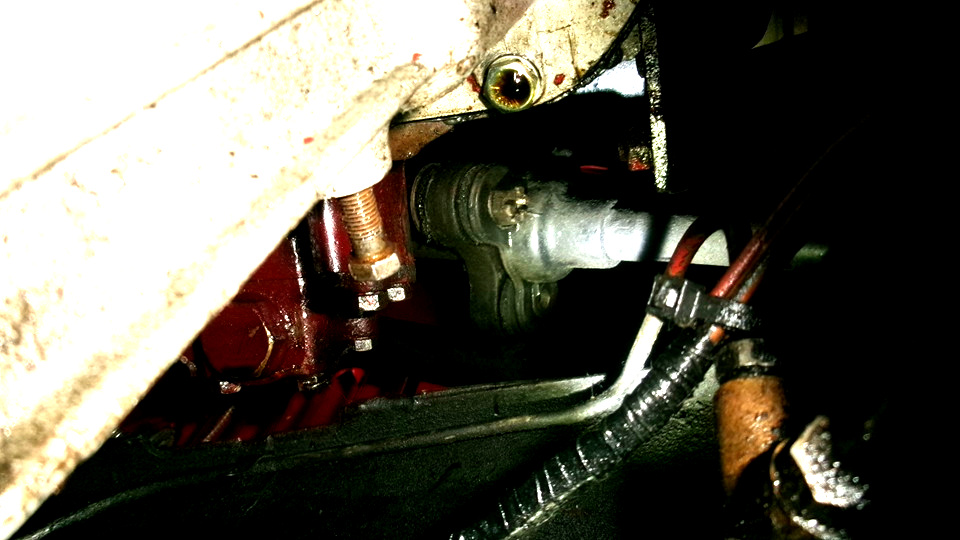
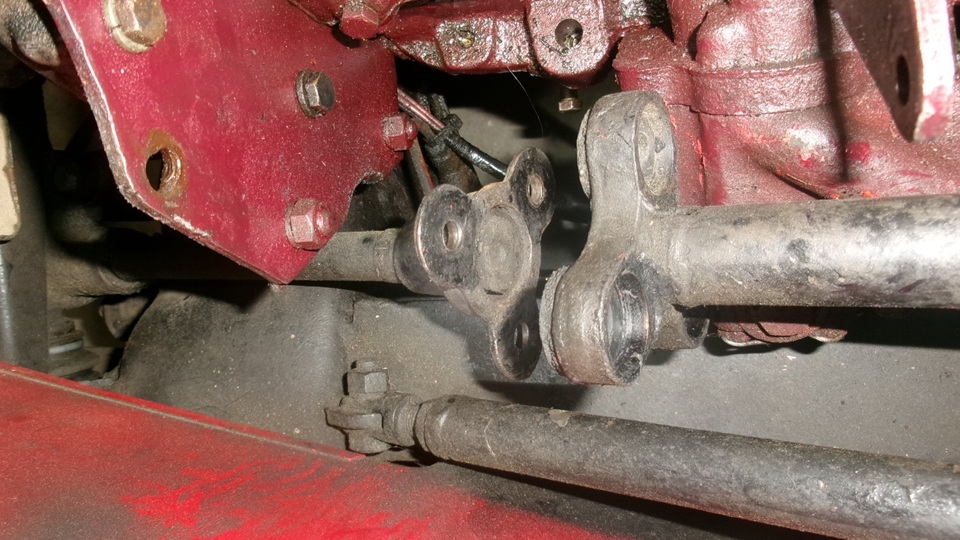
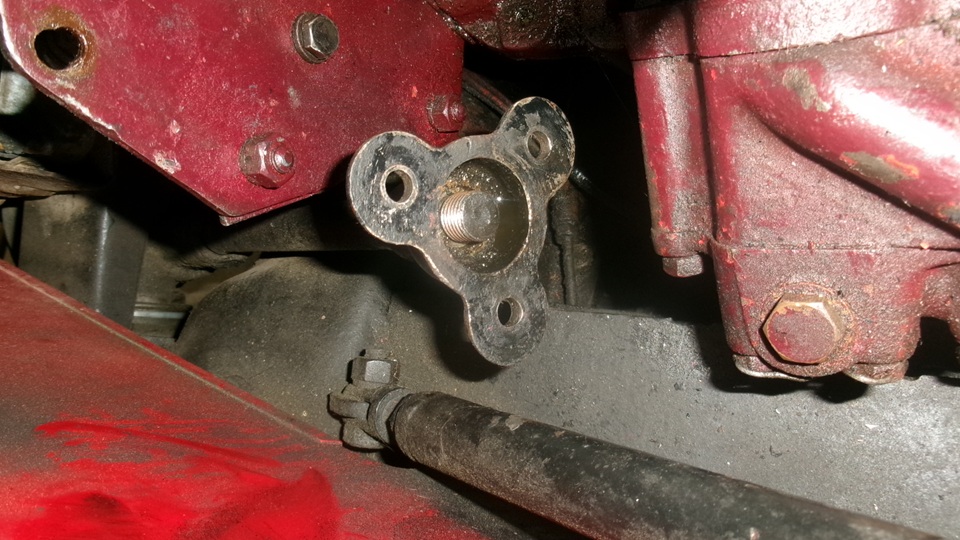
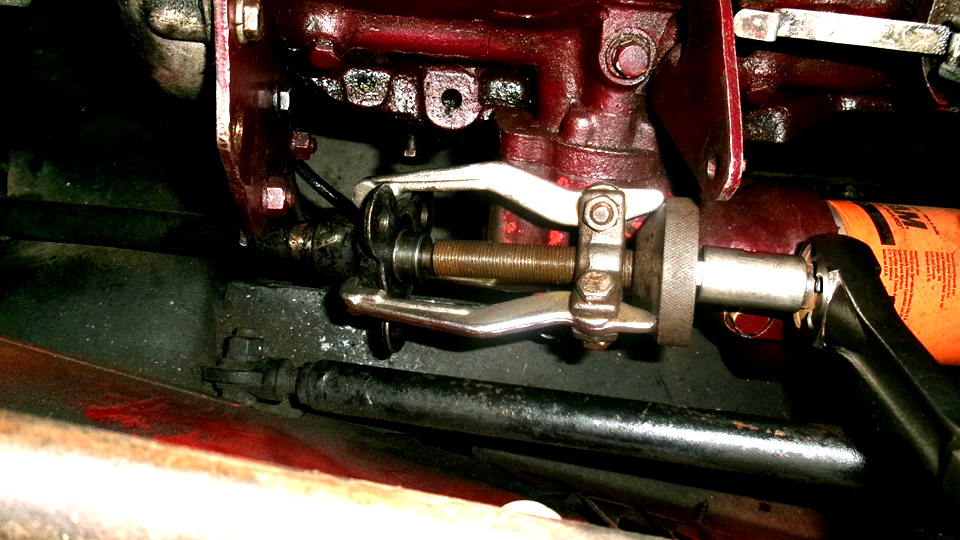
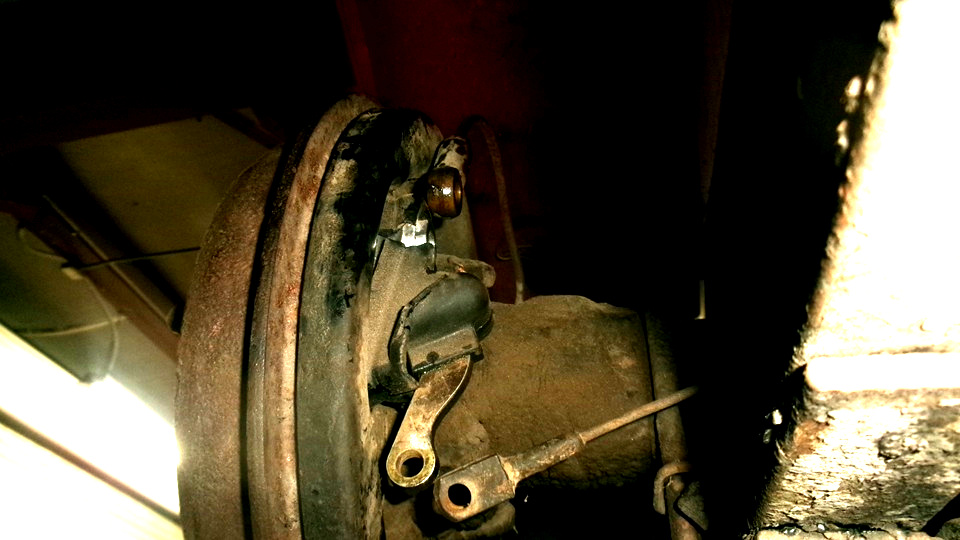
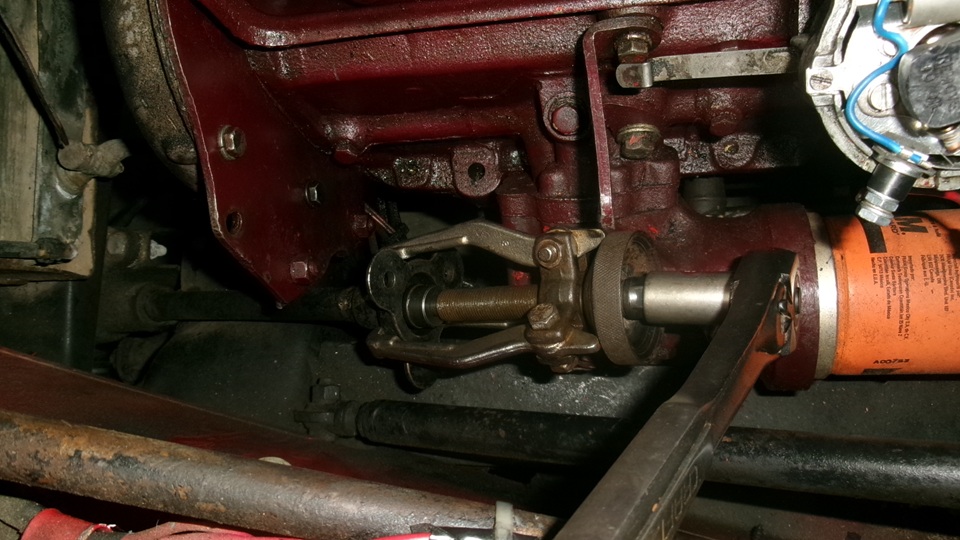
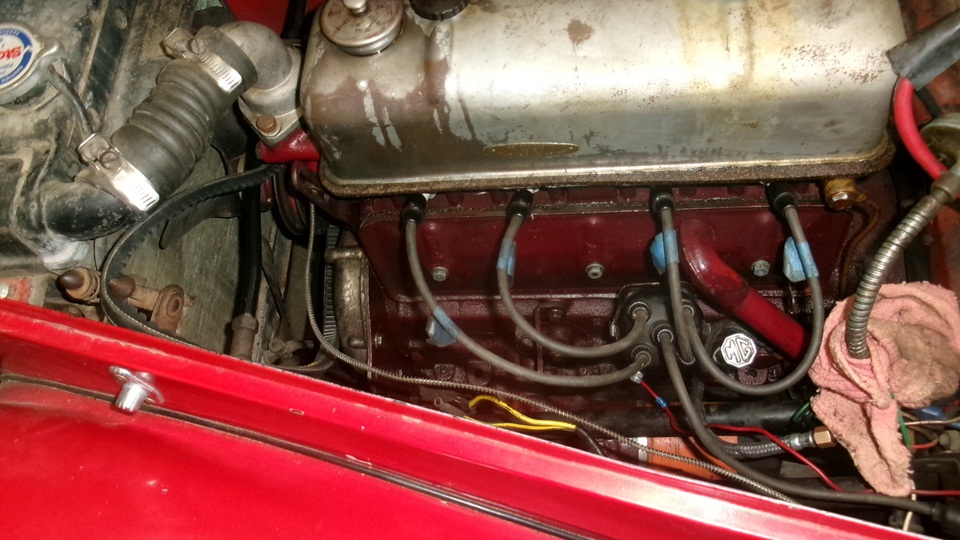
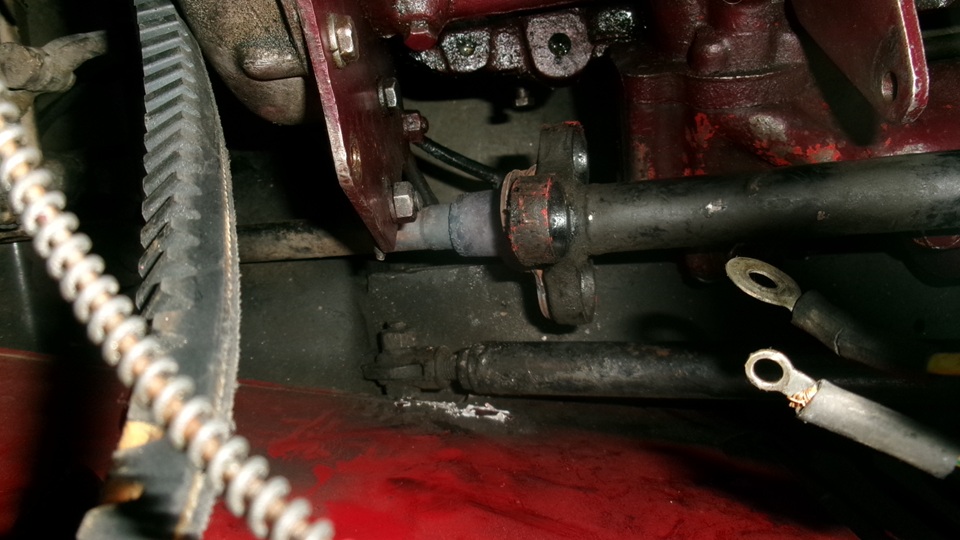
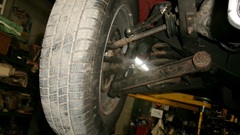
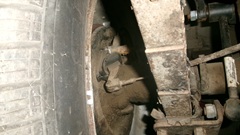
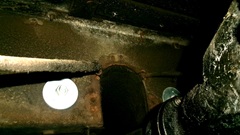
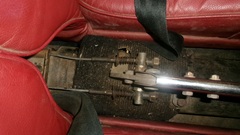
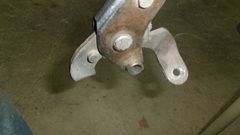
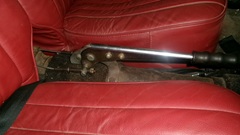
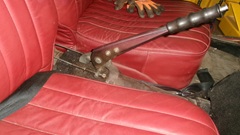
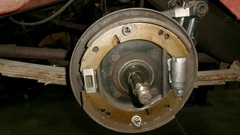
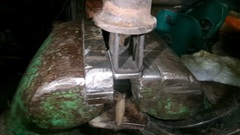
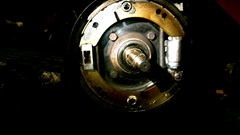
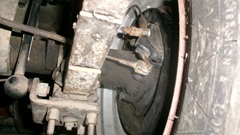
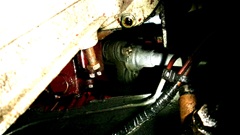
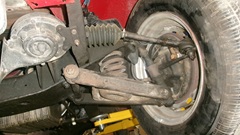
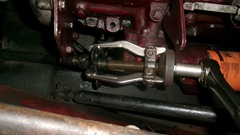
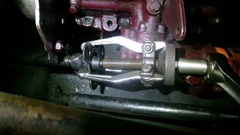
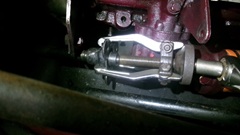
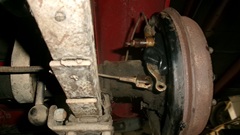
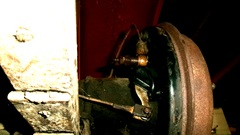
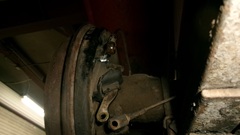
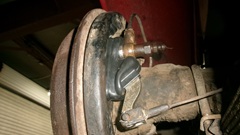
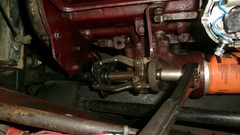
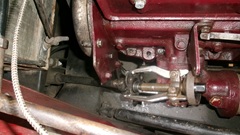
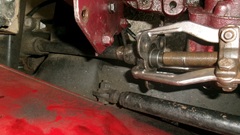
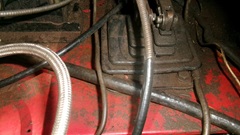
Today we get to attack the fractured steering column flex joint on the MG TF. Of course there is no space to put a hand or a wrench anywhere under the bonnet of the TF. But after some skinned knuckles and few odd wrench combinations we managed to remove the generator to gain access to the steering column joint.The first picture shows the tri-leg flex joint with one shoulder bolt with flat washer and two rubber bush8ngs still present. Just below the joint a flat washer lying on the frame, and at lower right in the picture another shoulder bolt with a rubber bushing still on it. Second picture shows the joint disassembled, with the tri-lobe flange being one with the shaft, either hot forged or welded that way, and that part is in good condition. Third picture shows the lower flange with securing nut and lock washer removed, and the flange stuck on a fine spline that so far refuses to come apart. Those three lobes are very thin, and the threads long since stripped out, so the flange has to be removed for repair or replacement. Of course the part is not available new.


 We had a 5-pound slide hammer with three-jaw puller on it, banging on it repeatedly with all might, but it still refuses to budge. I have a very sturdy 2-bolt or 3-bolt puller, commonly used as a steering wheel puller, but hefty enough to pull wheel bearings out of semi truck. We might remove the oil pump (4 bolts) to allow space to use it. Problem here is, if we pull too hard on that flange it is likely to break the three lobes, which happen to be quite thin (hardly thick enough to hold the prescribed threads). We just ordered a joint repair kit with new shoulder bolts and rubber bushings (and new brake hoses). We will set this aside to stew on it until tomorrow.
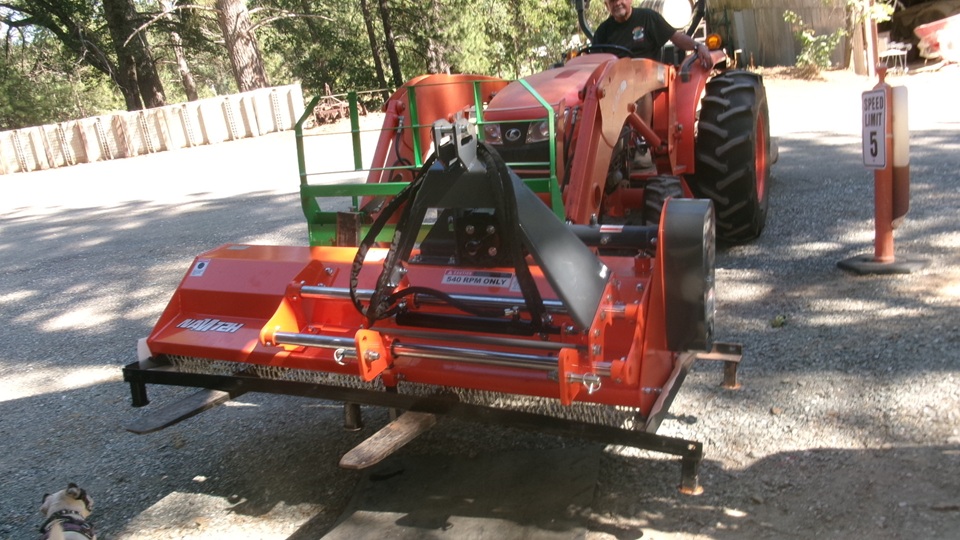
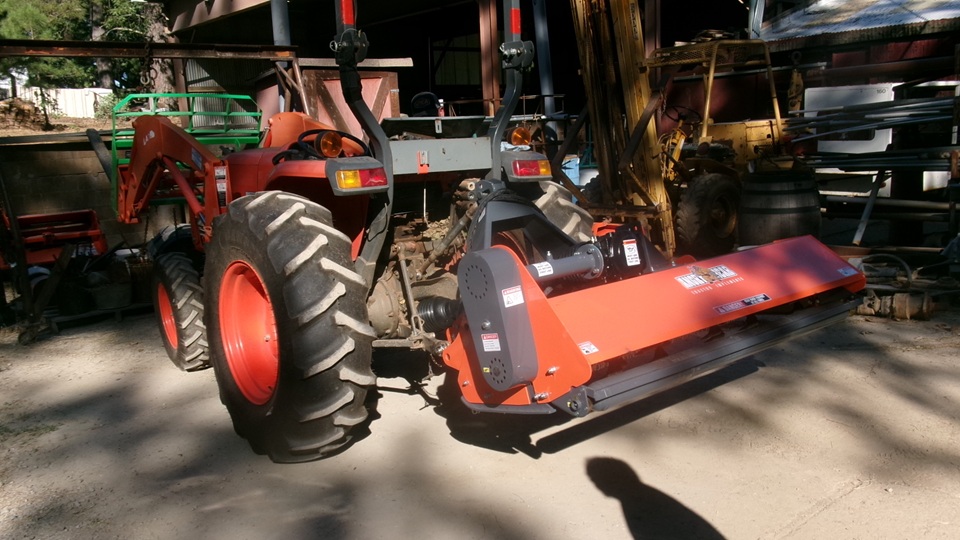
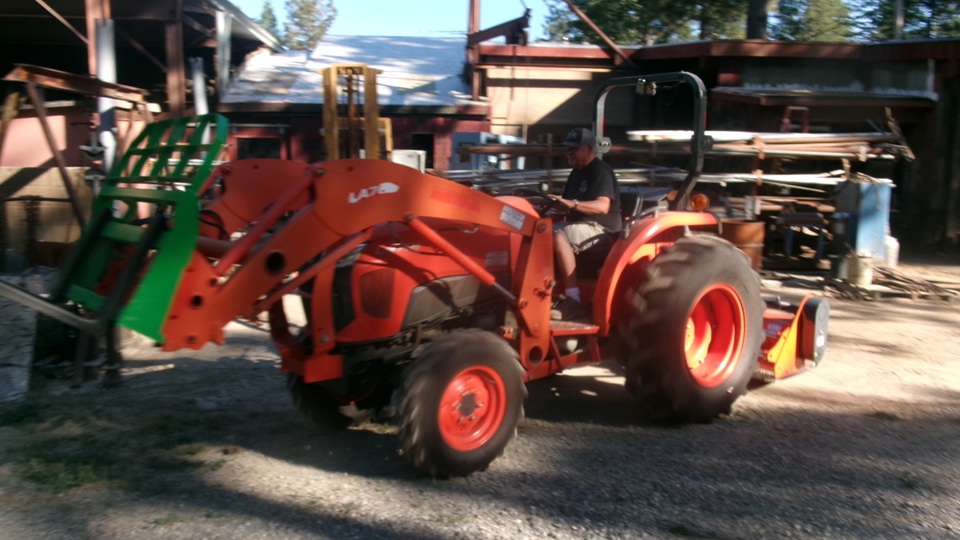
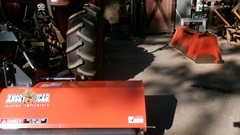
Meanwhile, something else just popped up. The business here has just procured a new flail mower that needs to be unpacked, assembled,and mounted on a 3-point hitch. It arrived surrounded by a bolted angle iron frame for shipping, so remove two dozen bolts, and save the bolts and angle iron for future materials on the farm. A hydraulically actuated side slide mechanism needed to be bolted on, as well as the 3-point hitch yoke. Then put oil in the gearbox and bearing housings.
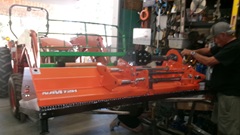

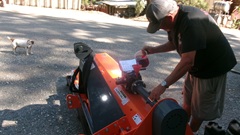
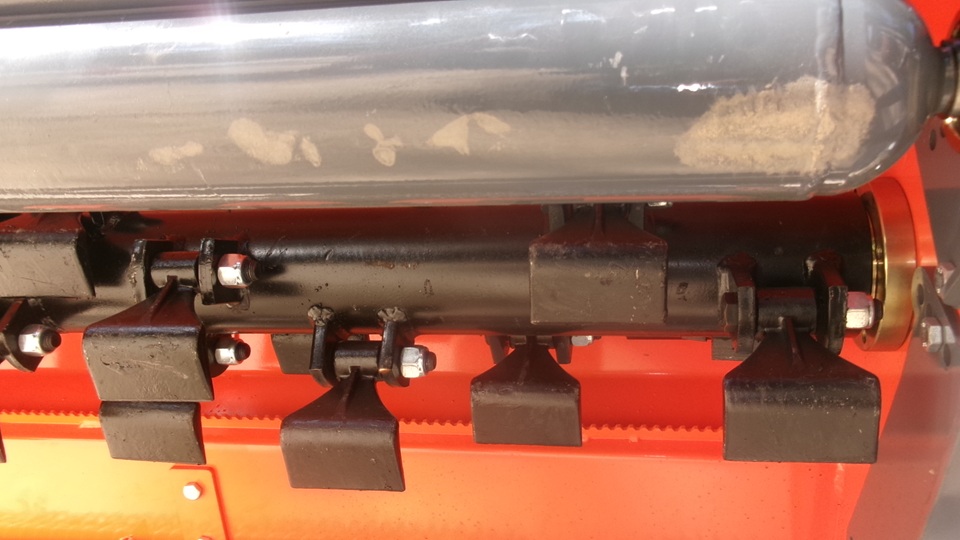
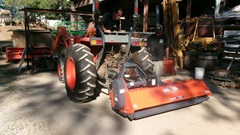
Not long to lash up the 3-point hitch and get the lift working. A look at the flail cutters underneath. Hooking up the PTO shaft and hoses for the cross slide control. Final adjust for level.


Exercising everything, up, down, right, left. Looks like it's ready to head for the field tomorrow. Dinner break at 6-pm.

Uh, you did know I used to be a farm kid, before I was a machine design engineer?
Thursday, June 25, 2026:
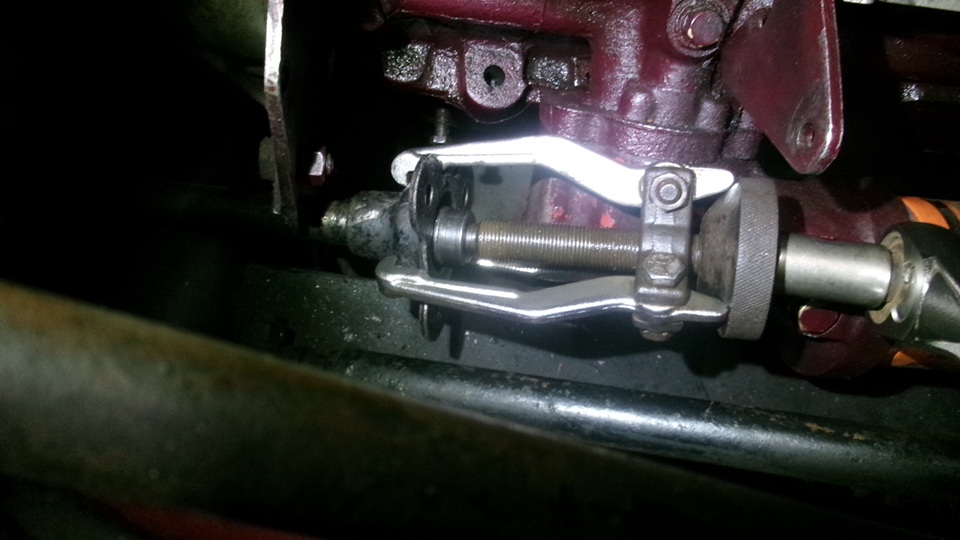
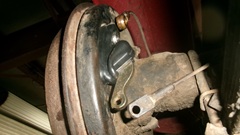
Back to fussing with the steering joint on the MG TF again. The slide hammer puller wasn't going to work, because there was not enough space to get a straight shot at the pinion shaft. Articulated 3-jaw pullers could not get a good hook with the flange, as well as alignment interference with the oil pump in the way. A 2-jaw puller could not be aligned with the 3-lobe flange. I finally landed on some parts that could work, maybe.
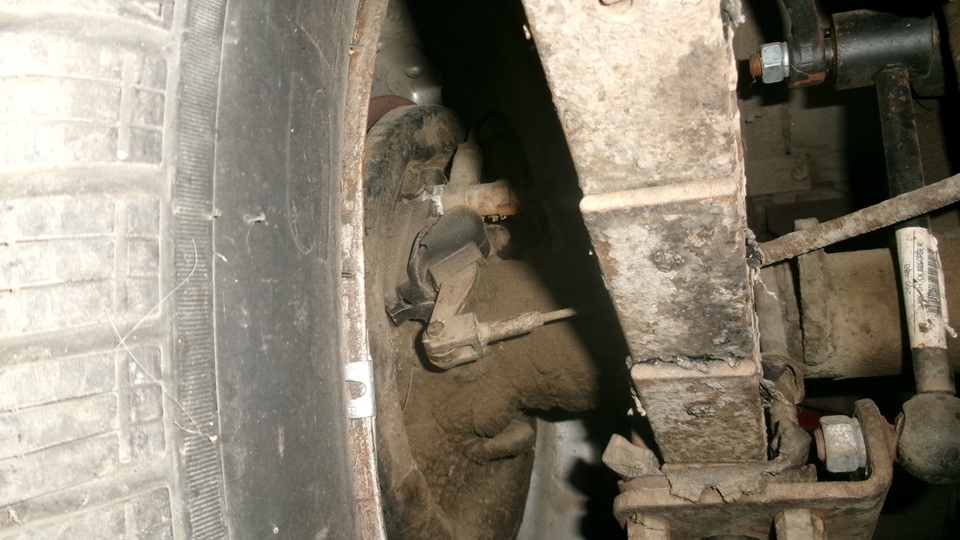
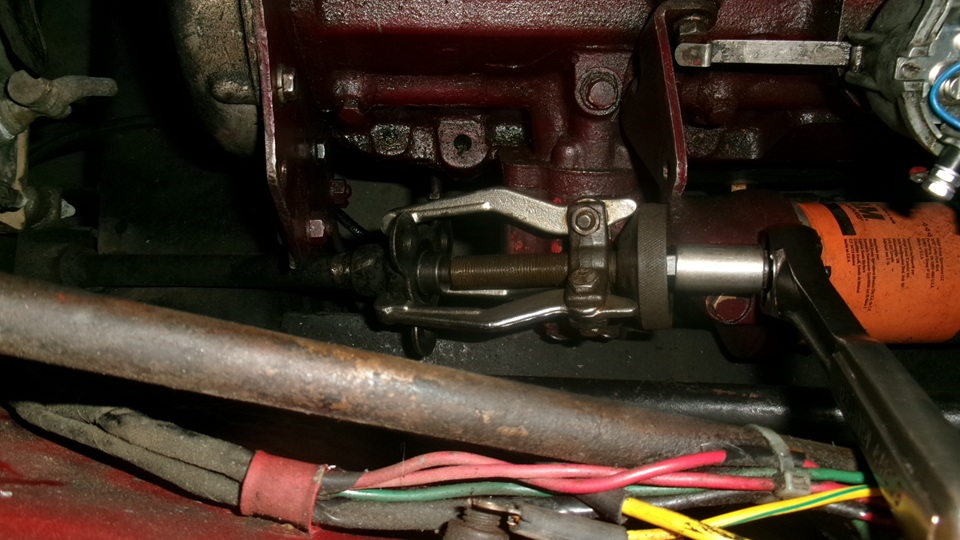
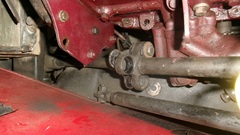
 Using the 3-jaw puller that was intended for use with the slide hammer, substitute a shorter wrench driven center pusher bolt from a different puller. The conical hand nut works to spread the tail of the arms to hold the arms firmly hooked behind the hub. With some fiddling with position of the hook arms, length of the pusher bolt, and tightening of the conical hand nut, the improvised three-jaw puller was finally in position, directly in line with the pinion shaft, and not interfering with the oil pump. It was beginning to look like a winner. Using the 3-jaw puller that was intended for use with the slide hammer, substitute a shorter wrench driven center pusher bolt from a different puller. The conical hand nut works to spread the tail of the arms to hold the arms firmly hooked behind the hub. With some fiddling with position of the hook arms, length of the pusher bolt, and tightening of the conical hand nut, the improvised three-jaw puller was finally in position, directly in line with the pinion shaft, and not interfering with the oil pump. It was beginning to look like a winner.
We had a pry par between the legs to keep it from rotating while turning the pusher screw with a socket and ratchet wrench. I thought it was working at about 50 lb-ft torque. After tightening we wound it down a few more turns, and it felt like progressive movement of the hub from the splined shaft. And then it didn't, as it got tighter and needed more torque. We stopped there and left it sit with the force on it, half expecting it to go "bang" and come loose at any moment. Time for dinner break, and I don't know what happens next.
Friday, June 26, 2026:
Sitting in Pacific time zone at 820-am, dealing with business in Eastern time zone (three hours out of sync at 11:20-am), making a phone call to renew my Antique Vehicle auto insurance. On hold for a while, then "Dial 1 and we will call you back". Okay, while waiting, get on line to register for "MG International 2026" in Sandusky, OH in late August, then on line again to make hotel reservations for that event. Once more on line to register for the Chicago "British Car Festival" in Palatine, IL in early September. Then a late breakfast break as time is flying, and suddenly 2:25-pm PST and 5:25-pm EST with business there about to close, and the insurance folks have not called back. Oops, panic call, and a real human voice answers, thank goodness. Not long then to renew the car insurance, and we can get back to fiddling with the MG TF.
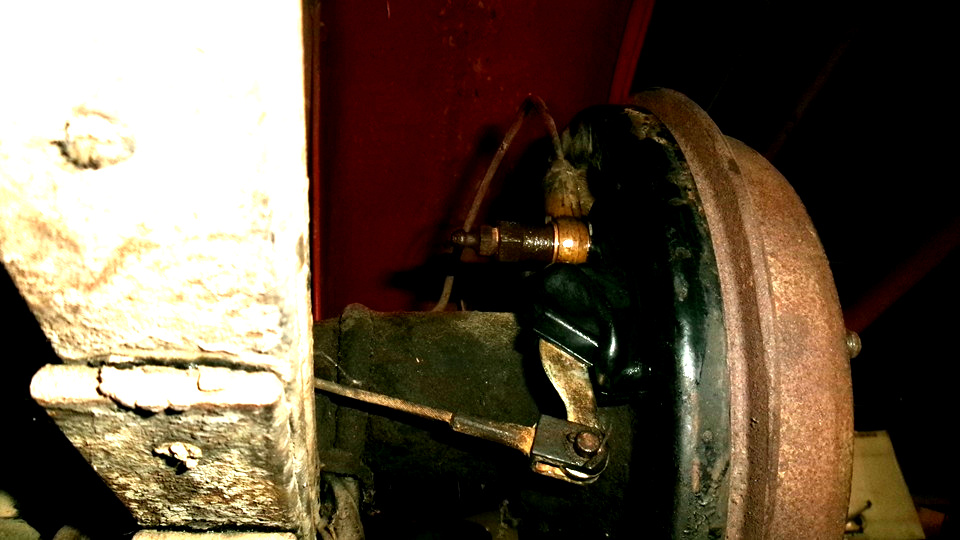
Time to replace the rubber dust excluder boots on the rear parking brake levers. Left side first, remove split pin and clevis pin to disconnect cable, and the rotted rubber boot tears away easily with light finger tug. Remove banjo bolt with two copper washers to push the banjo fitting aside. Slip the new rubber boot over the lever, push the boot into place nested around the slave cylinder flange. Reinstall banjo bolt with seal washers, and reconnect the cable with small clevis pin. Almost as easy as it sounds.
Rinse and repeat, same on the right side,done in a few minutes. Still need to replace hoses, so not bleeding it yet.
Then another shot at the stubborn steering coupling. I don't give up easily, but this thing is beginning to bug me. The three leg puller may be slipping a bit at one of the hooks, so slacken it off enough to tighten the locking collar a bit more, then tighten it up and wail on it with a big socket wrench, backed up with big pry bar. Again, well over 50 lb-ft torque on the jack screw, now wondering what part or tool might break first, as the spline is still is not coming apart. Step back and let it sit, thinking we may have to resort to the "Blue Wrench", maybe tomorrow.

Saturday, June 27, 2026:
Okay, we will be serious today, get the TF off of the hoist, and roll it back. The puller on the steering coupling has the steering disabled, so we use a trolley jack to lift and swing the back end toward the door, and the front end in alignment. Generator is out, and fan belt moved away from the crank pulley. It can run for a minute without fan or water pump,so back it up 20 feet to be outside, and chalk it up there. Get the acetylene torch set up and working, and a bucket of water to cool things down periodically.


We torched the female splined hub of the coupling, just to the left of the 3-jaw puller, until it was flowing red hot, then wrenched on the tools to pull the hub off of the splined shaft. First try, one puller jaw may have slipped loose, and it may have moved a little, with just a trace of male spline exposed. Take a break to let it cool down, bath it with water for final cooling. Remove and reset the puller with the hook arms hopefully more secure, and repeat. Heat the hub evenly to red hot, and wrench with vigor to pull like hell. Pretty sure it moved a little more, with 1/8-inch of the male spline exposed. Let cool completely, and go again. Heat to red, pull hard, felt like it must have been moving a bit more, but hard to tell. I'm convinced it was moving, but navigator not so much. After 4 or 5 serious heat and pull and cooling cycles, our arms were at limits of muscle power, and it wasn't moving any more. I can't remember a spline ever being this stubborn. I'm pretty persistent and do not give up easily. Failure is not supposed to be an option, but at some point frustration may turn to pragmatism.


Now I think we wait for the new coupling kit parts to arrive. Put the big boy tools away for now, and put the car back inside. Concert in the park tonight, mostly stay out of the way.
Sunday, June 28, 2026:
This is odd. So busy that I got four days behind on my notes and forgot what I was foing this day )and no pictures). So I guess it must have been a day off.
Monday, June 29, 2026:
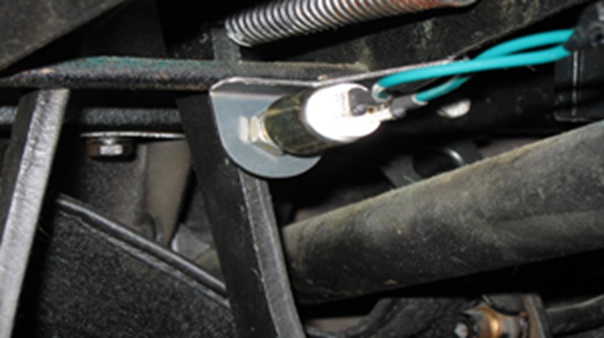
Contemplating adding an angle bracket at front of the pedal excluder in he engine bay to hold a push switch against top end of the brake pedal to serve as a mechanical brake light switch. Note that one fold of the draft excluder rubber sits on top of the hex head bolts, so the rubber has to be pushed back to wrench on those bolts during installation. I borrowed the line drawing from someone else, with dimensions in metric and the note in French. Need to be careful with the third angle projection thing, as it appears to be bent in the wrong direction. Need to flip the draft excluder retaining ring upside down so the small edge flange goes down (nearly against the paint on the heater shelf). Then place the angle bracket on top of the retaining ring, tucking the edge of the bracket under the first fold of the rubber. Put the P-clips on top of the bracket before installing the bolts with washers. Pull the rubber up to wrench the bolts down, and hope there is space for the wrench socket behind the bracket. Just thinking out loud.
Tuesday, June 30, 2026: 
Parts scheduled to arrive mid day Wednesday, so we have a day or two to kill. Someone has another suggestion for how to "upgrade" from the troublesome hydraulic brake light pressure switch to an instant-ion mechanical brake light switch. I have rech page for that, but there are six others ahead of him. And the page was getting crowded and a bit confusing. So before bulking up, I split the large page into six more pages with one switch idea per page, with the original page URL ET-255 serving as the index page.
 Now we get to add the seventh good idea, ET-255G. This one is intended to deliver as a complete installation kit with new switch, a finished bracket, a mini wiring harness, a complete instruction sheet with tool list included, and promised installation time less than one hour. I had been looking at this email information set for near ten days, on and off, setting it aside a few times when it looked a bit confusing. Today I had time to sit on it long enough to figure out how the proposed wiring change would work. Turns out there would be an easier and less confusing way to do it, so after posting the seventh good idea page with a link to the insatllation instructions, rather than sleeping on it I spent a mostly sleepless night mulling it all around in my head, while trying to figure out how to tell the guy he was wrong, followed with some helpful suggestions on how to do it better. It happens sometimes.
|