The MGA With An Attitude
MGA Guru Is GOING MOBILE - (November 16 - November 30, 2025)

Sunday, November 16, 2025:
Cruised on into Lexington, SC for breakfast. Made call to let our friend Dave Daniel to let him know we had arrived. He brought his spiffy MGA 1600 over for a warm afternoon cruise. Good to see both of them again. 9-pm we headed south again destined for the state line and the Georgia Welcome Center. Came up a little short on fuel, stopped a Love's near Yemassee, SC to gas up, then decided that was close enough (40 miles short) to knock off an hour earlier than planned. Good time to catch up a little clerical work. USPS does not deliver on Sunday, so tracking is still saying our wrench should arrive sometime on Monday. Glad we are not still stuck in West Virginia waiting for it.
Monday, November 17, 2025:
Up early, drive south for an hour. Breakfast in Richmond Hill, Georgia, just southwest of Savannah. Short stop, then getting on down the road, landed in Jacksonville, Florida (North side) in time for evening Zoom tech session with John Twist, chatting about restoring a car.
Tuesday, November 18, 2025:
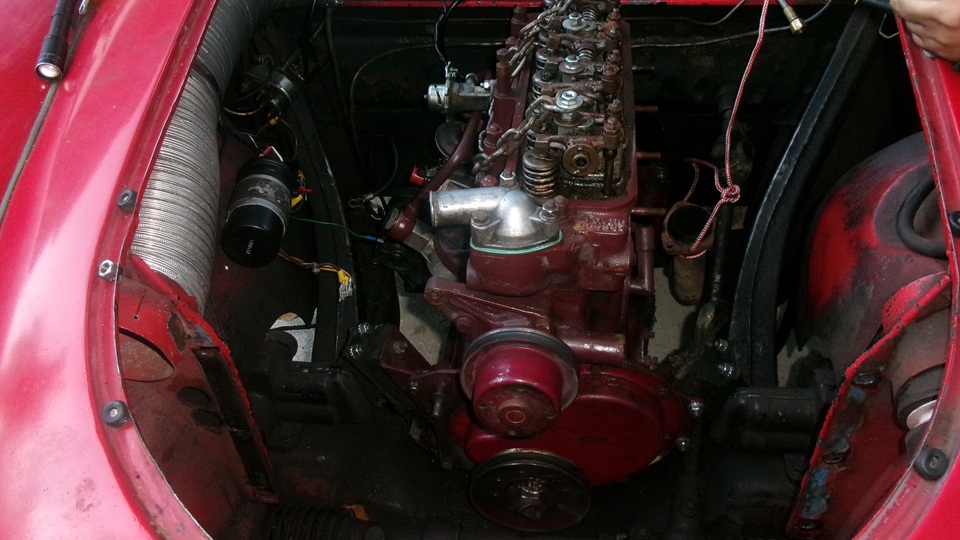
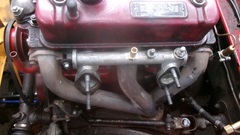
Moving on a little farther to Baldwin, FL (West side of Jacksonville). Alternator not working this morning. Bummer. have breakfast while the thing cools down. Tracking info says the replacement wrench is out for delivery today back in Princeton, WV(maybe). Odd failure mode for the alternator (aren't they all?), The ignition lamp bulb, which we just installed recently, was open circuit. Checked bulb with power and ground. Dead. Installed a new bulb, still not lighting up. Alternator not sinking current from Ignition lamp? Changed the alternator, ignition light on when key turned on,and goes out when running, charging 14 volts again, everything works. Make note to get the failed alternator tested soon.
Continue cruising south, less than 50 miles, engine develops a funny knock. Now what? Oil pressure okay, coolant temperature okay. Knocks a little when idling, knocks more under load. Can run up to 45-mph, 2500 rpm on very light throttle with very little knock, but knocks under more load or higher speed. Nursed it along gently a while more, maybe 15 miles, stopping at Loves in Hawthorne, Florida. Perplexed, sit down for late lunch, and think about it for a while. Feeling a little down, but there is always a solution so you can laugh at the situation later.
Wednesday, November 19, 2025:
Up for early breakfast, and reconsider the situation. Nothing obviously wrong with the car other than the odd noises. It sounds bad, but cannot identify the source of the noises. Not going to tear the car apart looking for something that might be quite simple, and may be harmless. So for diagnostics, take the easy way out and drive it a little more to see if it gets worse, or not. It's just a machine.
So we headed south at 10:15 in the AM, taking it easy, short shifting, keeping it under 2500-rpm or 45-mph, and see how it goes. No interstates, keeping to the state and federal highways, lots of small towns with reduced speed limits and a few traffic lights where we were often keeping up with traffic. We got a few drivers PO'd in open country with two lanes no passing, but they were mostly civil and understanding.
Five hours later we stopped for fuel and late lunch in Acadia, FL, 180 miles on, 180 miles closer to our intended destination without being towed, only 70 miles to go for cooperative friends. Go figure. What a difference a day makes. Yesterday we were highly concerned (worried sick). Today it turned out to be a nothing-burger. Well not quite nothing. I'm still trying to convince myself it might be a broken exhaust manifold, except the rattling noise under load or high speed sounds so convincing. Will certainly let you know when the game is over.
Thursday, November 20, 2025:
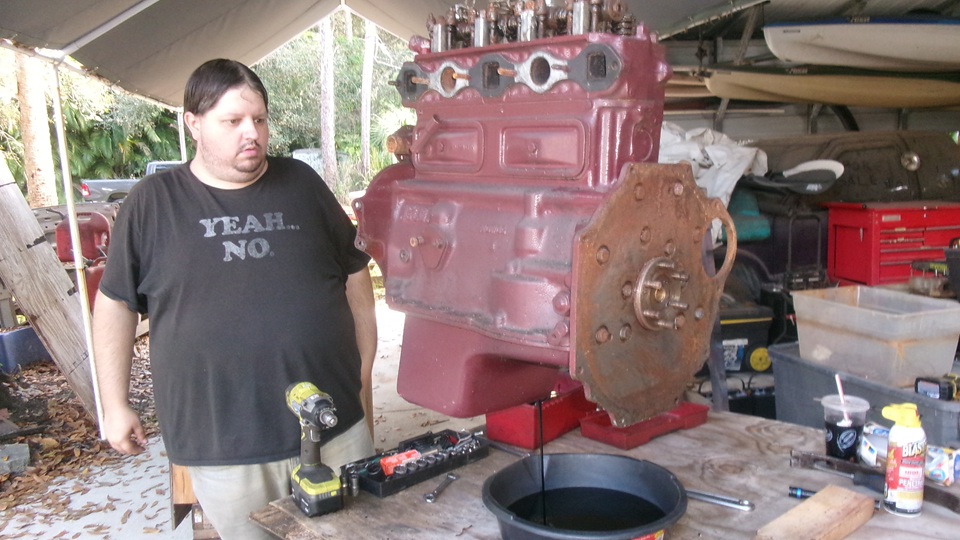
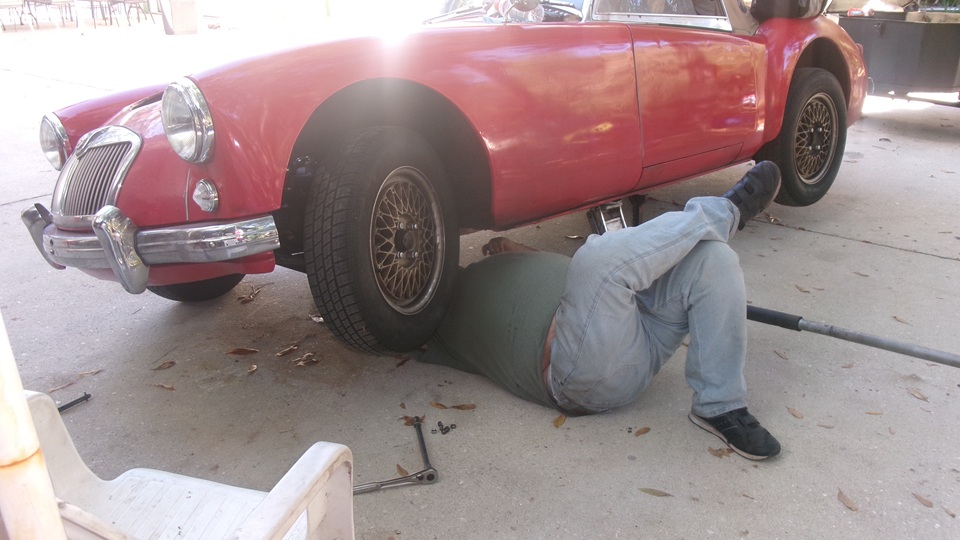
We puttered along some more his morning, keeping it under 2500-rpm, 45-mph. We made it from Arcadia, FL to North Fort Myers, FL in hour and a half, but need to say the noise is now notably more irritating, even with slightly lower engine speed. Now convinced we have a failed con-rod bearing, and mostly hoping it will hold together long enough to get to out intended destination. Struck out again at slightly lower speed, keeping to the side roads. The farther south we go the more congested the roads, and slow going making our way through metro areas. We did make it to Bonita Springs, FL with great concern for the worsening noises. Looks like we will make it to Tech Central's Thanksgiving dinner appointment in the morning, after which I suppose we will have to pull the engine to remove the crankshaft. Pity. Last December we had such high hopes for the replacement 18G/GA engine. 17,000 miles, and then this. Tough day, but finally got enough sleep for a change.
Friday, November 21, 2025:
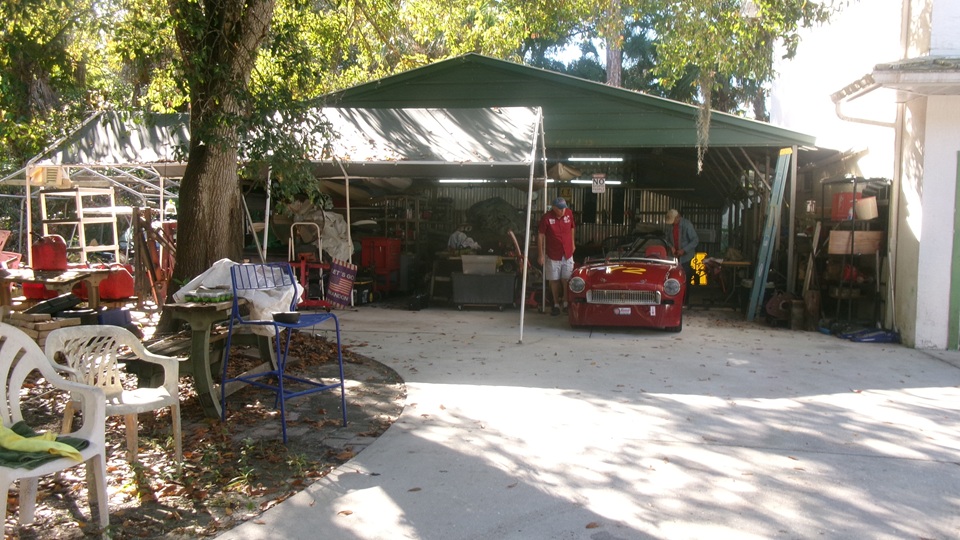
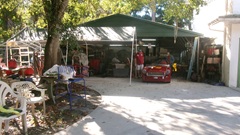
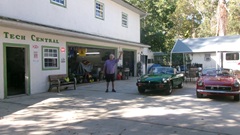
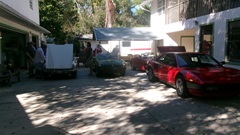
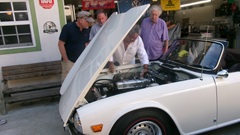
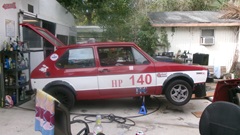
We drove (slowly) the last few miles to Tech Central in Bonita Springs, Florida this morning. Good to be back with friends we haven't seen since March. Tina the wannabe race car still wants to be, but not much luck so far, already had a couple of engine failures. Looks like some work space available in the shade. More cars coming in to park on the forecourt before the traditional Thanksgiving lunch feast.

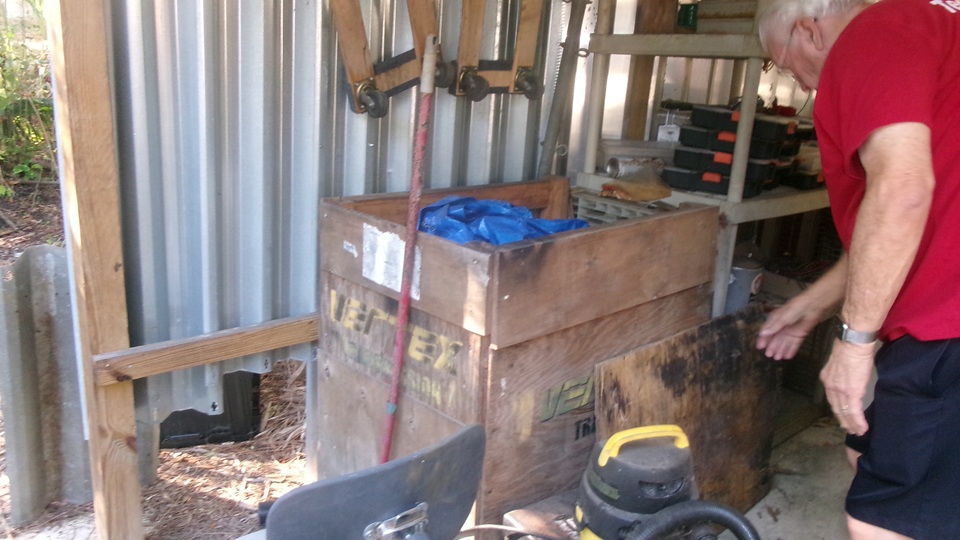
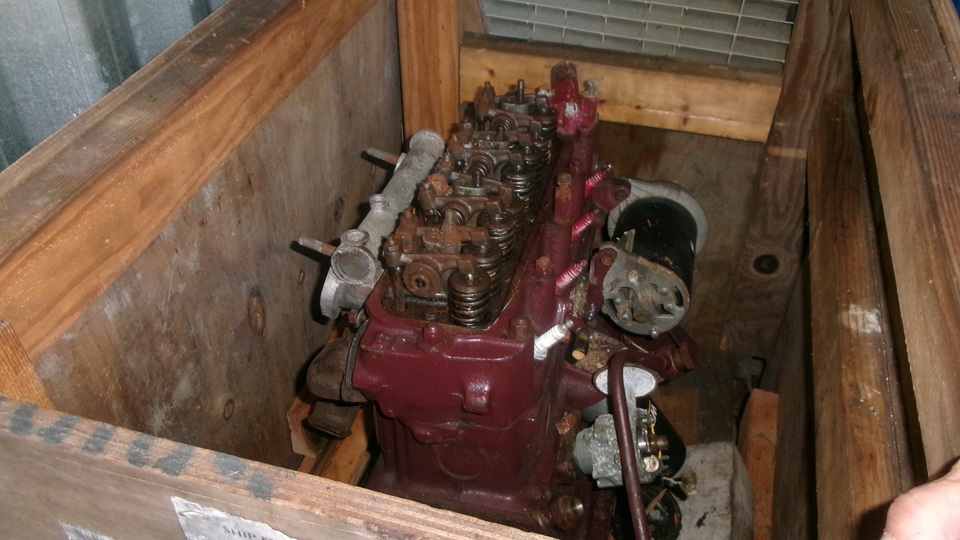
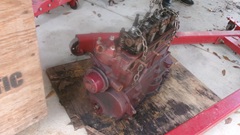
A quick peek in a shipping crate in back to consider a 1500 engine that came out of a friend's MG Z-Magnette, still running well when removed a few years ago when he was installing an 1800 engine. Would need to change the rear plate and flywheel and clutch, plus the oil pan and oil pump to drop this one into our MGA. Not likely, as it is only 1500cc with no mechanical tach drive, but something to consider in a pinch. Could be a good loaner engine if it looks like our repair may be a while in happening.

Another look at Tina, looking good as a well dressed lady should, as the forecourt was continuing to fill up.

The guys considering installing dual Weber side-draft carburetors on a TR6. Tight fit, but has been done.
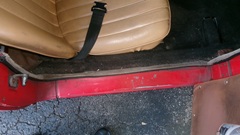
Time for feasting, and chat about getting older and people expiring. I called Glenn Lenhardt at Glenn's MG (and British Car) Repair in St Petersburg to see if they might have a spare crankshaft for the MGB 18G/GA engine. Just fishing, but maybe. If so, there is a crankshaft shop in St Petersburg that could polish or regrind one. Feeling better already, after chat with a few friends about what to do next. When the party was breaking up, we drove another 5 miles to a known good WiFi spot in Naples, FL. Got a call from another friend about possibly installing rear brake slave cylinders in an MGA Coupe. Then an email request from a bloke in Texas who is seriously considering making threshold plates for MGA, asking for a few simple dimensions for fitting. Easy to take a picture and a few tape measurements. Might be a good accessory idea for my car .


Saturday, November 22, 2025:
Add a link to the North American Shops list. -Snowliine Autoglass in Langley, BC, Canada is reported to be good with classic car windscreens and insurance claims. -- 20691 Langley Bypass, #102, Langley,, BC V3A 5E8 - Ph: 778-725-7669
Sunday, November 23, 2025:
Mostly just hanging out, with the holiday syndrome. First two attempts found WiFi spots not open at breakfast time. Third one open for breakfast, but no power outlet, Mid morning move back to the second spot, now open with power and WiFi. Fielding a tech question about wiring for an alternator conversion. Then a note from a friend in the UK reporting dimensional irregularities for rear leaf spring Silentbloc bushing, which is a continuing problem for more than 20 years. -- Seriously considering swapping the Magnette 1500 engine into our MGA (temporarily) to make it more normally drivable, as we don't know how long it may take to fix our 1800 crankshaft problem. This is a logistics problem, trying not to have the car off the road for more than one day at a time.
Monday, November 24, 2025:
Called Jerry at Tech Central, looking to set up an appointment to check out the Magnette engine, clear work space, maybe begin some disassembly. Jerry was busy, might be available late afternoon, hadn't called back after 4-pm, so looks like it is not happening today.
Tuesday, November 25, 2025:
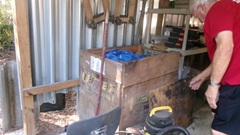
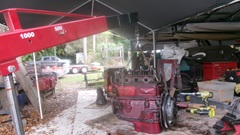
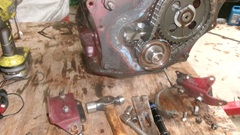
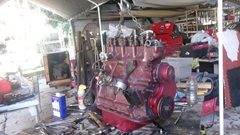
Determined to do something today, we dropped in to Tech Central by 10-am. Start by digging the old Magnette engine in the crate
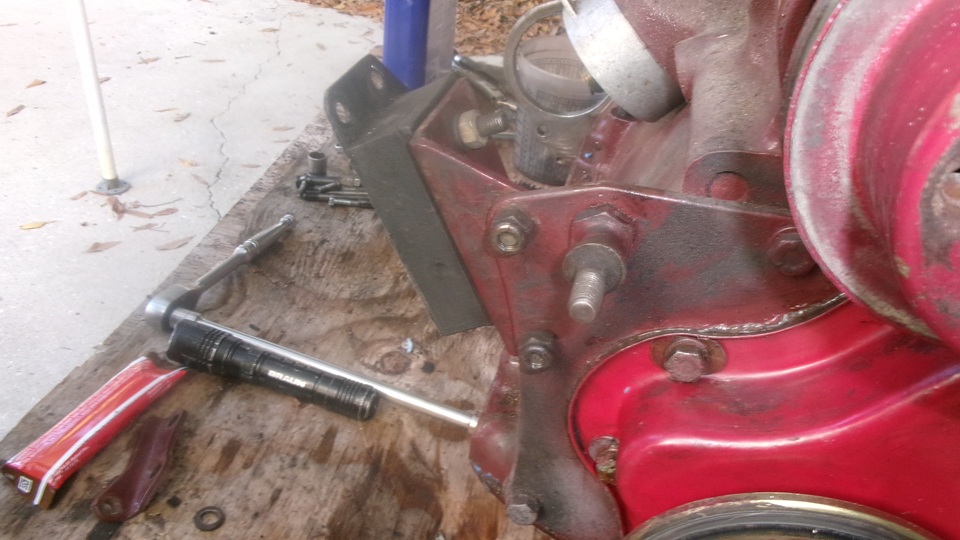
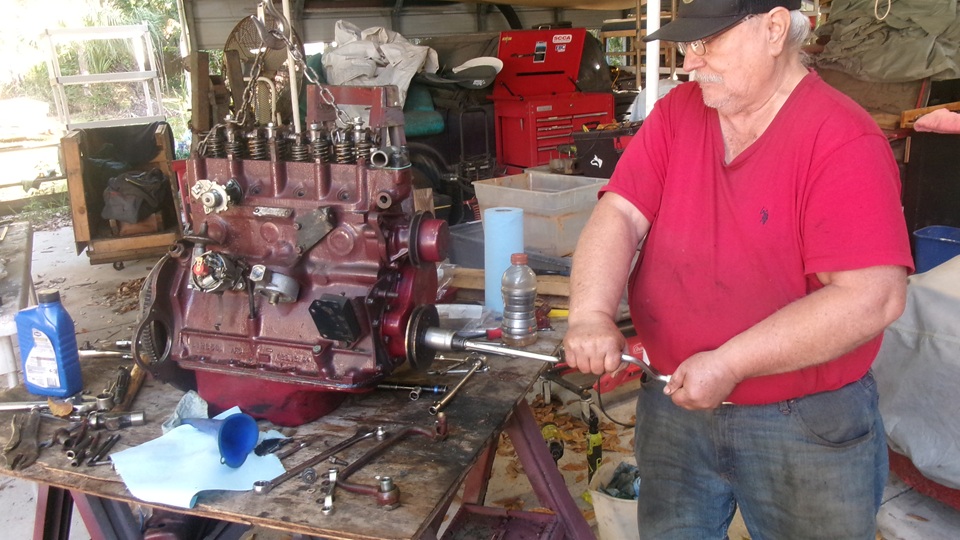
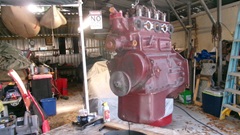
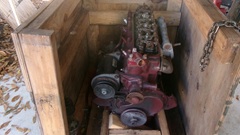 out of the back corner of the covered (but cluttered) work area. We noticed there was a two foot wide apron on the cement beyond the canopy frame. looking almost like a sidewalk after moving miscellaneous stowed stuff and sweeping away dead vegetation. The crate with the Magnette engine was on caster wheels, so with a bit of finesse we coaxed it around a corner and up the sidewalk to an open space in front. Remove a few wood screws to open one end of the crate, attach a lifting chain on top, and pull the engine out with an engine hoist.
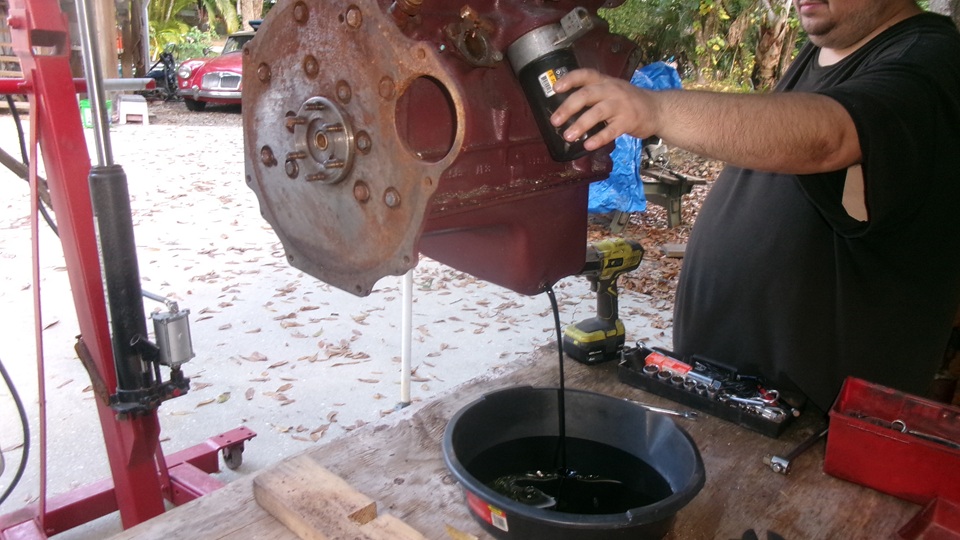
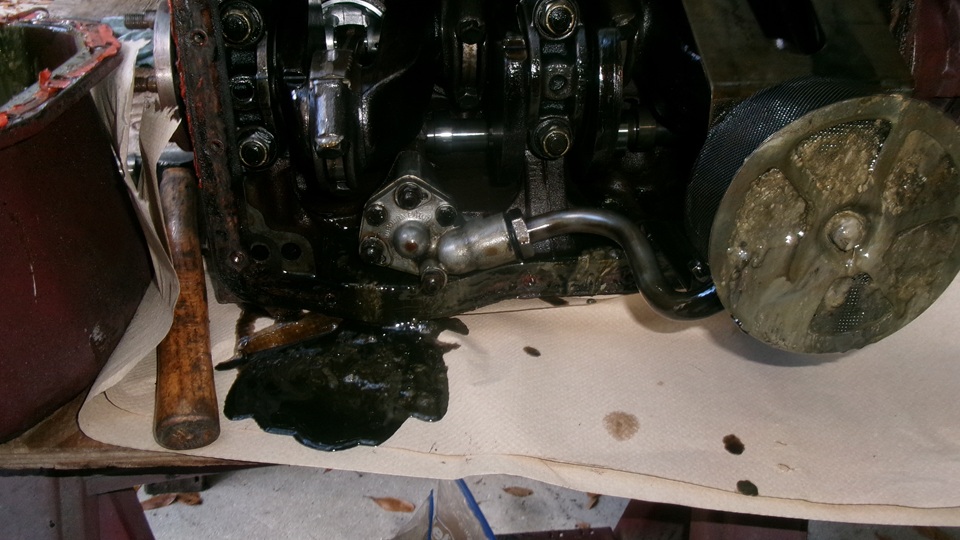
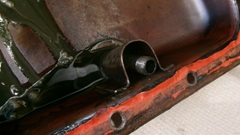
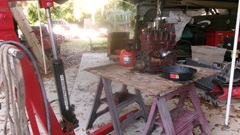
We set up a work table with two saw horses and plywood. Set the engine on the table and proceed with disassembly. Remove clutch and flywheel first for less weight and better balance, then pick it up high enough to drain the oil. Good luck there, slow and black, give it time to drain for a while. Remove the steel oil pipe, draft tube, and the Magnette engine mount brackets. Notice the forward position for the deep part of the sump as used in the Magnette.

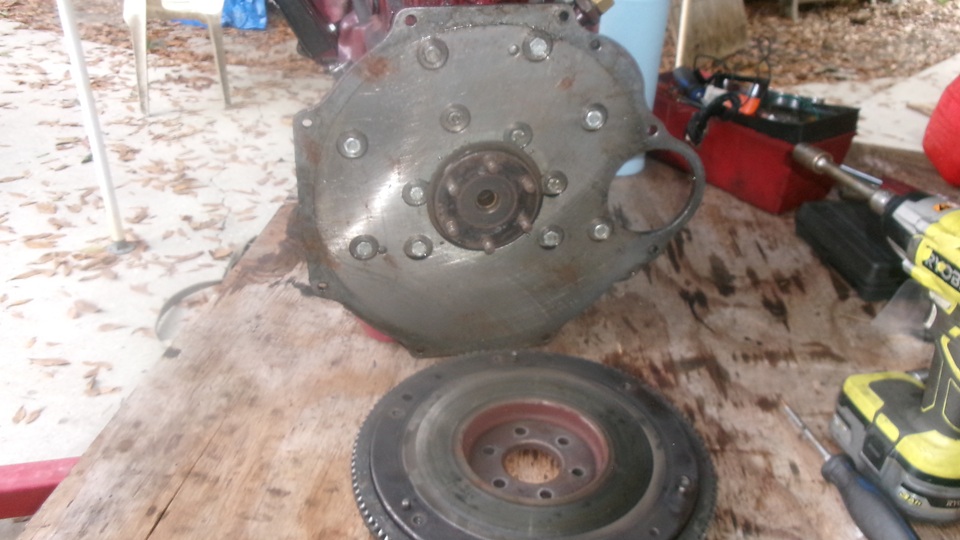
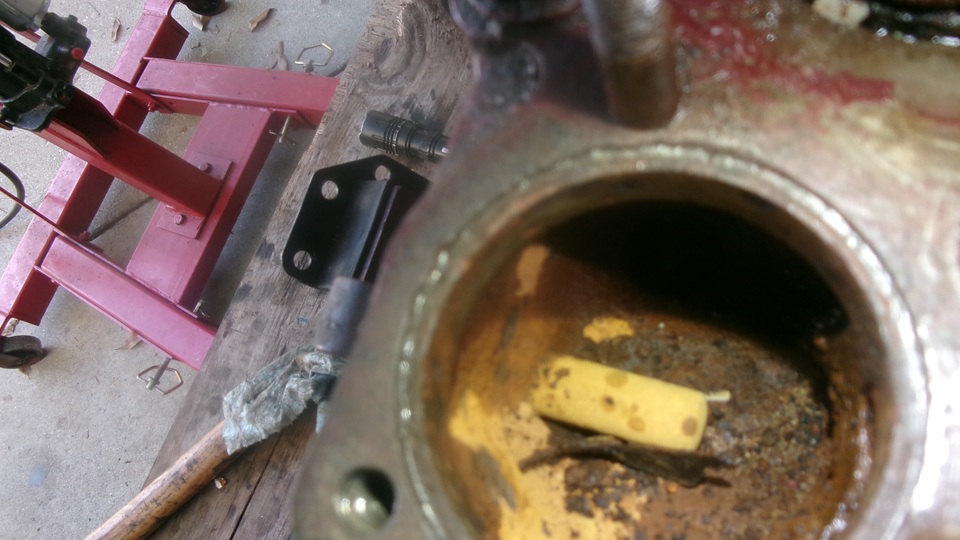
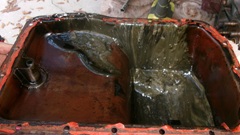
Remove the rear plate with the high starter position, needing low starter for our early issue MGA. Reinstall the drain plug, and empty the drain pan. Set the engine on its side, and remove the sump. There was the not so pleasant surprise for the day, really slimy old oil scum left in the sump. Squeegee that stuff out, wipe it up, wash the sump with petrol.
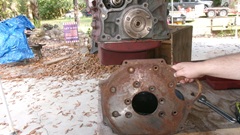
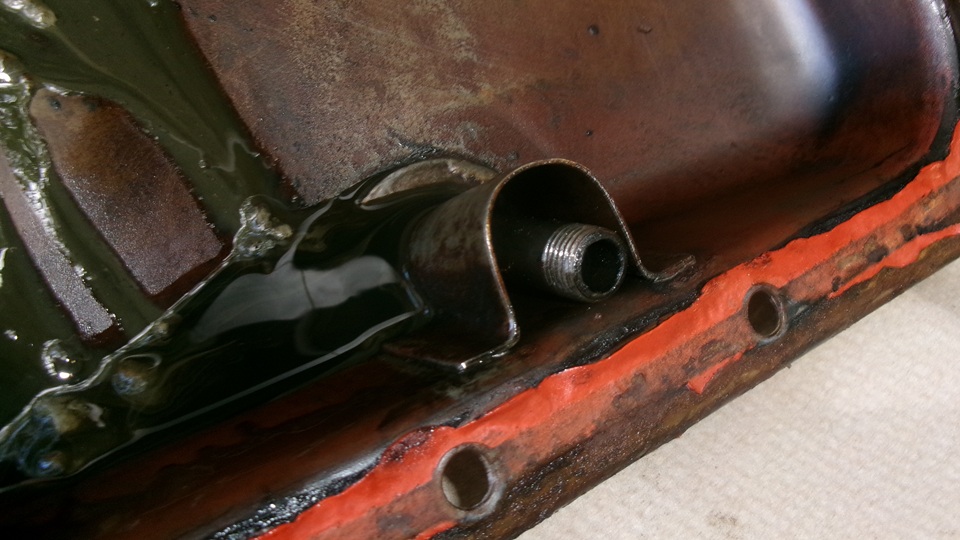
Time to remove the Magnette oil pump and oil pick-up screen, same scummy oil mess here. Wash these parts with petrol as well before stashing them away for temporary storage. Notice at the rear end of the s ump there is a drain-back slot below the rear main bearing cap with a short piece of threaded pipe inside. That pipe is supposed to be screwed into the bearing cap, but seems to have vibrated loose and fallen out. maybe not a big deal. The MGA 1500 has a similar but longer drain down pipe reaching below normal oil level. The MGA 1600 engine deleted the pipe, so nothing needed there anyway.

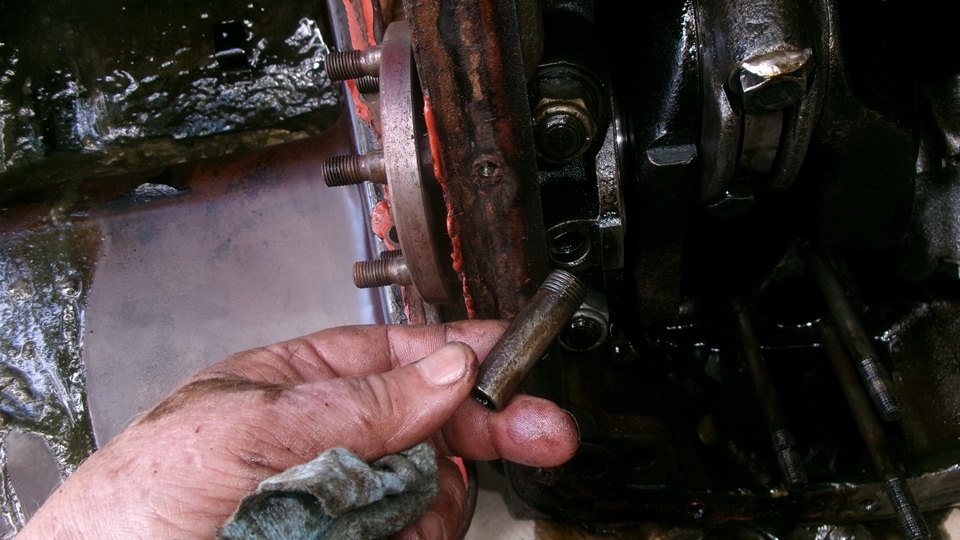
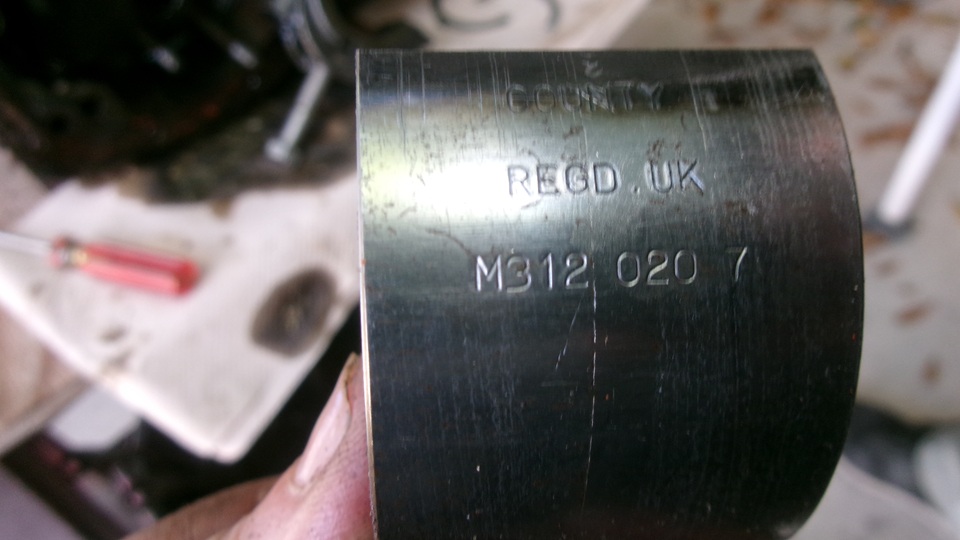
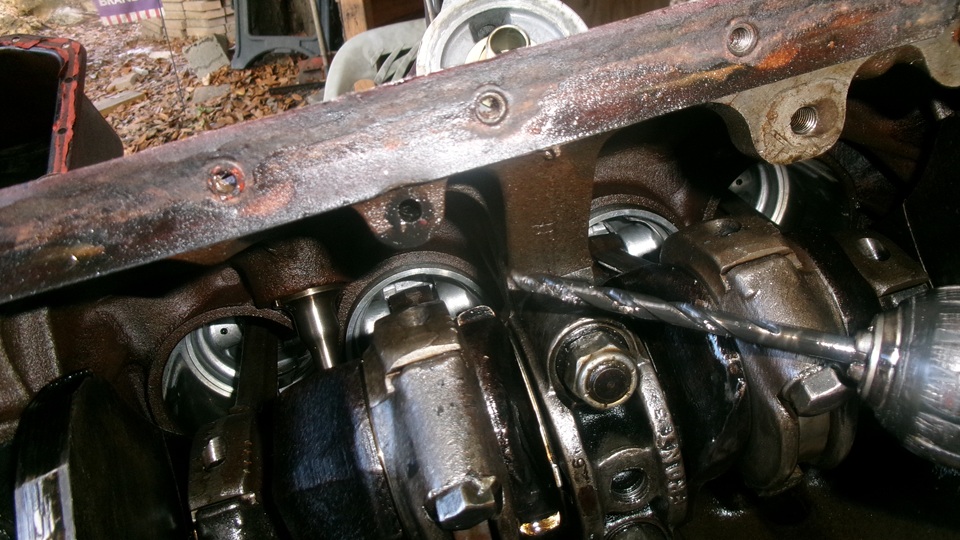
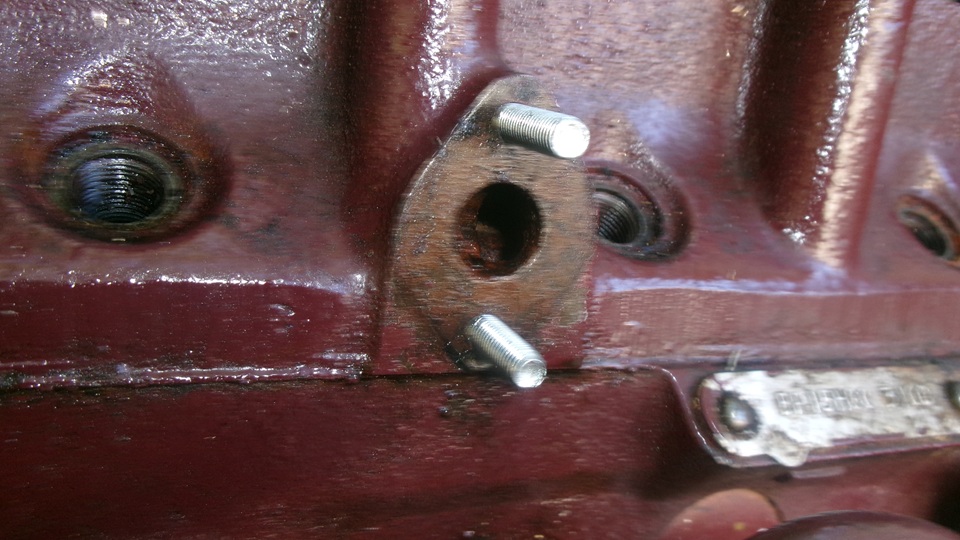
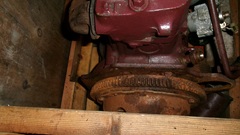
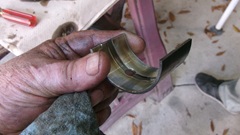
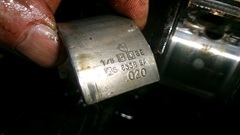
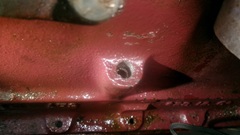
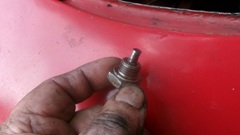
The Magnette crankshaft pulley was badly bent, but we have a new one on the in-car engine to swap over. While trying to record the part number on the front main bearing cap, I accidentally got a picture of the crankshaft re-grind sizes stamped on the front counterweight, 020 020. We pulled the center main bearing cap to check condition of the bearing shell, and verified the 020 undersize main bearing.
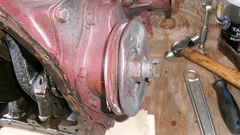

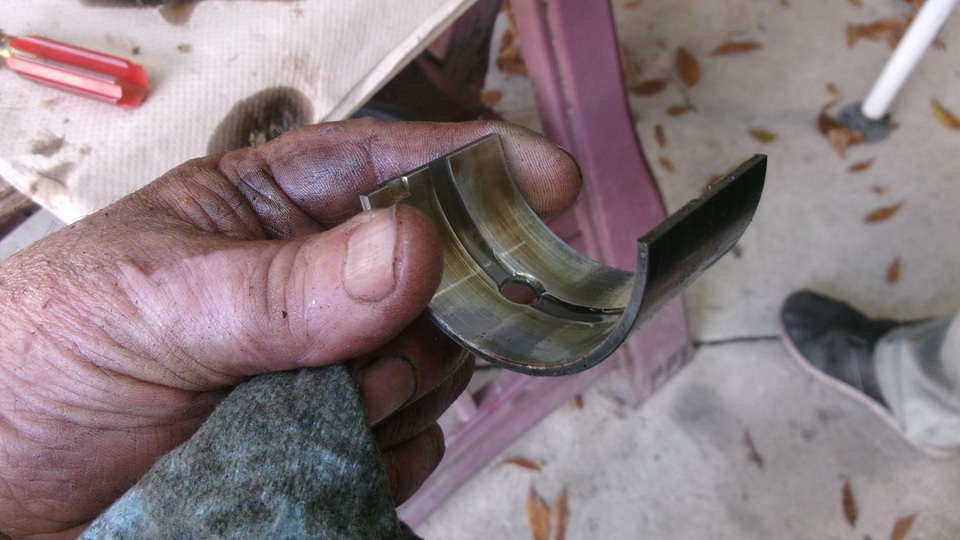
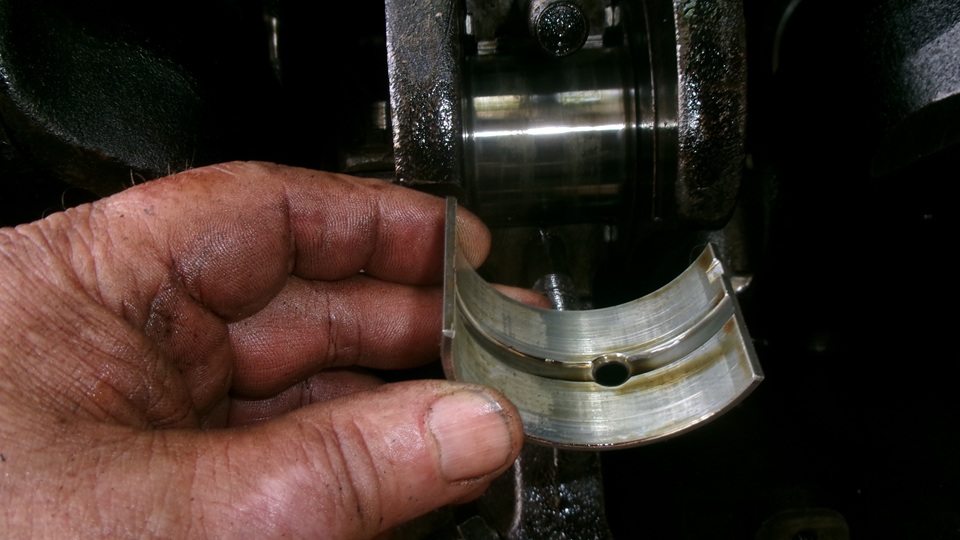
The main bearing was in very good condition, so put it back in place. We also pulled the #2 con rod big end cap to verify 0.020 regrind size, and the rod bearing was also in good condition, so put that one back as well.


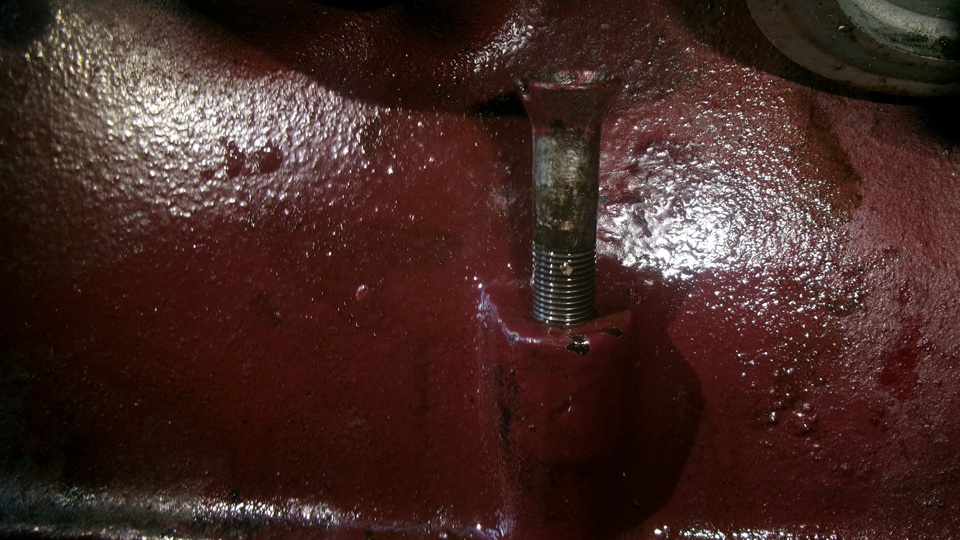
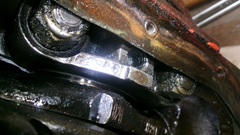
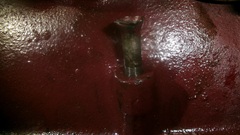
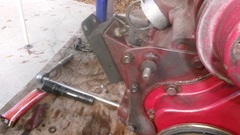
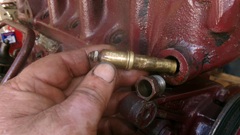
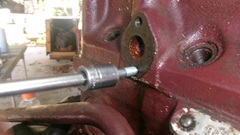
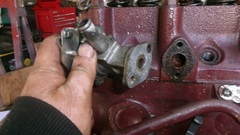
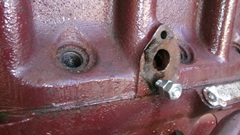
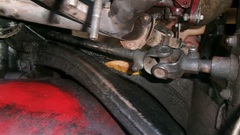
The next issue is, we need to remove the forward located Magnette dip stick and install the longer dip stick in the more central location. Problem here was, the slotted screw plug in the bottom of the threaded hole was severely stuck. We destroyed two straight tip screwdriver bits trying to unscrew the plug with a hand held impact driver. Failing that, the solution was to drill out the plug from underneath. the drilled clearance hole for the dip stick was 1/4-inch bore. and we had a jobber length drill bit that was just long enough to get the job done. Next picture is the Magnette dipstick pushed through from underneath.
e used the short dip tube with pliers and penetration oil. running it into the thread several times to clean out the thread above the plug. It worked like a charm, and the remaining thread depth if enough to hold the longer dip tube okay.It won't matter that the tube will be slightly higher than intended, as the MGA or early MGB dipstick extends to bottom of the sump when installed.

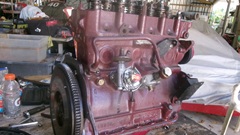
 Running out of light, good time to stop for the evening, and I have these photos and notes to process over very late lunch. Interesting process, as this is the first time I have ever converted a Magnette engine for use in the MGA.
Wednesday, November 26, 2025:
Up early for breakfast, then picking up shop towels and some minor groceries to last a day or two, as we are about to put the car out of service for a while. Arriving at Tech Central at 10-am, first order of business is to hike up to the attic to retrieve the MGA water pump pulley and one of the spare MGA water pumps, in case these might be needed for the Magnette engine. We left those here last winter when we were installing the MGB water pump with longer pulley. Moving a couple of cars out of the way to get the MGA closer to optimal work space. Jerry and another friend would be working on the Rabbit race car most of the day, and likely tomorrow. Half through the day thy were jacking it up to change oil when they found a loose wheel bearing, so that killed a couple extra hours.
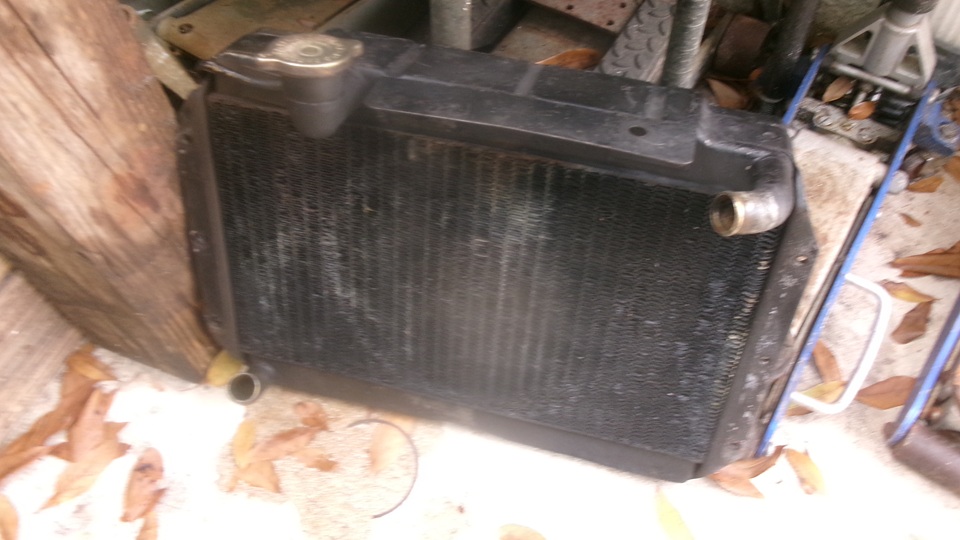
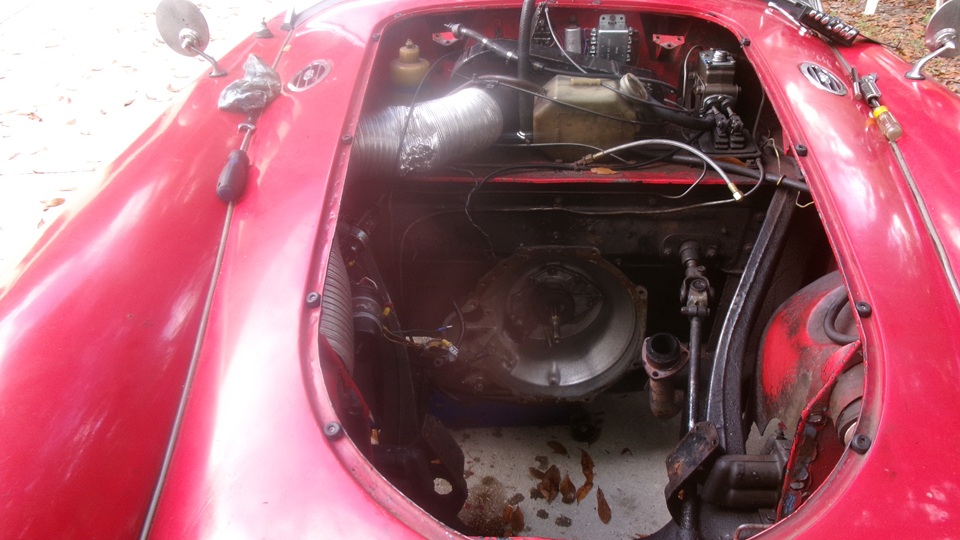
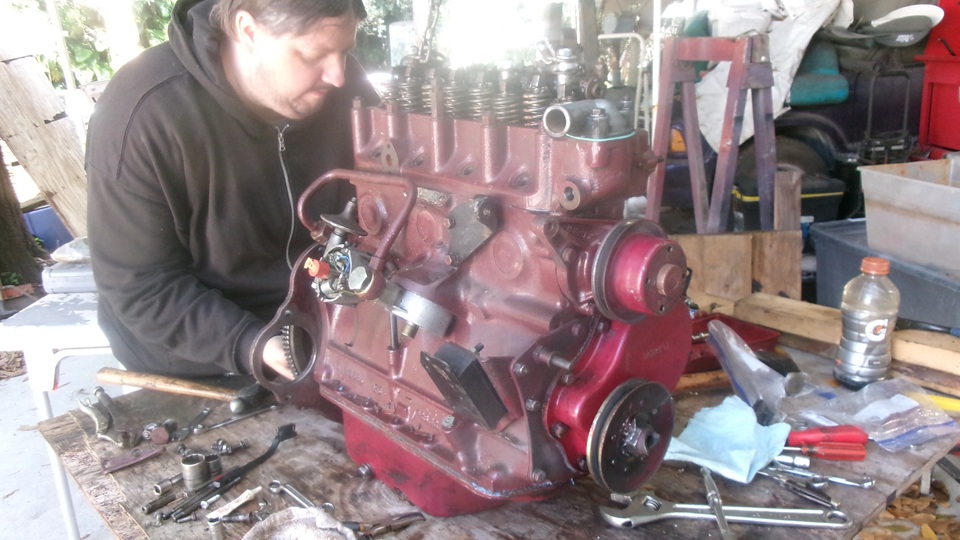
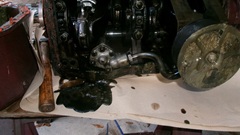
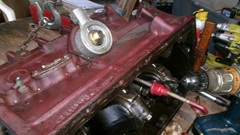
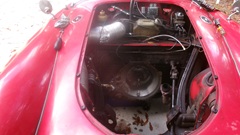
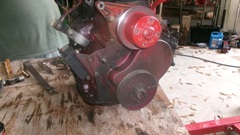
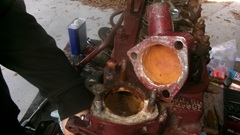
First get the Magnette engine off the work table and set it aside. Remove the bonnet from the MGA, and set that aside (two minutes with the thumb screws). Drain and remove the nice cell core radiator.

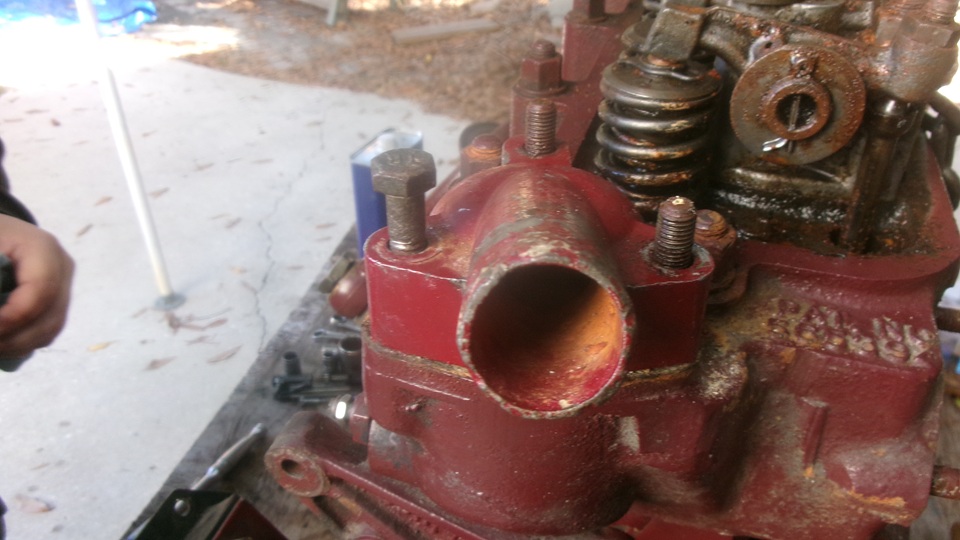
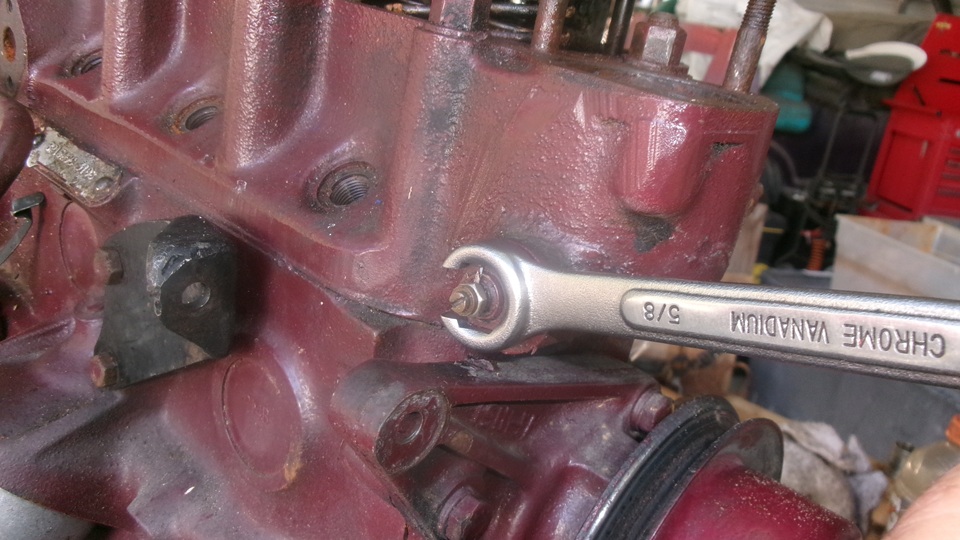
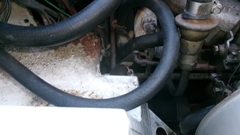
Disconnect heater hoses and remove the carburetors in short order, while navigator was removing the alternator and distributor. I was removing the fan and a few remaining peripherals while he was underneath to disconnect exhaust pipe from manifold.
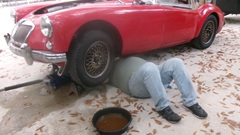
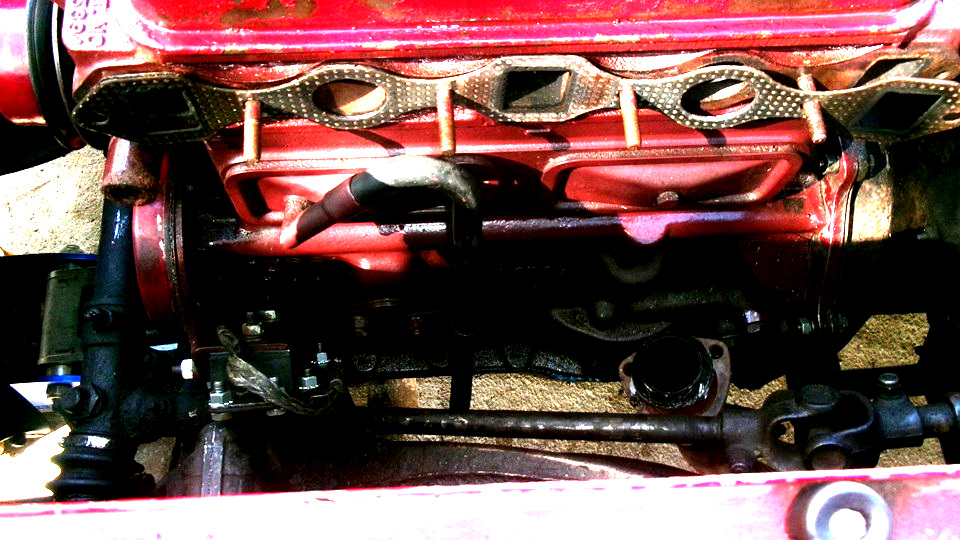
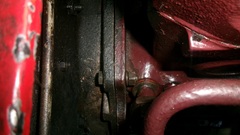
Remove starter motor and spin-off oil filter, drain engine oil , and give me a look at the magnetic drain plug. I swear there was nothing on it other other than clean oil, which is making me more curious about what the increasing knocking noise has been. Beginning to think maybe broken crankshaft rather than failed rod bearing.
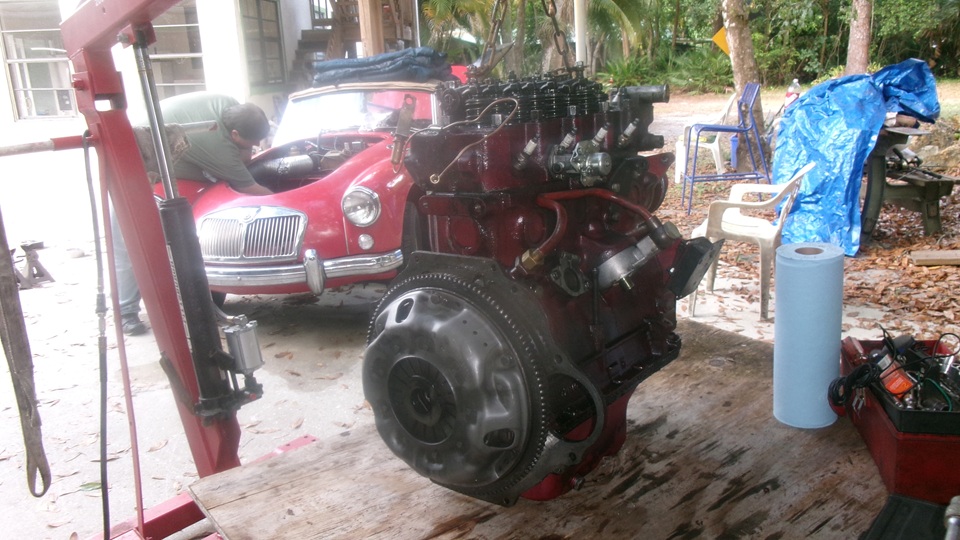
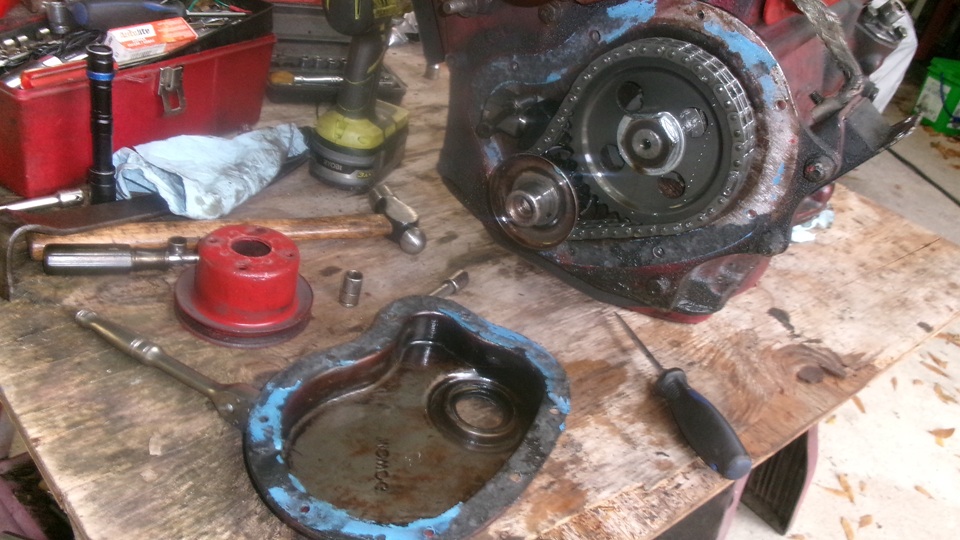
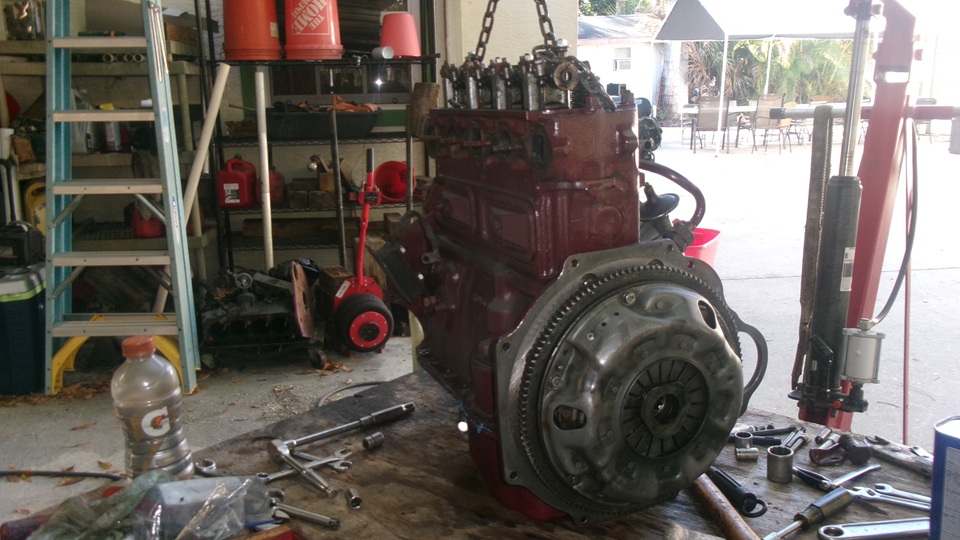
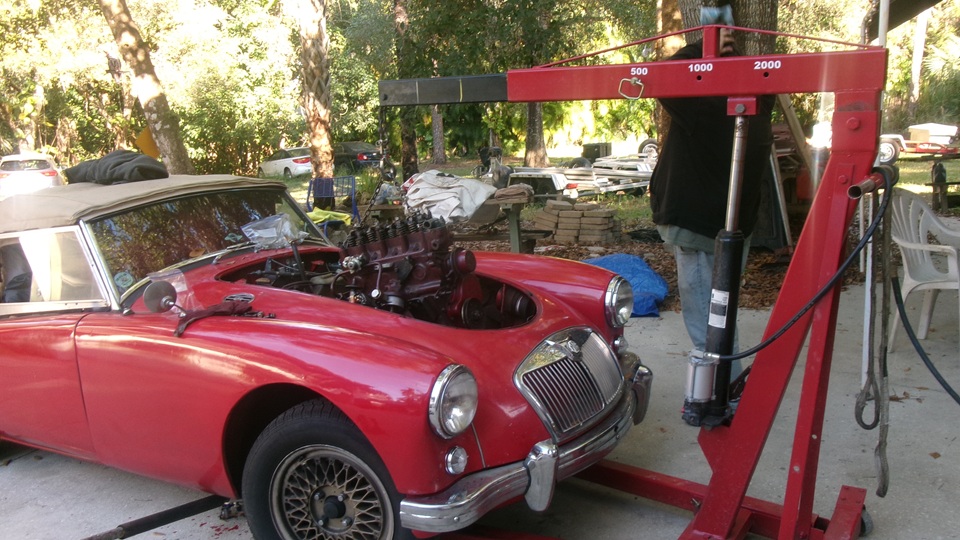
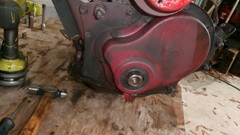
Remove most of the bellhousing bolts, all of the engine mount lower bolts. Remove valve cover and install a second lifting chain on the 1800 engine, and give it a little lift. Use floor jack and a couple wood blocks to push the gearbox up tight against top of tunnel as the engine was being lifted. Out with the last few bolts, lifting and pulling gently with finesse, the single groove crank pulley may take few paint flakes off the steering rack on the way by. which is exactly why this engine does not run a harmonic balancer. And the engine is out.
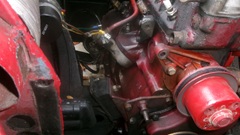
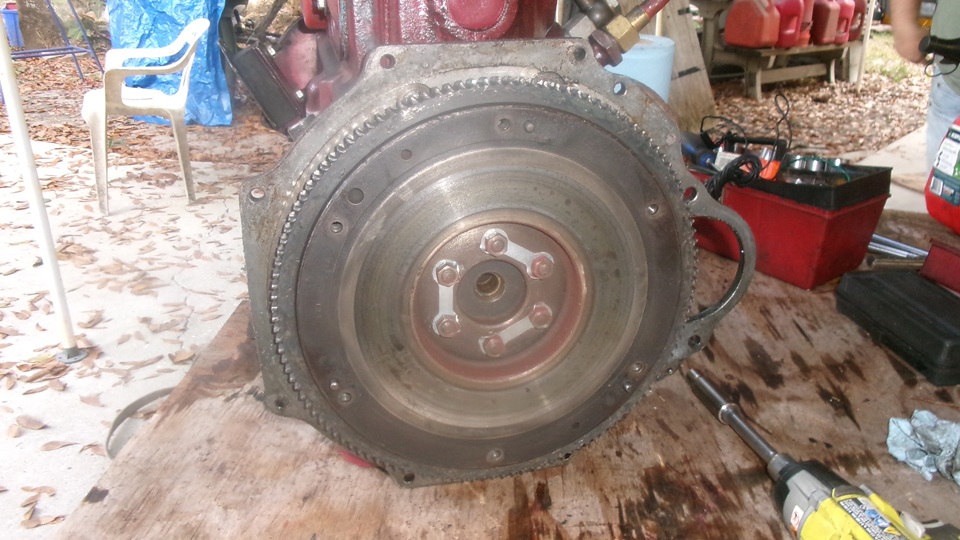
Set the engine on the table while we check out the clutch release bearing and arm and related parts, all in okay serviceable order.

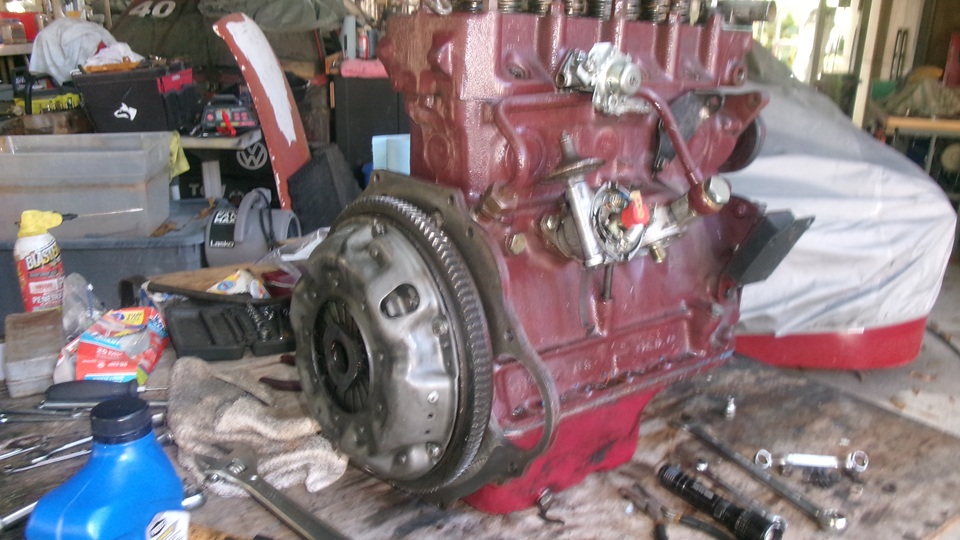
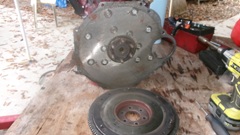
Remove clutch, flywheel, and engine rear plate, and put those parts near the Magnette engine where they will be used next.

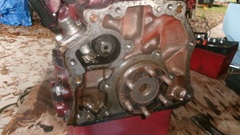
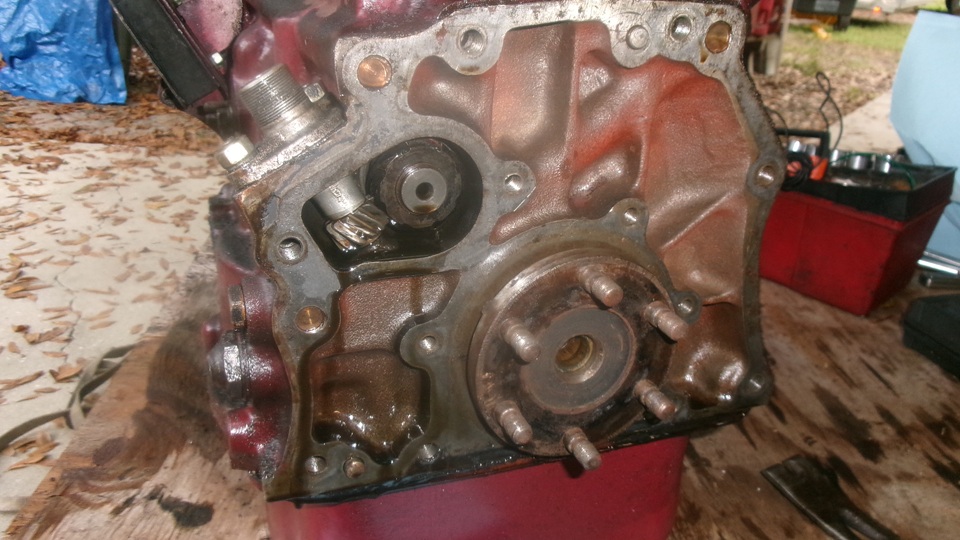
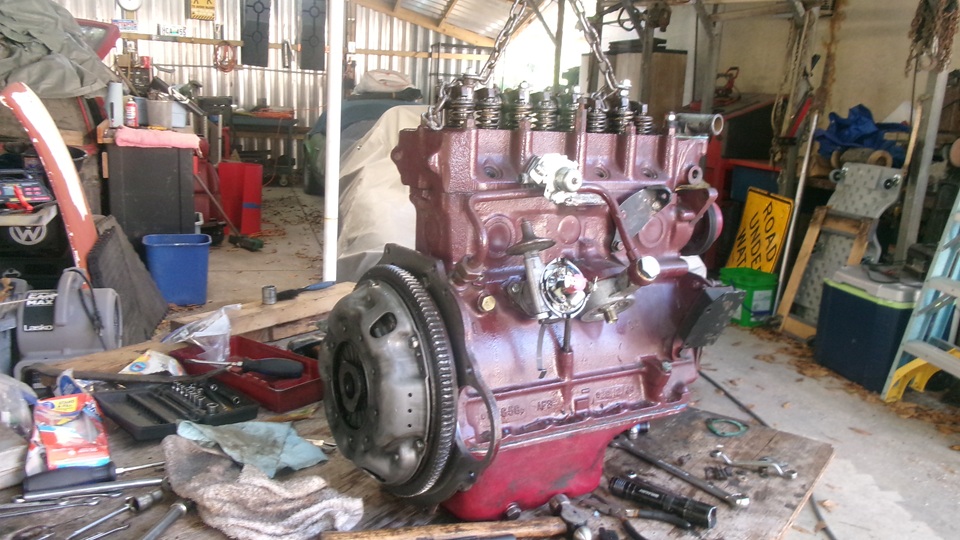
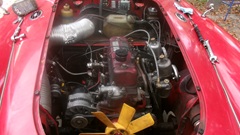
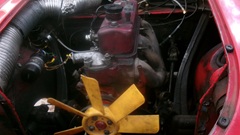
Remove the nearly new crank pulley and timing cover with rubber seal, everything inside in near perfect condition after one year and 17,000 miles running time. We have not found cause of the knocking noise yet.

Remove engine mounts and brackets , which will also be needed for the Magnette engine. Stick the long water pump pulley back on the 1800 water pump, just for effect, and it's time to clean up and put tools away for the evening.

Thursday, November 27, 2025:
Happy Thankgiving. We get to work on the MGA while our friends are celebrating with family. We got several hours of work done today, had some nice pictures, but had some sort of mishap with the camera and lost the photo files while trying to download them from camera to computer. So, going to have to record today's notes from memory.
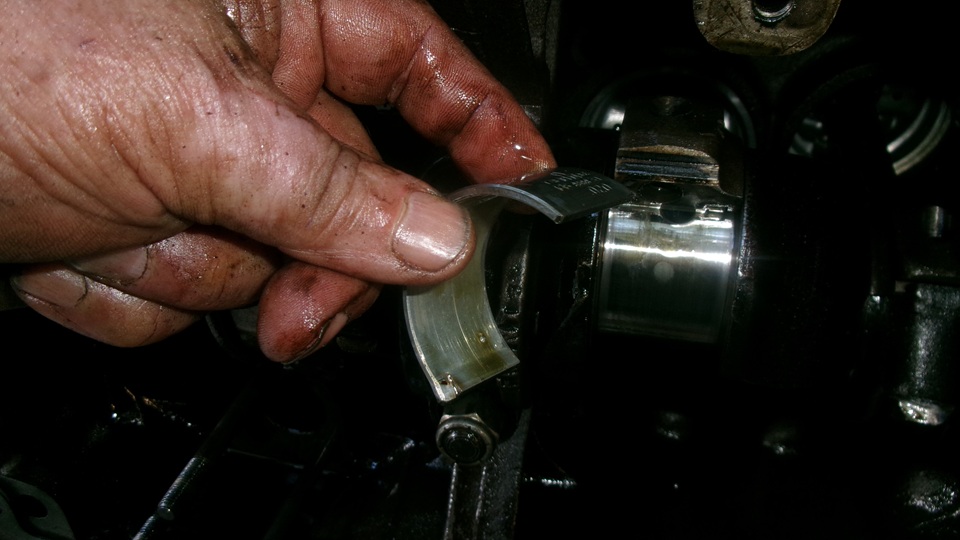
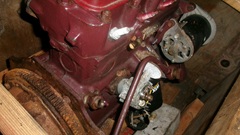
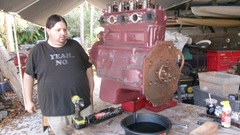
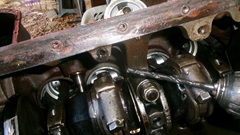
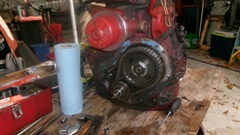
First business was to remove the sump and oil pump and oil pickup parts from the 1800 engine, to be installed on the Magnette engine. Not long to remove the parts, and as soon as the sump was off we immediately discovered the source of the knocking noises. The bad news is, it has a broken crankshaft. The good news is, it is only a broken crankshaft, no other notable damage. Whenever we can source a replacement crankshaft (with mating bearings), it is a bolt-in operation to put it back together. Meanwhile we can get on with the conversion of the Magnette engine to have something to drive while he 1800 is getting fixed.
So, with sump and oil pump removed, set the 1800 aside and get the Magnette engine back on the table. Oil pump studs are different length, so pull out the long and short studs and install three of same length from the other engine. It seemed like a good idea to disassemble the oil pump for a look at the internal condition. Only a year old and well kept, all is well there. However, it is a aftermarket replacement pump with 6-mm screws holding the bottom to the main body, and they may have been over torqued during manufacture. One of the screws galled up and tore the threads out of the pump body. I don't have another clean 6-mm screw, or a 6-mm Heli-Coil for thread repair. But we do have 14-28-UNF hex head screws, a wee bit larger than the 6-mm size, so I stuck one of those in there, slightly cross threaded, and it tightened up fairly well. It only needs to stay together long enough to get the pump installed. Once installed, the three long mounting studs with hex nuts will hold the pump parts together as well as securing it in place. A bit of clean-up, oil pump and sump installed., and also install the engine rear plate (with low starter position).
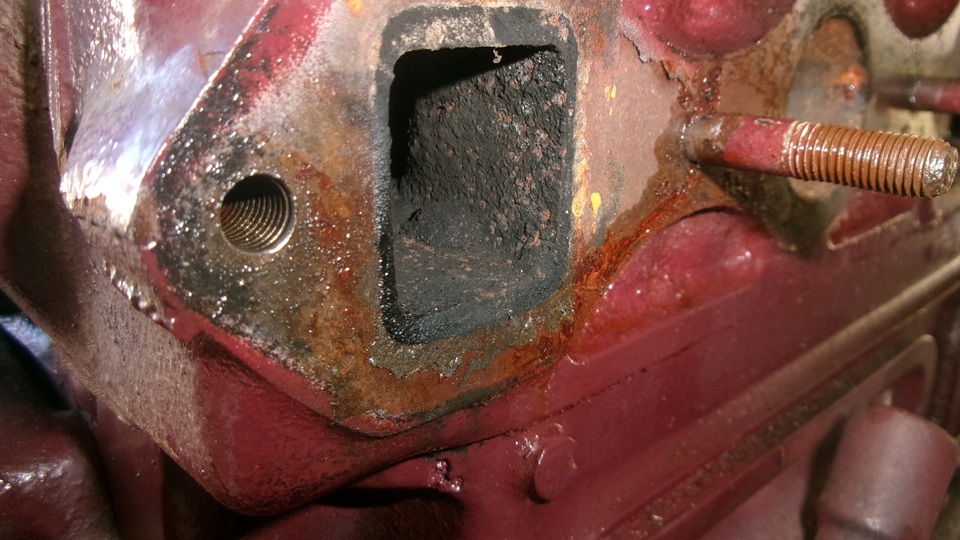
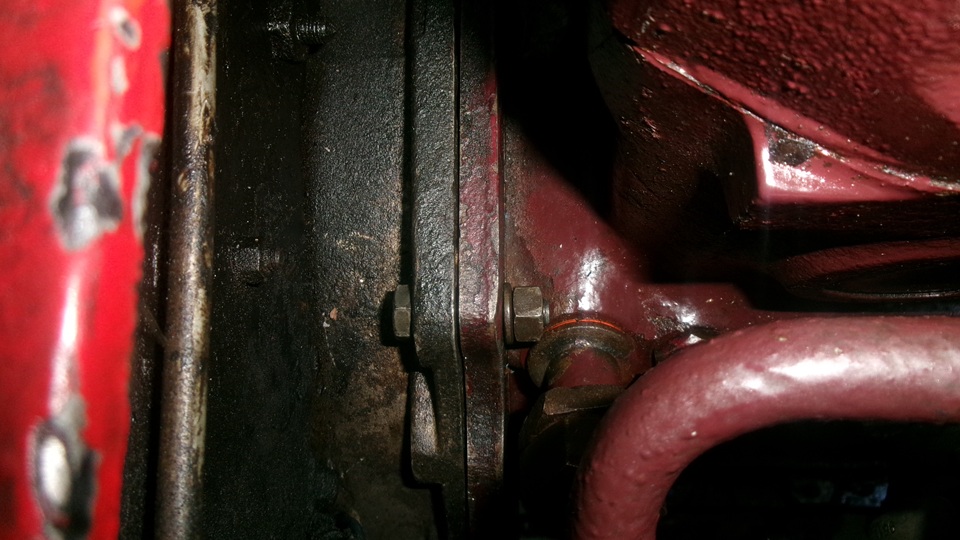
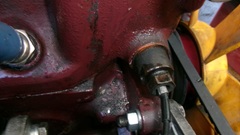
The water drain cock valve on side of the Magnette engine was substantially buggered, in sad need of replacement, Looked like it was installed with no seal washer, and someone had over tightened it trying to stop s leak, A half hour of difficulty with a large Vice-Grip finally got the brass bodied drain valve out of the engine block. It was replaced with a short threaded hex head plug and seal washer. We transferred the threaded adapter fitting for attachment of the oil pressure signal hose, and installed large copper sealing washers on the fittings for the external oil pipe. Beginning to think there were no seal washers anywhere on this engine.
The distributor drive gear was in wrong orientation, which we knew from position of the distributor before that was removed. By now we have four different distributors to play with,two or three having the mechanical advance frozen to not work, one having the rotor on top incorrectly oriented 180 degrees off, one having the bottom drive dog misoriented 30 degrees (cross drilled and pinned wrong), and two with buggered bottom end pilot parts that could not mate with the drive gear in the block. Must have been two hours messing with distributor parts by the time we had one full set installed to work properly.
Then we removed the Magnette timing cover with felt seal, replacing it with the early MGB timing cover with rubber seal. There was another pleasant surprise when the timing chain and sprockets and tensioner parts were all looking like new replacement parts with little or no running time. Peachy. Not long to get that back together. Then we ran out of daylight at 6-pm, No fun working with flashlights, so time to clean up and knock off and get into a very late lunch. Getting close to installing the engine in the car.
Friday, November 28, 2025:
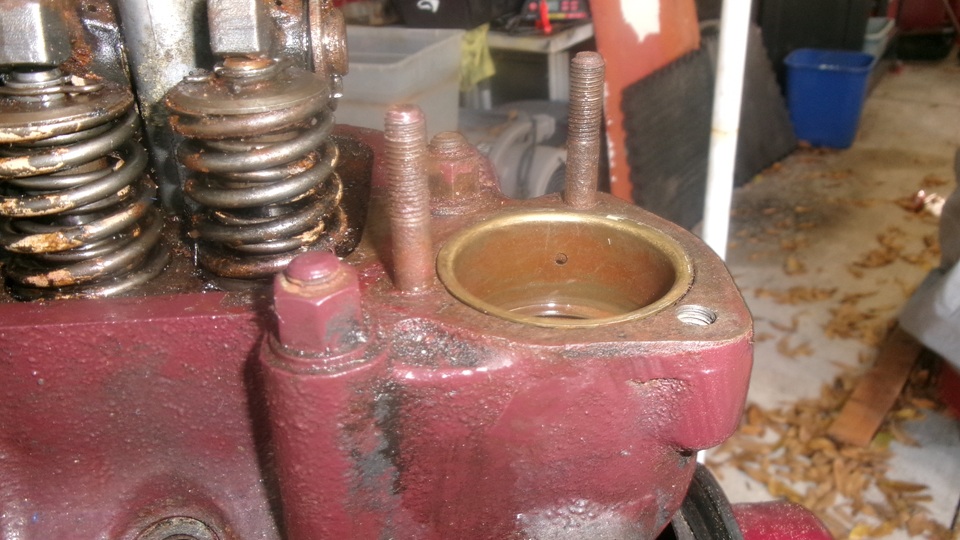
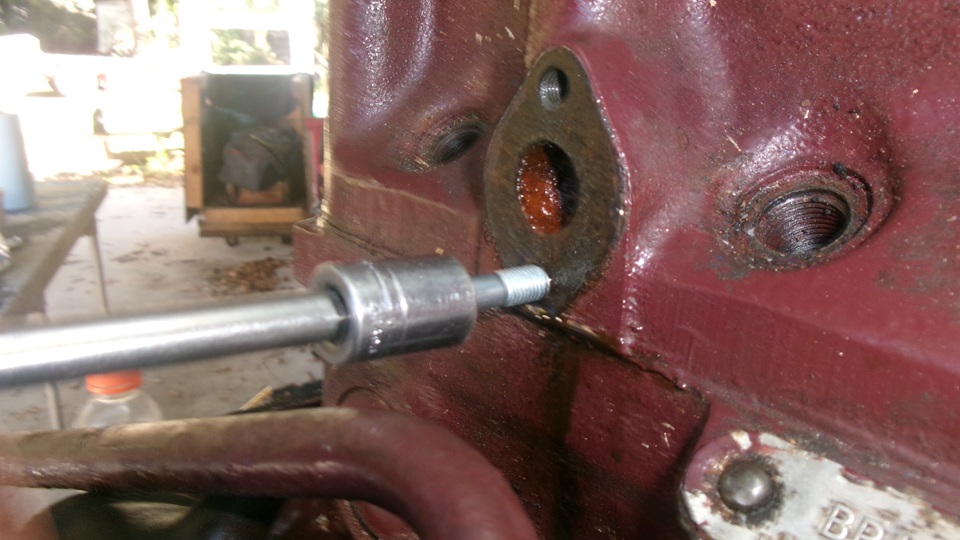
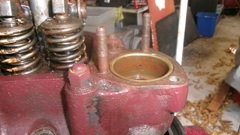
Remember, Friday is normal tech day at Tech Central Racing. We had breakfast and were on the job with the Magnette engine by 8:30. Then cars were rolling in by 9:00. We are not used to being the featured event on Tech Fridays, but couldn't duck everything, so the gang milling about was a bit distracting. There was no thermostat, possibly scavenged for use elsewhere. The nuts on two studs were loose, while the third position had a bolt just sitting there. Kind of expecting a broken stud in the head. We know these are special studs with British Standard thread on the bottom and UNF thread on top, and I do have spare studs (or take one out of the other engine). If we had to drill out a broken stud, I don't have a Heli-Coil kit for that thread size. But we lucked out. The two studs that thread through into the water jacket are rusted in place, but still serviceable. Someone apparently tapped to re-thread the third blind hole to accept the 5/16-18-UNC bolt. That seems to be a solid thread so we can re-use the bolt for now. The alloy cover was so badly corroded that someone had used Bondo filler to rebuilt the inner edge, so that will have to be tossed, but we can grab the new cover from the 18000 engine along with the good thermostat and blanking sleeve. Clean up the counterbore to accept the thermostat.


Drop in the blanking sleeve and thermostat, and set the cover on top to be sure it will fit properly.


Meanwhile, Elliot was installing engine mounts, generator/alternator adjuster stud and flywheel.


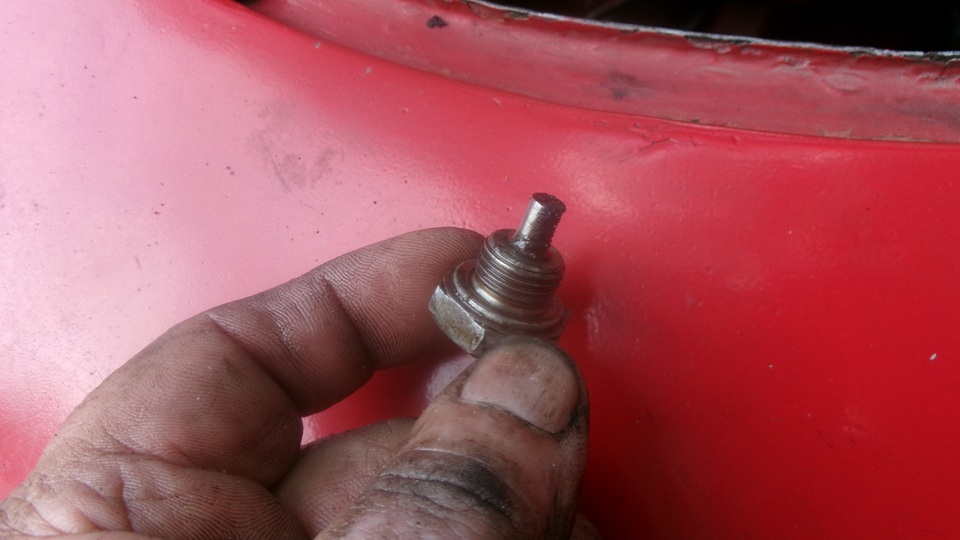
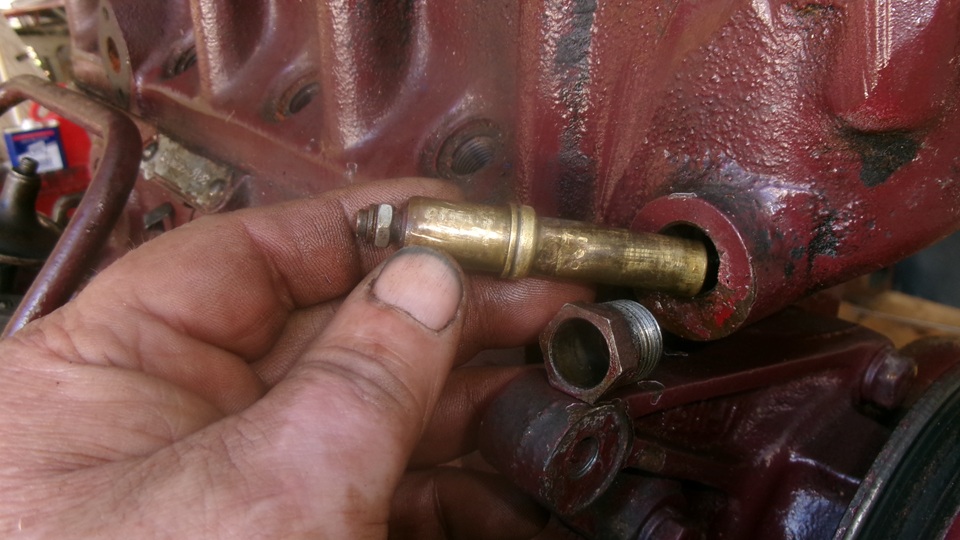
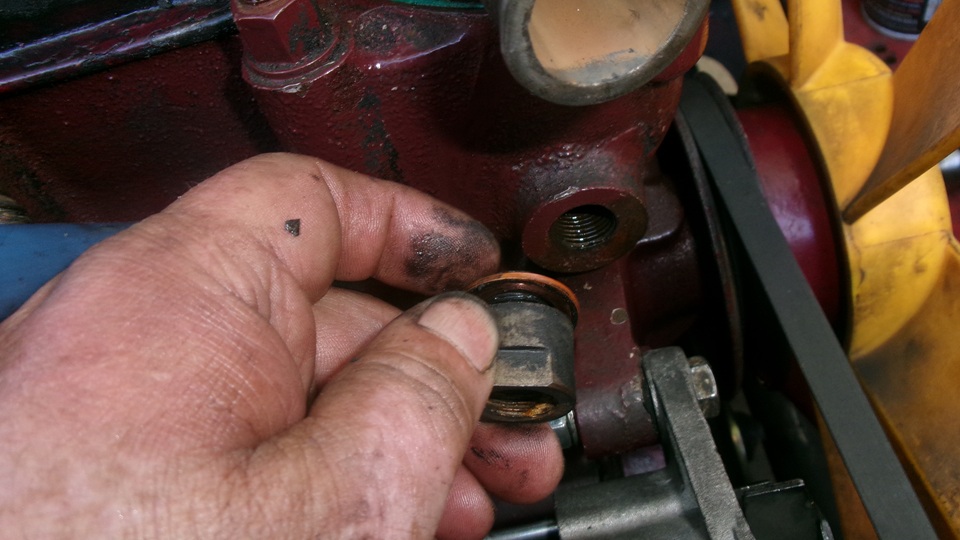
There was an electric temperature transducer that was stuck tight, then zero clearance dragging the thimble on the bore ll the way out, but we finally got it out, and I suppose it will still work, so save it.


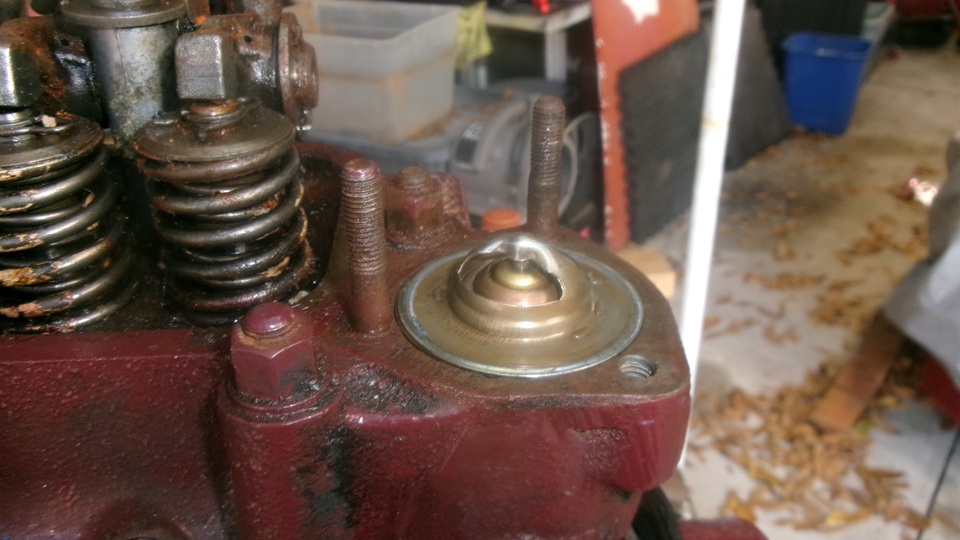
Thermostat with banking sleeve, gasket and cover installed. Oil pipe in place, could be an access problem for the heater valve. Clutch disc and pressure plate cover installed.


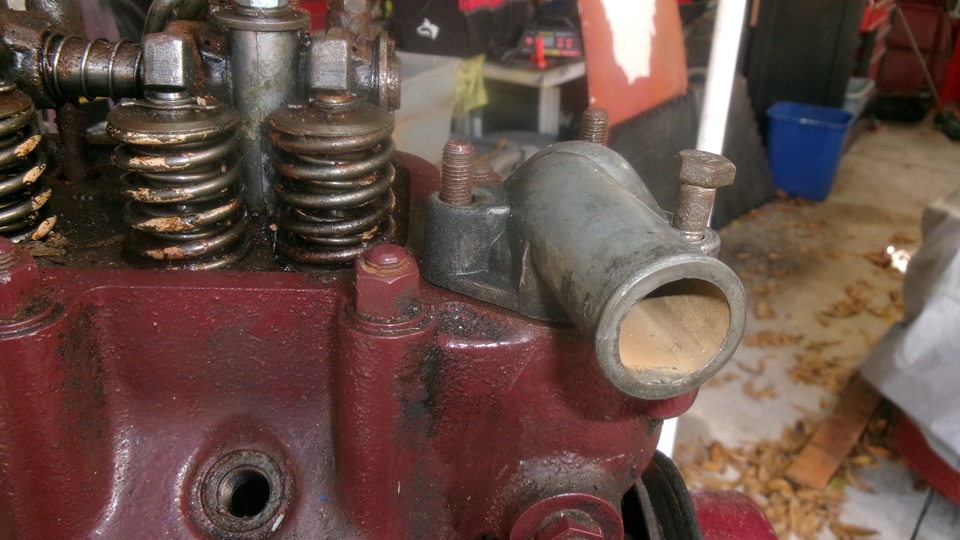
Remove the two shorter front and rear manifold studs,as we prefer to use bolts in these locations. Clean the threads on the other four manifold studs to assure the nuts can turn freely. Remove the incorrect small bolts that were holding the heater valve,and clean out the threads in the shallow blind tapped holes.

Then making our own threaded studs to replace original parts no longer available. Start with a long bolt with 1/4-28 UNF thread,and use a thread cutting die to extend threads farther down the length of the bolt. Cut that to length and de-burr the cut end to have new 1/4-28-UNF x 1-1/8 long threaded studs. Double nut to install the studs.


Still a close fit ,but there is enough space to install the heater valve with hex nuts. Looks like the engine is about ready to install.
After all that work, I guess we could snap a few more pictures of the assembly.


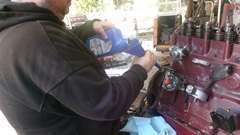
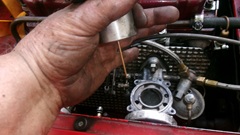
We are being somewhat cautious with this old used and long dormant engine, as nothing seems to be easy. We decide to prime the oil pump before installing the engine in the car, because this is much easier on the bench. Remove the external oil pipe,and find a small funnel that may fit into the oil output port.I put a speed wrench on the crank nut and turn the engine backward while Elliot was feeding oil into the outlet port on right rear of the engine. Keep cranking until my arms are tired,then crank some more. Might have been 80 turns or more before the engine sucked in one pint of oil. Then reinstall the oil pipe and it's time ready to drop in.


Notice the floor jack still has the gearbox bellhousing firmly up against the top of the tunnel while the engine barely wiggles in past the steering rack. We have done this a lot, and with some finesse it does go in without removing the crank pulley.

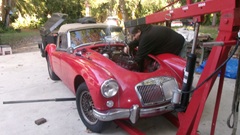
With a few bellhousing bolts secure, set it on the engine mounts to install those bolts, and tighten everything. Install the starter motor, oil pressure signal hose and oil filter.


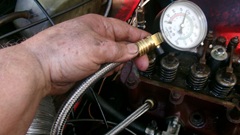
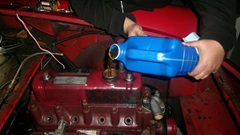 Fill the sump with oil, and check everything twice. Flip the battery switch on, and crank the starter while counting. This commonly takes about 45 seconds with a newly assembled engine, but since we had primed the oil pump,the pressure came up to 40-psi on the safety gauge in 40 seconds. Bully! call lit a night.
Saturday, November 29, 2025:
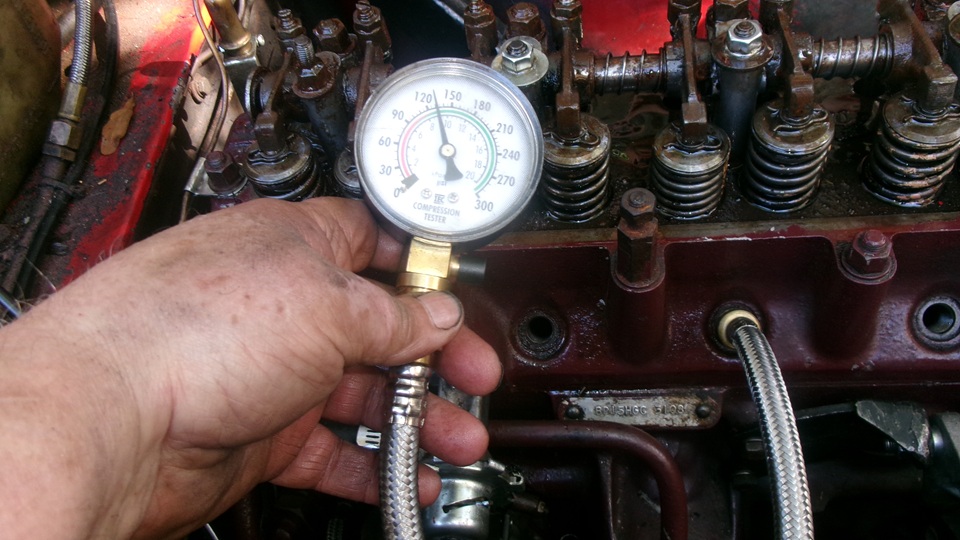
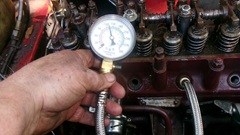
You know what we get to do today, finish dressing the engine in situ and make it run. Like everything else, easier said than done. Navigator insists that for this temporary engine we should go back to the draft pipe and not try to install PCV on a stock 1500 engine. ,so start with the draft pipe before the manifolds. Then we did compression test before trying to start it, as we have no idea if it has any compression or not, and this was first opportunity. Results were 0, 120, 80, 20. Boo, hiss. It might start on 1 cylinder, run on 2 cylinders, but not good enough. We keep hearing comments that it "ran when parked", so give them benefit of the doubt. Possibly stuck valves not closing all the way?

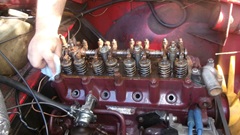

Remove valve cover, turn engine, check rocker arms. They all had a little wiggle space when they should, not completely sticking open, maybe just a little open not entirely tight on the seats. So with each cylinder 1 and 4 turned to TDC (valves seated), do a little hammer tapping on the output end of the rocker arm to pop the valve open a tad and let it snap back shut, hoping for firm seating, and maybe clear some debris off of the seat interface. Well dang, it actually seemed to work, giving some notable increase in compression. So do it some more, tap, tap, tap, check compression, more improvement, rinse and repeat. After a while the pressure was up to something reasonable, 85,130, 95, 110. That might start on three and run on four with a rough idle, but could be minimally drivable.

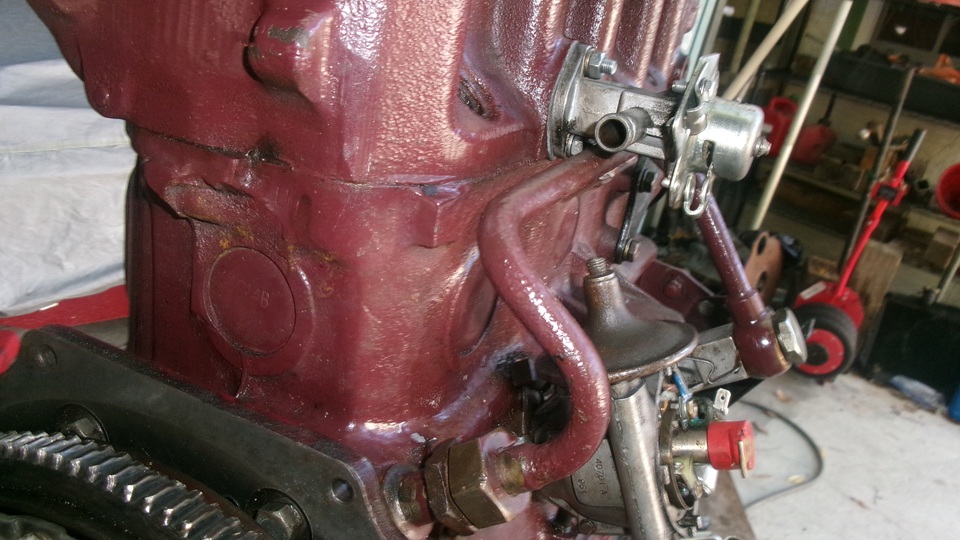
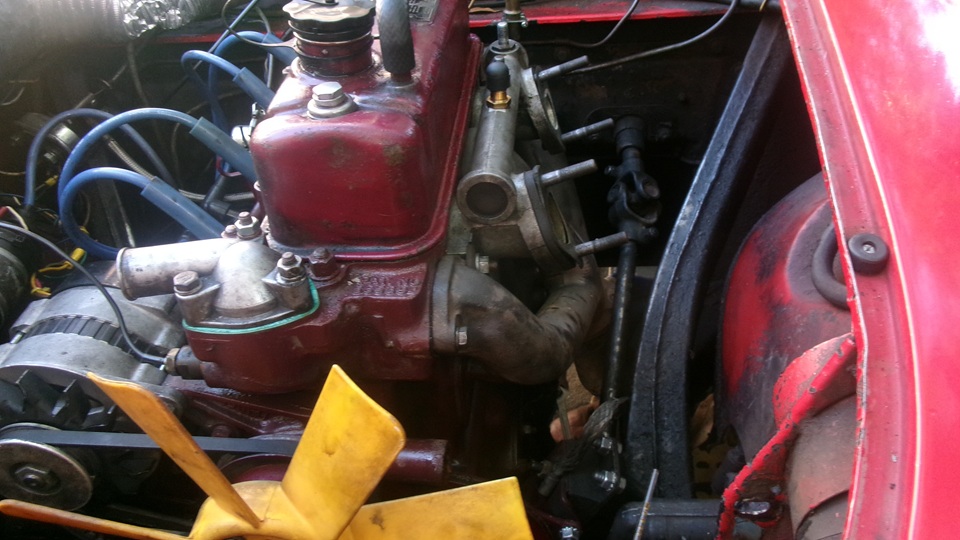
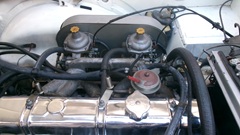
Dress the right side with heater valve control cable, spark plugs, distributor, vacuum pipe, alternator, temperature sensor adapter for shallow thread to accept short flare nut, and screw in the analog temperature sensor.

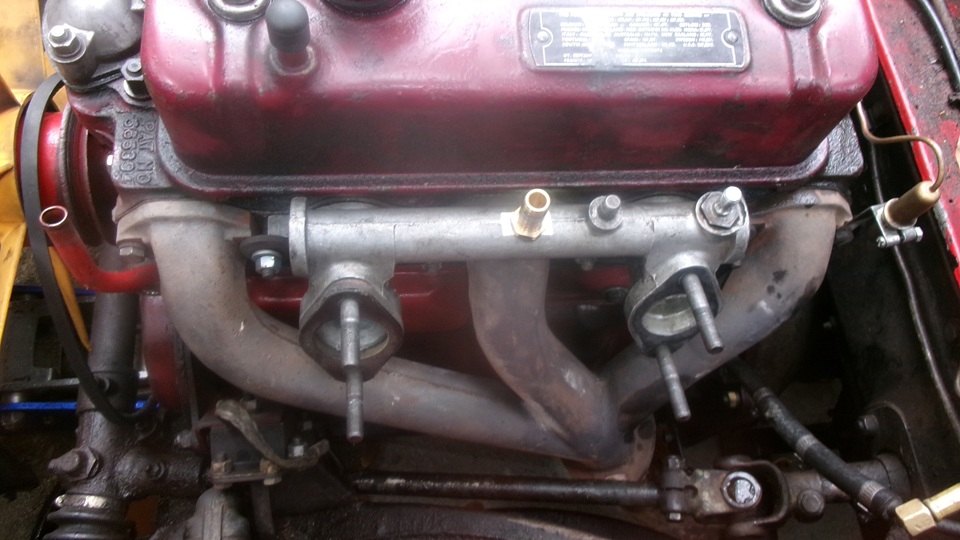
Stick a vent hose on top, mostly for feel good effect, as it will not be connected to anything else. On left side install exhaust and intake manifolds, and connect the exhaust pipe with ring seal and brace strap to the bellhousing bolt.


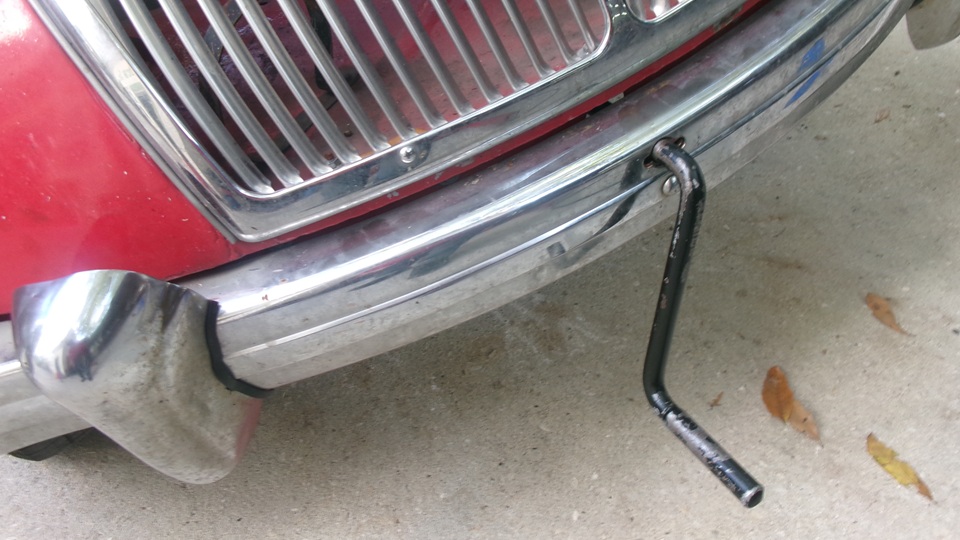
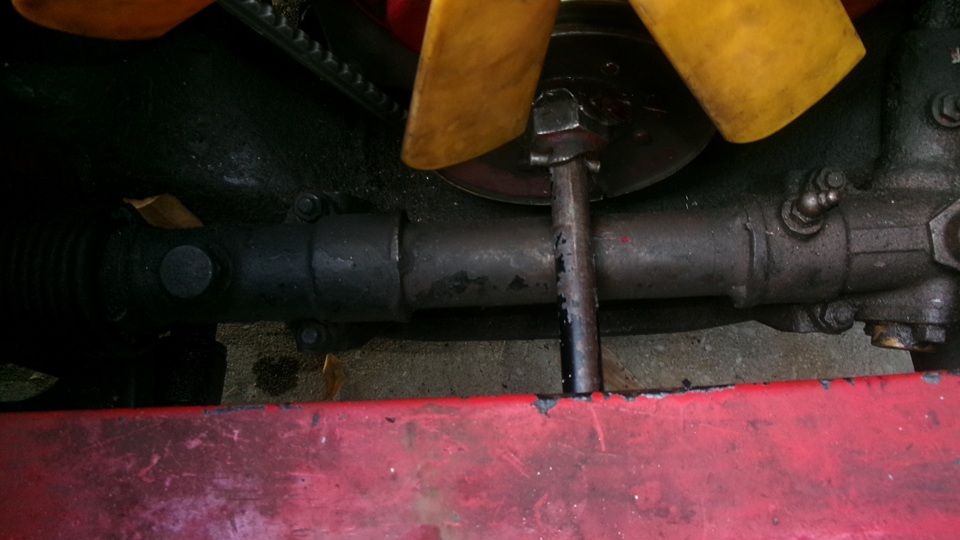
While Elliot was tightening the last few bolts, I jumped on a little side job that has gone begging for more than a year. Ever since the deer hit repairs last June, the starting handle was hard to engage, being slightly misaligned. I took a die grinder to the shaft guide sheet metal opening below the air pan to enlarge the hole downward to allow easy alignment and engagement of the starting handle to the crankshaft dog nut. That is a nice improvement, making it convenient to use the starting handle again (nice for valve lash adjustment if nothing else).


Install carburetors with fuel and vacuum pipes and control cables (old story by now). For the 1500 engine with draft pipe
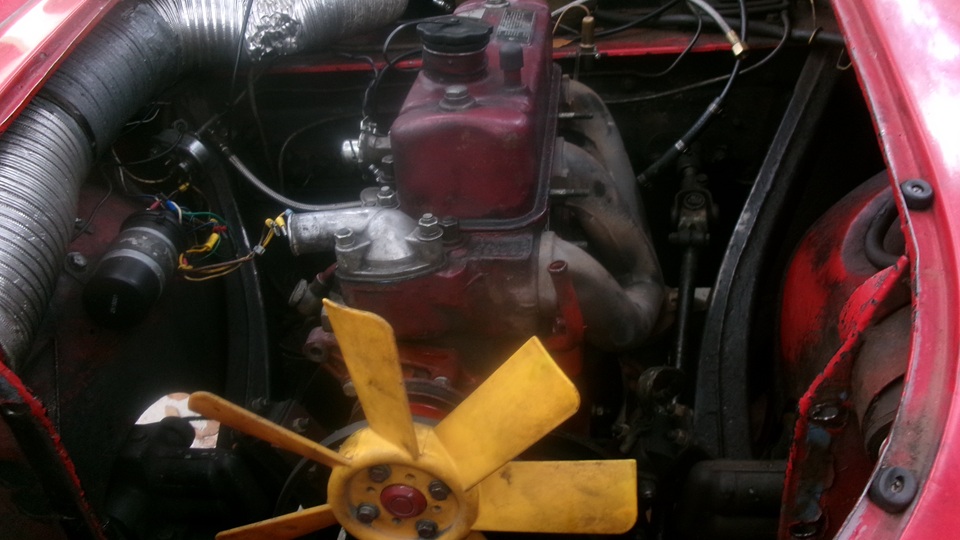
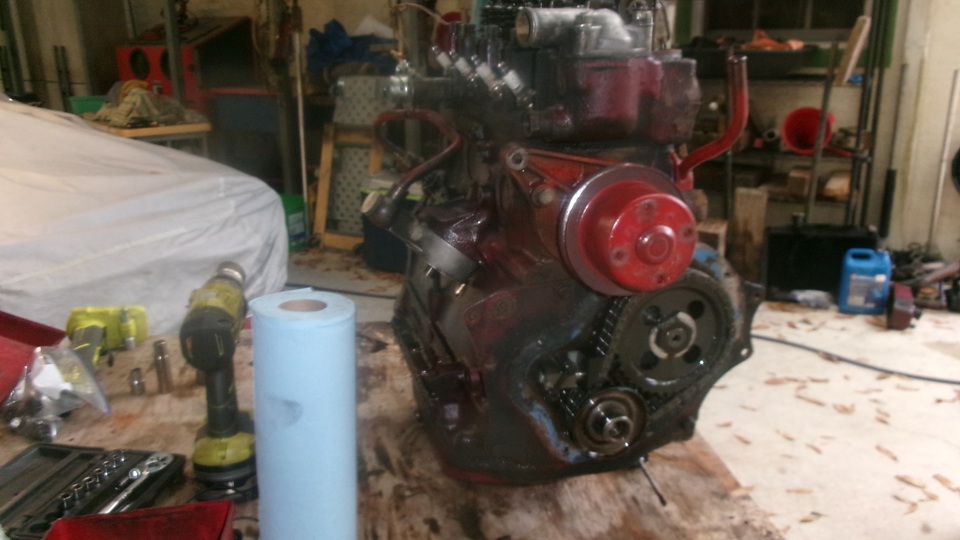
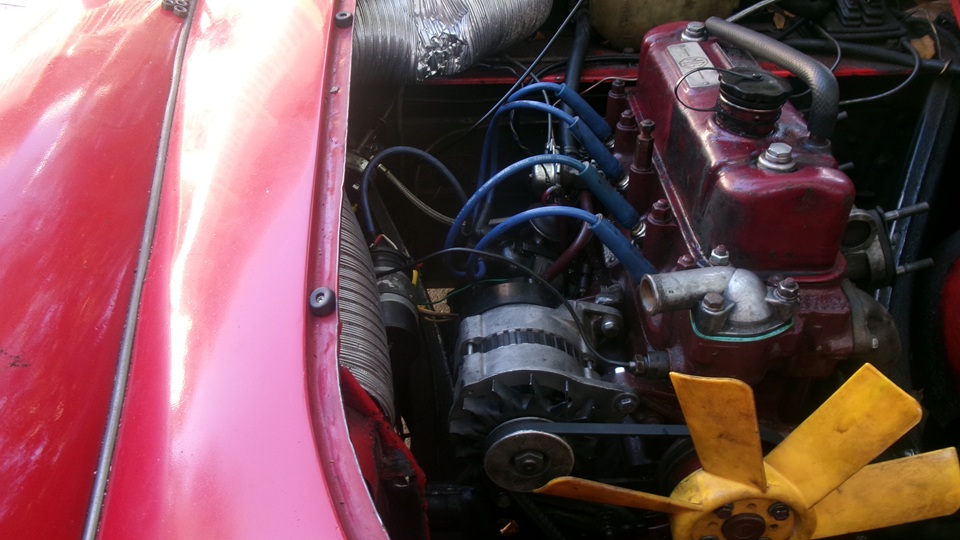
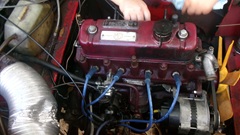
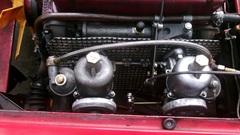 crankcase ventilation, switch back to"GS" fuel metering needles. Install radiator with hoses, fill with plain water for now. A quick once over, everything secure. Battery disconnect switch on, ignition switch on, fuel pressure up, give the "S" knob pull, and it started immediately (huge ego boost). crankcase ventilation, switch back to"GS" fuel metering needles. Install radiator with hoses, fill with plain water for now. A quick once over, everything secure. Battery disconnect switch on, ignition switch on, fuel pressure up, give the "S" knob pull, and it started immediately (huge ego boost).
Some rough running, but it kept going on all four cylinders, let it warm up while checking to verify no leaks anywhere (except a little water from thermal expansion). Tune-up time, set timing by ear, lean out slightly rich carbs, keep fine tuning mixture until it was idling fairly well. Still a little puttering as might be expected with less than even compression numbers, but good enough for a test drive, or in this case, a short drive to late lunch at a known good WiFi spot. Pick up tools and clean up some, fill water bottles, re-pack trailer.
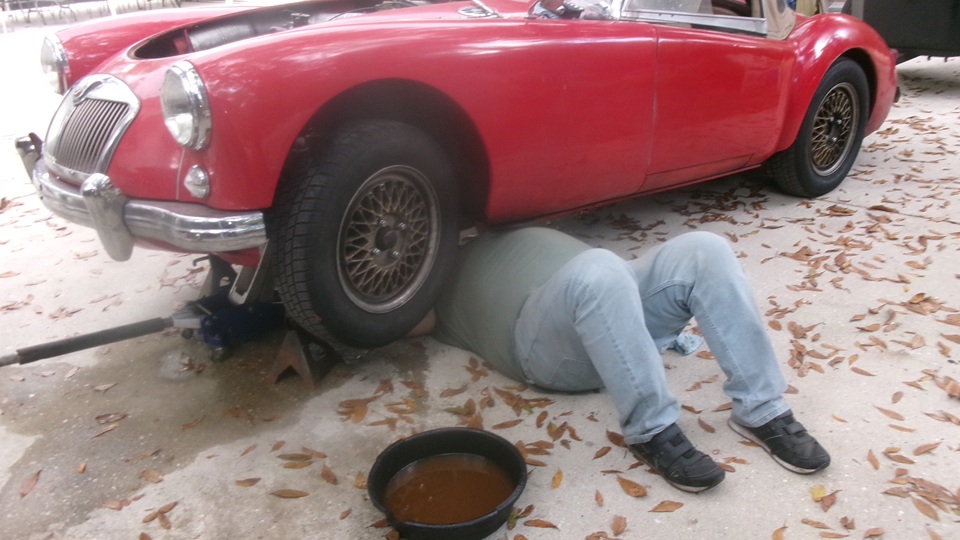
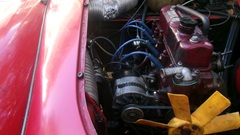
With a moderate amount of confidence, drive out of the neighborhood and head for the expressway a mile away, Full throttle up the ramp and merge in, and a mile on it was overheating and beginning to boil and blow steam. Oops, switch of, pull over, open bonnet, let it cool some before slowly refilling water (about 3 quarts). Back on the road to drive on, 2-1/2 mile to the exit. Temperature gauge going up again, so go into heat amelioration mode. Switch off engine and coast some with forward breeze and thermal convection cooling. Down to 40, switch on select 3rd gear to restart, accelerate gently to 60, switch off and coast some more, rinse and repeat a few times to get where we were going. Been there, done that. One time we drove it 40 miles like this without a fan belt., Fan and water pump not needed, as long as there is warm water in the system and a steady breeze. Park it and take a well deserved break for dinner and WiFi. Late night top up water and drive a mile to a motel.
Sunday, November 30, 2025:
Up before 8-am, drive a mile back to the WiFi spot and breakfast. A few hours later, refill water, to see less than a pint lost, so it was only thermal expansion this time (maybe). Now confident we can drive short distances at a stretch, so take the day off and think about further investigation later, maybe tomorrow. So far we got what we required, minimal transportation, not grounded. Time for processing photos and notes (above), thinking what to do next. Tomorrow I suppose we get seriously onto the chore of finding a replacement crankshaft for the 1800 3-main engine.
|